Garage door openers are a cornerstone of modern convenience, especially brands like Chamberlain that have made a name for reliability. One key component that often gets overlooked is the backup battery—essential during power outages and in ensuring smooth operation. Knowing how to change the battery in your opener not only maintains uninterrupted functionality, but also extends its lifespan and reduces the risk of unexpected failures.
In this comprehensive guide, we’ll dive into every aspect of changing the battery in a Chamberlain garage door opener. You’ll get step-by-step instructions, safety tips, troubleshooting advice, and maintenance best practices. Whether you’re a seasoned DIYer or just someone wanting detailed guidance, this article will help you tackle the task confidently.
Read too: Why Your Liftmaster Garage Door Won’t Stay Closed and How to Fix It? Troubleshooting Tips
Why You Should Know About Changing The Battery In A Chamberlain Garage Door Opener
Many homeowners postpone battery replacement until their opener stops working during a power outage—often at the worst possible time. Having a fresh battery ensures:
- Reliable operation during power losses
- Preserved motor and diagnostics functionality
- Improved safety, so the door can reverse or stop as needed
- Longer overall unit lifespan by reducing strain during backups
The design of most Chamberlain units includes a built-in backup battery compartment—making changing the battery in a Chamberlain garage door opener both straightforward and important.
Step-by-Step Guide to Changing The Battery In A Chamberlain Garage Door Opener
Step 1: Safety First – Power Down & Prepare
- Disconnect power: Unplug the opener from its electrical outlet to avoid shock or accident.
- Allow unit to rest: Give it a minute to fully power off.
- Clear the area: Keep pets, kids, and clutter away from your workspace.
Step 2: Locate and Access the Battery Compartment
- Refer to manual: Your specific model guide shows where the backup battery resides—usually on the front or side of the motor unit.
- Open the compartment: Remove the screws or slide open the battery cover with care.
Step 3: Remove the Old Battery
- Unlock connectors: Some units have a latch or clip holding the battery.
- Gently remove it, avoiding wire damage.
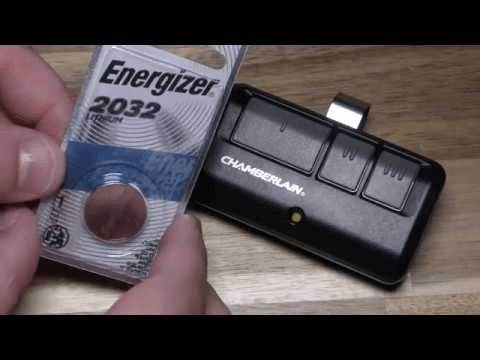
- Take note of the battery type (usually 12 V sealed lead-acid, 7 Ah or 9 Ah).
Step 4: Install the Replacement Battery
- Match the specs exactly: voltage, Amps/Hr rating, and polarity.
- Place the fresh battery into the compartment.
- Reconnect the terminals, red for positive (+) and black for negative (–).
- Re-secure the battery with any fasteners or straps and close the compartment.
Step 5: Restore Power & Test
- Plug the opener back in.
- Allow battery to charge—it may take a few hours before full backup is available.
- Test the backup system by pressing the “Learn” or test button (varies by model) or simulating a power cut.
Troubleshooting Common Issues After Replacement
| Problem | Possible Cause | Solution |
|---|---|---|
| Opener beeps nonstop | Battery not charging | Check connectors and reset unit |
| Door won’t operate when power is off | Faulty battery or connections | Recheck wiring and ensure seal |
| Battery leaks or bulges | Old or damaged backup battery | Properly dispose, replace with identical specs |
| Error or fault code on keypad | Circuit board requires reset | Consult manual and perform reset |
Pro Tips for Changing The Battery In A Chamberlain Garage Door Opener
- Replace every 2–3 years, even if unused.
- Keep a spare battery near the garage for quick swaps.
- Use quality sealed lead-acid batteries—cheap or generic alternatives may fail early.
- Store properly: Batteries should not sit discharged for long.
Understanding Battery Types & Why Specs Matter
Most Chamberlain openers use sealed lead-acid (SLA) batteries. Why is the exact voltage and amperage so critical?
- Voltage mismatches can damage electronics or prevent charging.
- Amperage determines runtime during power loss—the higher, the longer your opener stays functional.
- Correct polarity is vital—incorrect hookup can fry components.
Environmental and Safety Considerations
Proper Disposal
Old SLA batteries contain acid and lead. Use local recycling centers or hazardous waste drop-offs—never throw them in the trash.
Temperature Sensitivity
Temperatures below freezing can reduce battery capacity. Ensure your garage is not excessively cold—or use a battery rated for low temperatures.
Avoiding Gas Buildup
While SLA batteries produce minimal gassing, it’s wise to leave the opener cover slightly open for a few hours after replacement.
Maintenance Checklist for Chamberlain Openers
- ☐ Battery Check: Test monthly with a multimeter (12.6 V = full)
- ☐ Terminal Inspection: Clean and tighten every 6 months
- ☐ Replace as Scheduled: Every 2–3 years
- ☐ Surge Protector Usage: Always use a quality surge protector
- ☐ Firmware Updates: For smart models, check app or app support regularly
Frequently Asked Questions (FAQs)
Can I use a gel battery instead?
No—all Chamberlain units require sealed lead-acid. Gel batteries may not charge correctly and risk malfunction.
How do I reset the opener after installing?
Unplug for 30 seconds, then plug back in. Many models auto-reinitialize—check your manual for specific instructions.
What happens if I don’t change the battery?
Loss of backup, potential motor strain during outages, and possible failure of safety sensors.
Can I replace the battery myself?
Yes, with basic tools and proper safety steps. If unsure, consult a licensed technician.
Conclusion
Mastering changing the battery in a Chamberlain garage door opener isn’t just a simple maintenance task—it’s essential for ensuring your opener remains reliable, safe, and functional during outages. Following this guide gives you the confidence and knowledge to perform the swap, troubleshoot related issues, and maintain your system effectively.
Need printable instructions, a parts list, or photo guide? Just let me know—I’d be happy to help you out!

Leave a Reply