If you’ve ever looked closely at your garage door opener remote or wall panel, you may have noticed three buttons—but what do they all do? What are the 3 buttons on garage door opener, and how can you make the most of them?
Understanding the purpose of each button is essential for maximizing the convenience and security of your garage door system. Whether you’re programming a new remote, setting up multiple garage doors, or using advanced features like vacation lock or light control, this guide will walk you through everything you need to know.
Read too: How To Replace Garage Door Roller Like a Pro? Step-by-Step Guide
What Are The 3 Buttons On Garage Door Opener?
The three buttons on a garage door opener remote or wall control unit typically serve distinct purposes, and knowing what they are can help you operate your garage more effectively.
Let’s break it down.
1. Primary Garage Door Control Button
This is the main button that operates your primary garage door. Pressing it sends a signal to open or close the door. Most remotes designate this as Button 1 (usually the largest or centrally located).
Common Uses:
- Opening or closing the garage door
- Programming new remotes or keypads
- Using with the “learn” function on the opener unit
2. Secondary Door or Light Control Button
The second button can be programmed for a second garage door if you have one or, in some models, used to control the garage light independently from the door mechanism.
Common Uses:
- Operating a second garage door opener
- Turning the overhead light on/off
- Activating auxiliary features (depends on model)
3. Third Button (Multi-Function or Lock/Vacation Mode)
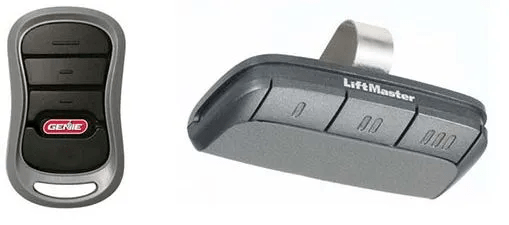
The third button is usually a multi-function button. Depending on your opener brand (such as LiftMaster, Chamberlain, Genie), it may serve different purposes, such as:
- Locking the remote signal (vacation mode)
- Operating a third garage door
- Connecting to smart devices or MyQ system
Types of Garage Door Openers with 3 Buttons
Garage door remotes and wall consoles vary by brand and model. Here’s how the 3-button configuration typically works across different brands:
LiftMaster/Chamberlain/Craftsman
- Button 1: Garage Door 1
- Button 2: Garage Door 2 or Light
- Button 3: Lock Function or Garage Door 3
Genie Remotes
- Often marked as Intellicode remotes, these feature 3 programmable buttons for up to three different doors or devices.
Universal Remotes
- Allow programming for multiple garage doors from various brands
- Button mapping depends on user programming
Knowing what are the 3 buttons on garage door opener in your specific model will depend on reading your manual or checking the brand’s website for a button assignment guide.
Programming the 3 Buttons on Your Garage Door Opener
Programming your garage door opener’s buttons is straightforward. Here’s a general step-by-step guide (note: consult your opener’s manual for brand-specific instructions).
Step 1: Access the Learn Button
Find the Learn button on the back of your garage door opener motor unit. It’s usually near the antenna wire or under a small light cover.
Step 2: Press the Learn Button
- Press and release the Learn button. The LED light will begin blinking.
Step 3: Press the Remote Button
- Within 30 seconds, press and hold the desired remote button (Button 1, 2, or 3) until the motor unit light blinks or you hear a click.
Step 4: Test the Remote
Press the programmed button to ensure it operates the correct door or function.
Repeat the process for additional buttons to program multiple doors or features.
Advanced Features of the Three Buttons
Many homeowners don’t realize that their 3-button garage door opener remote or wall console can do much more than open and close the door.
Vacation Lock (Security Lock)
Some models use the third button to activate vacation lock mode, which disables all remote signals to prevent break-ins when you’re away.
How to Use:
- Press and hold the lock button for a few seconds.
- A light will blink, indicating it’s active.
- To deactivate, press the same button again.
Light Control
On wall consoles, one button may be dedicated to turning the garage opener light on or off manually. This is convenient when you’re in the garage but not using the door.
Door Timer
Higher-end systems allow setting automatic closing timers. For example, if the garage door is left open for more than 10 minutes, it will close automatically.
Troubleshooting 3-Button Garage Door Opener Issues
Sometimes, one or more buttons stop working. Here’s how to troubleshoot common issues.
1. Reprogram the Button
If a button no longer works, try reprogramming it using the learn button on the opener.
2. Check Battery Power
Replace the remote battery every 12–24 months. Weak batteries can cause signal failure.
3. Interference or Range Issues
Wi-Fi routers, LED lights, and other electronics can interfere with remote signals. Try operating the remote closer to the door opener.
4. Reset the Opener
If none of the buttons respond, reset the opener and erase all codes:
- Hold the learn button for 6–10 seconds until the light turns off.
- Reprogram each button from scratch.
Benefits of Having 3 Buttons on Your Opener
Here’s why 3-button remotes or wall consoles are preferred over single-button models:
- Control Multiple Doors: Perfect for households with multiple garage bays.
- Security Features: Locking function adds safety when you’re away.
- Light Control: Manual light operation without opening the door.
- Smart Integrations: Some buttons work with MyQ, HomeLink, or smart home systems.
What Are The 3 Buttons On Garage Door Opener Wall Console?
On wall consoles, the button layout often mirrors what’s on your remote. Typically:
- Main Button: Opens and closes the door.
- Light Button: Controls the light independently.
- Lock Button: Disables remote access temporarily.
For smart wall consoles, you may also find:
- Motion sensors
- Wi-Fi status indicators
- Diagnostic LEDs
These advanced wall consoles help manage your garage with more control, convenience, and security.
Safety Tips for Using Garage Door Openers
- Always keep remotes out of reach of children.
- Never walk or drive under a moving garage door.
- Regularly inspect opener wires, sensors, and tracks.
- Test the safety reversal system monthly.
- Update your opener system if it’s more than 10 years old for better security and technology support.
Frequently Asked Questions
Q: Can I program all 3 buttons for different doors?
A: Yes, most remotes allow separate programming for each button to control different garage door openers.
Q: What if one button stops working?
A: Replace the battery, then reprogram it. If it still doesn’t work, the remote may need replacing.
Q: Can I use one of the buttons for smart home features?
A: Some smart remotes support integration with MyQ, HomeLink, or Alexa-compatible systems. Check your model.
Q: Are 3-button remotes compatible with all openers?
A: Only if they are from the same brand or labeled as universal and support the same frequency/technology.
Final Thoughts: Understanding the 3 Buttons On Your Garage Door Opener
Now that you know what are the 3 buttons on garage door opener, you can use them with confidence. Whether it’s operating multiple doors, managing lights, or boosting security with lock mode, those three buttons are there to make your garage safer and more convenient.
Always refer to your specific opener’s manual for exact button functions, and don’t hesitate to take advantage of advanced features built into modern systems.


Leave a Reply