When replacing the bulb doesn’t solve the problem, many homeowners start asking How To Replace Light Socket In Garage Door Opener. A faulty socket is a common but often overlooked reason garage opener lights stop working. Over time, heat, vibration, and wear can damage the socket itself—not just the bulb.
The good news is that replacing a light socket in a garage door opener is achievable for most DIYers, as long as you follow proper safety steps and understand the process. This guide explains everything clearly, even if you’re a beginner.
Read too: How To Replace Garage Door Roller Like a Pro? Step-by-Step Guide
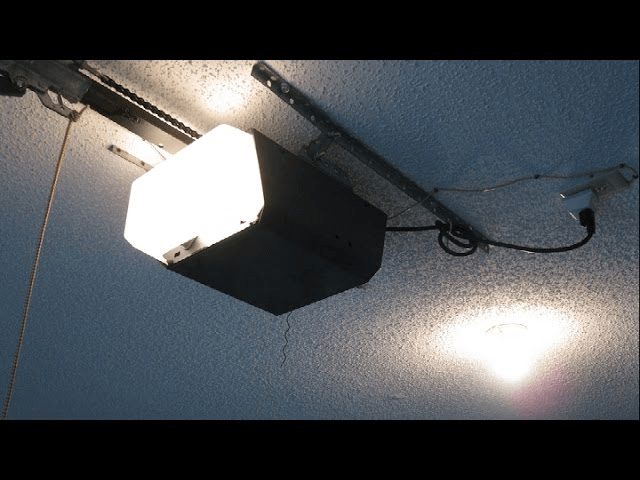
What Is the Light Socket in a Garage Door Opener?
The light socket is the component that:
- Holds the bulb securely
- Supplies electrical power to the bulb
- Activates automatically when the opener runs
In most garage door openers, the socket is mounted inside the opener housing and connected to the logic board via simple wiring.
Because it’s exposed to constant vibration and heat, the socket can loosen, corrode, or fail over time.
How To Replace Light Socket In Garage Door Opener: When Is It Necessary?
Common Signs of a Bad Light Socket
- Bulb works in other fixtures but not in the opener
- Light flickers when the door moves
- Burn marks or corrosion inside the socket
- Bulb feels loose even when tightened
If you notice any of these symptoms, replacing the socket—not the bulb—is often the correct fix.
Why Light Sockets Fail in Garage Door Openers (People Also Ask)
Several factors shorten socket lifespan:
- Heat buildup from incandescent bulbs
- Constant vibration from the motor
- Moisture or humidity in garages
- Over-wattage bulbs exceeding manufacturer limits
Industry repair data suggests lighting-related issues account for up to 15% of garage opener service calls, especially in older units.
Is It Safe to Replace a Garage Door Opener Light Socket Yourself?
Yes—with caution.
This repair involves basic electrical connections, not high-voltage wiring. If you are comfortable with:
- Using a screwdriver
- Handling small wires
- Following safety rules
Then this task is well within DIY range.
If not, a professional technician may be a better option.
Tools and Materials You’ll Need
Tools
- Phillips and flathead screwdrivers
- Needle-nose pliers
- Voltage tester (recommended)
- Work gloves
Materials
- Replacement light socket (model-compatible)
- Electrical tape or wire connectors
Always match the socket to your opener’s model and voltage rating.
Safety Checklist Before You Begin
⚠️ Do not skip these steps
- Unplug the garage door opener from the outlet
- Confirm no power using a voltage tester
- Allow the opener to cool for 10 minutes
- Use a sturdy ladder
Never work on a powered unit—even for lighting repairs.
Step-by-Step: How To Replace Light Socket In Garage Door Opener
Step 1: Remove the Light Bulb
- Turn counterclockwise
- Set aside safely
This gives you clear access to the socket.
Step 2: Remove the Opener Housing Cover
Most openers use:
- Snap-in plastic covers, or
- Screws along the sides or bottom
Remove carefully and keep screws in a container.
Step 3: Locate the Light Socket Assembly
Inside the housing, find:
- The socket base
- Two connected wires (usually black and white)
Take a quick photo for reference before disconnecting anything.
Step 4: Disconnect the Old Socket
- Use needle-nose pliers to gently pull wire connectors
- Do not pull on the wires themselves
If wires are screwed in, loosen screws slowly.
Step 5: Remove the Socket from Its Mount
Depending on design:
- Twist and release
- Unscrew retaining clips
Inspect for burn marks or melted plastic—these confirm failure.
Step 6: Install the New Light Socket
- Mount the new socket in the same position
- Secure firmly but do not overtighten
Correct alignment prevents vibration damage.
Step 7: Reconnect the Wires
- Match wire colors exactly
- Use original connectors or electrical tape
- Ensure tight, secure connections
Loose wiring can cause flickering or shorts.
Step 8: Reassemble the Housing
- Replace the opener cover
- Reinstall screws or snap cover back on
Double-check stability before restoring power.
Step 9: Test the Repair
- Screw in a garage-rated LED bulb
- Plug the opener back in
- Activate the door
The light should turn on smoothly with no flicker.
Choosing the Right Replacement Socket
What to Look For
- Voltage compatibility (usually 120V)
- Heat-resistant materials
- Secure mounting design
Universal sockets work in many cases, but model-specific sockets are best.
Light Socket vs Light Bulb: Quick Comparison
| Component | Failure Symptoms | Fix |
|---|---|---|
| Light bulb | No light, but socket intact | Replace bulb |
| Light socket | Flickering, burn marks | Replace socket |
| Wiring | Intermittent power | Rewire or service |
LED Bulbs and Light Socket Longevity
Switching to LED bulbs helps because they:
- Produce less heat
- Resist vibration
- Reduce socket wear
LED bulbs can double the lifespan of a new socket.
Common Mistakes to Avoid
- ❌ Working with power connected
- ❌ Mixing up wire polarity
- ❌ Using bulbs above watt rating
- ❌ Leaving loose connectors
Avoiding these mistakes prevents repeat failures.
When You Should Not DIY This Repair
Consider professional help if:
- Wires are burnt or brittle
- Logic board damage is visible
- Opener trips breakers
In these cases, socket replacement alone may not solve the problem.
Understanding Garage Door Opener Electrical Basics
For a general explanation of how garage door openers work—including internal lighting circuits—the overview on Wikipedia’s garage door opener page provides a reliable, high-level reference.
FAQ: Light Socket Replacement in Garage Door Openers
Q1: How do I know the socket is bad and not the bulb?
If the bulb works elsewhere and the socket shows burn marks or flickers, the socket is likely faulty.
Q2: Can I use a universal light socket?
Yes, as long as voltage and mounting style match your opener.
Q3: How long does it take to replace a light socket?
Most DIY replacements take 30–45 minutes.
Q4: Is replacing a socket cheaper than professional service?
Yes. A socket typically costs $10–$25, compared to $150+ for service calls.
Q5: Will a bad socket affect garage door operation?
No, but it reduces safety and convenience.
Conclusion
Learning how to replace light socket in garage door opener can save money, restore proper lighting, and improve overall garage safety. While the repair involves basic electrical work, it’s straightforward when done carefully and correctly.
With the right tools, proper precautions, and this step-by-step guide, most homeowners can complete the repair confidently and safely.
👉 If this guide helped you, share it on social media so others can fix their garage lighting the right way.


Leave a Reply