Installing a garage door opener can make daily life much easier, allowing you to open and close your garage with the push of a button. Many homeowners ask what do I need to install garage door opener before starting the project.
The good news is that most modern garage door opener kits include many of the required parts. However, you’ll still need certain tools, hardware, and preparation to complete the installation safely and efficiently. This guide explains everything you need—from equipment and materials to step-by-step installation tips.
Read too: Door and Garage Door Companies: Choosing the Right Partner for Your Needs
What Do I Need To Install Garage Door Opener?
Before starting the project, it’s important to understand the essential components required.
A garage door opener system typically includes:
- Motor unit
- Rail assembly
- Drive system (chain, belt, or screw)
- Trolley carriage
- Remote controls
- Safety sensors
- Wall control panel
Garage door openers are motorized systems designed to open and close garage doors automatically using radio signals and mechanical drive mechanisms. You can learn more about how they work here:
https://en.wikipedia.org/wiki/Garage_door_opener
Most installation projects take 3–5 hours for DIY homeowners.
Tools Needed to Install a Garage Door Opener
To install a garage door opener properly, you’ll need several basic tools.
Essential Tools
| Tool | Purpose |
|---|---|
| Power drill | Install mounting brackets |
| Socket wrench | Tighten bolts and nuts |
| Screwdrivers | Secure electrical components |
| Ladder | Reach ceiling mounting points |
| Tape measure | Measure installation distances |
| Level | Ensure opener alignment |
Additional Helpful Tools
- Adjustable wrench
- Pliers
- Stud finder
- Hammer
- Wire stripper
Having these tools ready makes installation much easier.
Parts Required for Garage Door Opener Installation
In addition to tools, several structural parts are necessary.
Standard Components
- opener motor unit
- rail or track assembly
- mounting brackets
- hanging support brackets
- door arm connection
- safety sensors
Most opener kits include these parts, but some items may need to be purchased separately.
Optional Accessories
- wireless keypad
- smartphone control module
- battery backup system
- surge protector
These accessories improve convenience and safety.
Types of Garage Door Openers
Before installing the system, it helps to understand the different opener types.
1. Chain Drive Openers
Chain drive systems use a metal chain to move the garage door.
Advantages:
- affordable
- durable
- widely available
Disadvantages:
- noisier than other systems
2. Belt Drive Openers
Belt drives use a rubber belt instead of a chain.
Advantages:
- quieter operation
- smooth movement
Disadvantages:
- slightly more expensive
3. Screw Drive Openers
These systems use a threaded steel rod.
Advantages:
- fewer moving parts
- simple design
Disadvantages:
- sensitive to temperature changes
Electrical Requirements for Installation
Another important part of what do I need to install garage door opener is electrical preparation.
Power Requirements
Most garage door openers require:
- 120-volt electrical outlet
- grounded power supply
- nearby ceiling outlet
If no outlet exists near the opener location, you may need an electrician to install one.
Garage Door Compatibility Check
Before installing an opener, confirm that the garage door itself is compatible.
Compatibility Checklist
- door must be balanced
- springs must function properly
- tracks must be aligned
- door should open smoothly by hand
If the door feels heavy or uneven, repairs may be needed before installing the opener.
Step-by-Step: How To Install a Garage Door Opener
If you’re ready to begin the project, follow these basic installation steps.
Step 1: Assemble the Rail System
Lay the rail sections on the floor and connect them according to the instructions.
Typical rail lengths range from 7–10 feet depending on door height.
Attach the trolley and drive mechanism before mounting.
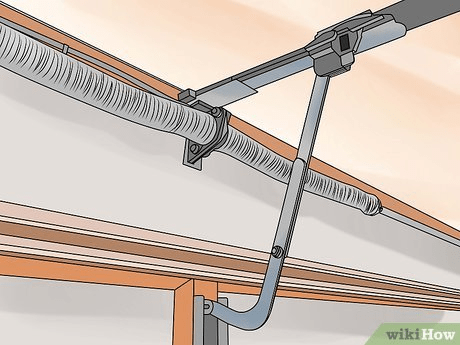
Step 2: Install the Motor Unit
Attach the rail assembly to the motor housing.
Ensure bolts are tightened securely using a socket wrench.
This forms the main drive system.
Step 3: Mount the Opener to the Ceiling
Using a ladder:
- Locate ceiling joists using a stud finder.
- Attach mounting brackets to the joists.
- Secure the opener using support straps.
The opener should sit approximately 7–8 feet above the floor.
Step 4: Install the Door Arm
The door arm connects the opener trolley to the garage door.
Steps include:
- Attach the curved arm to the trolley.
- Attach the straight arm to the door bracket.
- Connect both arms with bolts.
This linkage allows the opener to move the door.
Step 5: Install Safety Sensors
Safety sensors prevent the door from closing on objects.
Mount sensors:
- 6 inches above the floor
- on both sides of the door frame
Ensure sensors face each other directly.
Step 6: Install the Wall Control Panel
Mount the wall button inside the garage.
Recommended height: about 5 feet above the floor.
Run low-voltage wiring from the opener motor to the wall control.
Step 7: Program Remote Controls
Once installation is complete, program the remotes.
Typical process:
- Press the Learn button on the opener.
- Press the remote control button.
- Wait for the indicator light confirmation.
Test the system several times to ensure proper operation.
Safety Tips During Installation
Garage door installation involves mechanical and electrical components.
Important Safety Tips
- disconnect power before wiring
- use sturdy ladders
- avoid adjusting door springs without training
- follow manufacturer instructions carefully
Garage door springs are under high tension and can be dangerous.
Cost of Installing a Garage Door Opener
Installation costs vary depending on equipment and labor.
Average Costs
| Item | Cost Range |
|---|---|
| Garage door opener | $150 – $500 |
| Professional installation | $200 – $500 |
| Accessories | $30 – $150 |
DIY installation can save money but requires careful attention.
Advantages vs Disadvantages of DIY Installation
Advantages
- lower installation cost
- flexible schedule
- learning experience
Disadvantages
- requires tools and time
- possible mistakes during installation
- may void warranties if installed incorrectly
Many homeowners successfully complete the installation with proper preparation.
Maintenance After Installation
Regular maintenance helps keep your garage door opener working smoothly.
Maintenance Checklist
Inspect your system every 6–12 months for:
- loose bolts
- worn drive components
- sensor alignment
- lubrication needs
Cleaning sensors with a soft cloth ensures accurate detection.
FAQ – What Do I Need To Install Garage Door Opener
Q1: Can I install a garage door opener myself?
Yes. Many homeowners install openers themselves using standard tools and following the manufacturer’s instructions.
Q2: How long does installation take?
Most DIY installations take 3–5 hours depending on experience.
Q3: Do I need a special electrical outlet?
Yes. Most garage door openers require a 120-volt grounded outlet near the ceiling.
Q4: What tools are most important for installation?
A drill, ladder, wrench set, and measuring tape are the most commonly used tools.
Q5: Do garage door opener kits include all parts?
Most kits include essential components, but mounting hardware or accessories may need to be purchased separately.
Q6: Should I hire a professional installer?
If you are unfamiliar with electrical work or structural mounting, hiring a professional installer may be safer.
Conclusion
Understanding what do I need to install garage door opener helps homeowners prepare properly for a smooth installation process. With the right tools, components, and safety precautions, many people successfully install garage door openers themselves.
From assembling the rail system to installing safety sensors and programming remotes, each step plays an important role in ensuring the opener works reliably.
Whether you choose DIY installation or professional service, a properly installed garage door opener provides convenience, security, and improved daily functionality.
If you found this guide helpful, share it on social media so other homeowners can learn how to install garage door openers safely and efficiently.


Leave a Reply