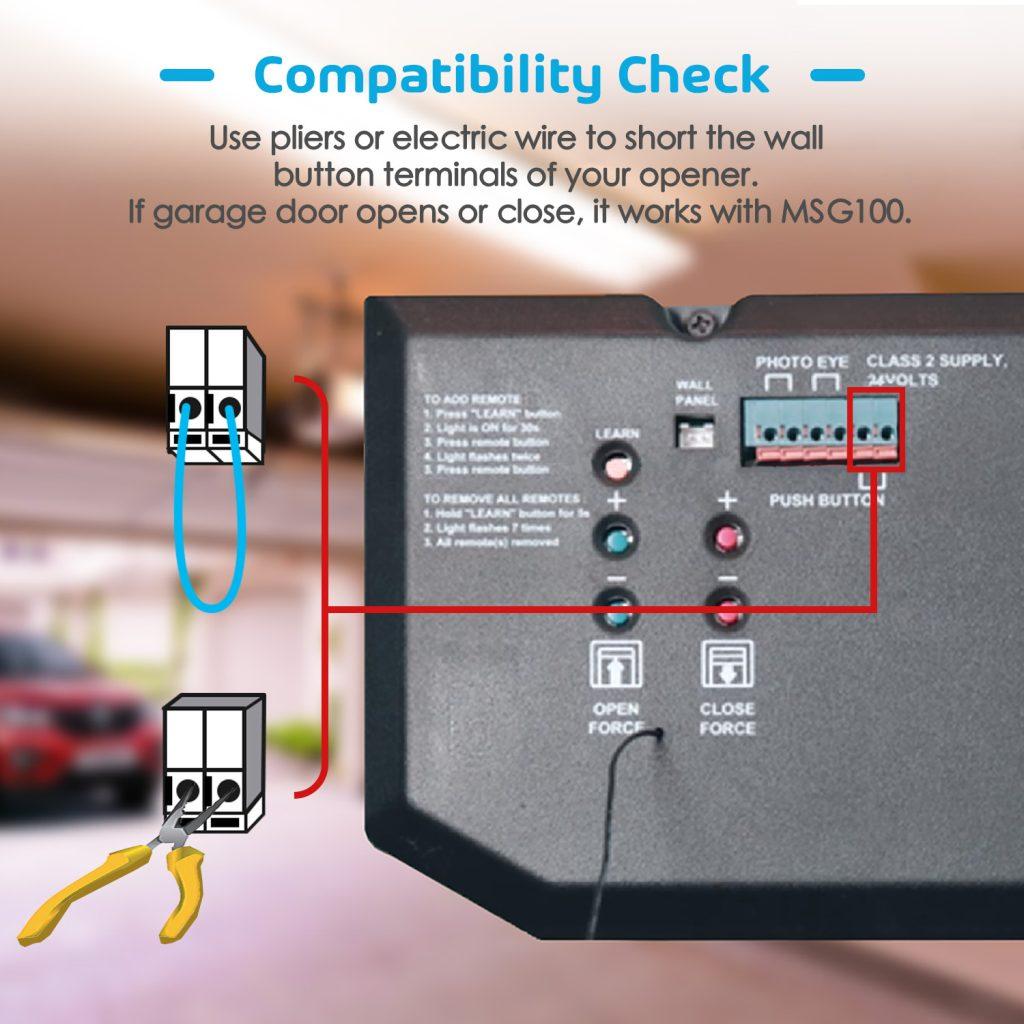
The Meross Garage Door Opener is a smart and convenient device that can transform the way you access and control your garage. If you’re looking to install a Meross Garage Door Opener and want a clear, easy-to-follow guide, you’ve come to the right place. In this article, we’ll walk you through the installation process, step by step, so you can enjoy the benefits of a smart garage door opener.

Why Choose a Meross Garage Door Opener:
Before we dive into the installation process, let’s briefly explore why the Meross Garage Door Opener is a popular choice:
- Smart Home Integration: Meross offers compatibility with popular smart home platforms like Amazon Alexa, Google Assistant, and Apple HomeKit. This means you can control your garage door using voice commands or your smartphone.
- Remote Access: With the Meross app, you can open or close your garage door from anywhere, providing convenience and peace of mind.
- Security Features: Meross garage door openers often include advanced security features like activity logs and notifications, ensuring your garage is secure.
- Easy Installation: Meross products are designed for DIY installation, and you don’t need advanced technical skills to set them up.
Materials and Tools You Will Need:
To install your Meross Garage Door Opener, gather the following materials and tools:
- Meross Garage Door Opener Kit: Ensure you have the complete kit, including the opener itself, control unit, sensors, and all necessary hardware.
- Screwdriver Set: You’ll likely need a Phillips and a flat-head screwdriver for various parts of the installation.
- Power Drill: A power drill with a range of drill bits will be useful for making holes and securing screws.
- Ladder: To safely access and work around the garage door opener area.
- Measuring Tape: For precise measurements and alignment.
- Wire Cutter and Stripper: To handle the wiring part of the installation.
- Socket Wrench Set: You might need this to tighten nuts and bolts securely.
- Staple Gun: For securing wires neatly along the garage door frame.
Step-by-Step Guide to Install Meross Garage Door Opener:
Preparation
- Start by reading the Meross instruction manual carefully. Familiarize yourself with all the components and their functions.
- Ensure your garage door is in good working condition and that it operates smoothly.
Mounting the Opener
- Locate a suitable spot on the ceiling of your garage to mount the Meross Garage Door Opener. Ensure it’s close to an electrical outlet.
- Securely mount the opener using the provided brackets and screws.
Install the Trolley
- Assemble the trolley mechanism according to the instructions.
- Attach the trolley to the garage door according to the manufacturer’s guidelines.
Connect the Drive System
- Connect the drive system to the trolley. This is a crucial step, so ensure it’s securely attached.
Wiring and Sensors
- Connect the control unit to your garage door opener.
- Install the safety sensors, positioning them correctly on both sides of the garage door, and connect the wires.
Power Supply
- Connect the control unit to a power source, typically an electrical outlet on the ceiling.
- Make sure all connections are secure and follow the manufacturer’s instructions for wiring.
Program the Opener
- Follow the provided instructions to program your Meross Garage Door Opener with your desired remote control or smartphone app.
- Test the opener to ensure it’s working correctly.
Safety Testing
- Perform safety tests, including checking the auto-reverse feature when the door encounters an obstacle.
- Ensure the sensors are working by obstructing the door’s path.
Conclusion:
Installing a Meross Garage Door Opener can greatly enhance the convenience and security of your home. With the ability to control your garage door remotely, integrate it into your smart home system, and receive notifications about its status, you’ll have peace of mind and convenience at your fingertips. By following this step-by-step guide, you can confidently install your Meross Garage Door Opener and start enjoying its benefits.
Remember that if you encounter any difficulties during the installation, refer to the manufacturer’s instructions or seek assistance from a professional. Proper installation is essential to ensure the safety and functionality of your garage door opener.


Leave a Reply