A properly adjusted garage door is essential for its smooth operation and, more importantly, your safety. One popular brand that homeowners trust for their garage door openers is Liftmaster. In this comprehensive guide, we will take you through the process of adjusting your Liftmaster garage door, ensuring that it functions optimally and securely.
Section 1: Understanding Liftmaster Garage Door Opener
Liftmaster is a leading manufacturer of garage door openers known for their reliability and innovative features. They offer a range of models to suit different needs, including belt drive, chain drive, and screw drive openers. Liftmaster openers are renowned for their durability and advanced security features, providing homeowners with peace of mind.
Section 2: Signs that Your Liftmaster Garage Door Needs Adjustment
Identifying the signs that your Liftmaster garage door requires adjustment is crucial to maintaining its performance and safety. Common indicators include:
- Uneven movement: If your garage door jerks or moves unevenly when opening or closing, it may be a sign of misalignment or spring tension issues.
- Excessive noise: Unusual creaking, grinding, or squeaking noises during operation can signify the need for adjustment.
- Sagging or imbalance: A visibly sagging door or one that doesn’t stay in place when partially open indicates that the springs or cables may need adjustment.
- Delayed response: If your Liftmaster opener takes longer than usual to respond to commands or if it only partially opens or closes, adjustment may be required.
By addressing these signs promptly, you can prevent further damage and potential safety hazards.
Section 3: Preparing for Garage Door Adjustment
Before you begin adjusting your Liftmaster garage door, it’s crucial to prioritize safety. Follow these essential steps:
- Disconnect the power: Locate the power source for your garage door opener and unplug it to prevent accidental activation during the adjustment process.
- Secure the door: Close the garage door and lock it in place using a clamp or vice grip to prevent it from moving unexpectedly.
- Gather the necessary tools: You will need a tape measure, adjustable wrench, pliers, winding bars, and a ladder to access the necessary components safely.
Taking these precautions will minimize the risk of accidents and ensure a smooth adjustment process.
Section 4: Step-by-Step Guide to Adjusting Your Liftmaster Garage Door
Now that you’re ready to adjust your Liftmaster garage door, follow these step-by-step instructions:
- Adjusting tension springs: Measure the current tension and make adjustments as needed using winding bars and the manufacturer’s guidelines.
- Aligning the tracks: Examine the tracks for any gaps, tighten loose bolts, and adjust the track alignment using a level.
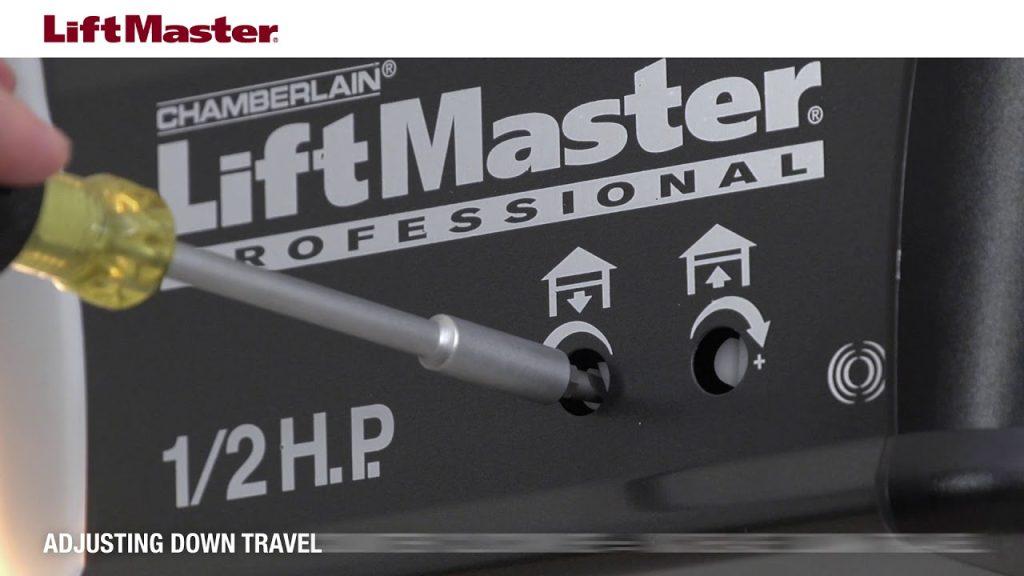
- Fine-tuning force and travel limits: Test the force and travel limits of the opener, adjusting them to ensure the door stops and reverses properly when encountering an obstruction.
- Calibrating safety features and sensors: Check the alignment and functionality of the safety sensors, ensuring they detect obstacles and respond appropriately.
Following these instructions carefully will help you achieve a well-adjusted Liftmaster garage door that operates smoothly and safely.
Section 5: Troubleshooting Common Issues
Even with proper adjustment, you may encounter some common issues with your Liftmaster garage door. Here are a few troubleshooting tips:
- Noisy operation: Lubricate the moving parts, such as hinges, rollers, and springs, with a silicone-based lubricant.
- Door reversing unexpectedly: Adjust the travel limits and force settings to ensure the door closes fully without reversing.
- Malfunctioning safety sensors: Clean the sensors and check for any obstructions blocking their path.
- Uneven closing: Inspect the cables and springs for damage or wear, and replace them if necessary.
Regular maintenance and addressing these issues promptly will extend the lifespan of your Liftmaster garage door and ensure its continued smooth operation.
Section 6: Frequently Asked Questions
- How to adjust a Liftmaster garage door opener?
- What are the signs that my Liftmaster garage door needs adjustment?
- Can I adjust my Liftmaster garage door without professional help?
- What tools do I need to adjust my Liftmaster garage door?
- How often should I adjust my Liftmaster garage door?
- What are the safety precautions to take before adjusting a Liftmaster garage door?
- Can adjusting my Liftmaster garage door improve its lifespan?
- How do I troubleshoot common issues after adjusting a Liftmaster garage door?
- Can I adjust the speed of my Liftmaster garage door opener?
- What are the travel limits and how do I adjust them on my Liftmaster opener?
Conclusion
By following this comprehensive guide, you can confidently adjust your Liftmaster garage door, ensuring its optimal performance and your safety. Remember to prioritize safety precautions, identify the signs that adjustment is necessary, and troubleshoot common issues promptly. By mastering the art of Liftmaster garage door adjustment, you’ll enjoy a smoothly functioning door that provides security and convenience for years to come.


Leave a Reply