Unlock the Secrets to a Smoothly Functioning Garage Door Opener
Having a reliable and smoothly operating garage door opener is crucial for convenient and secure access to your garage. Among the leading brands in the industry, Liftmaster stands out for its innovative designs and top-notch performance. However, even the best garage door openers require occasional adjustments to ensure optimal functionality. In this guide, we will delve into the art of adjusting Liftmaster garage door opener, empowering you to take control of its performance and maintain a hassle-free experience.

Understanding Your Liftmaster Garage Door Opener
Liftmaster has earned its reputation as a trusted brand when it comes to garage door openers. To effectively adjust your opener, it’s important to understand its components. The Liftmaster opener comprises a powerful motor, a drive system that controls the door’s movement, safety sensors, and other crucial elements. Regular adjustments are necessary to keep these components in proper alignment and working condition, ultimately extending the lifespan of your garage door opener.
Signs that Your Liftmaster Garage Door Opener Needs Adjustment
Being aware of the signs that your Liftmaster garage door opener requires adjustment can save you from potential issues down the line. Noisy operation, jerky or erratic movements, misaligned tracks, or a door that doesn’t close properly are all indicators that adjustment is necessary. Ignoring these signs may result in further damage to the opener or even compromise the security of your garage.
Safety Precautions and Tools Required
Before diving into adjusting your Liftmaster garage door opener, it’s crucial to prioritize safety. Gather the necessary tools, including a screwdriver, pliers, a level, and any other specified in your opener’s user manual. Additionally, equip yourself with safety gloves and glasses to protect against any potential hazards. By following these safety precautions, you can proceed with peace of mind.
Adjusting the Opener Settings
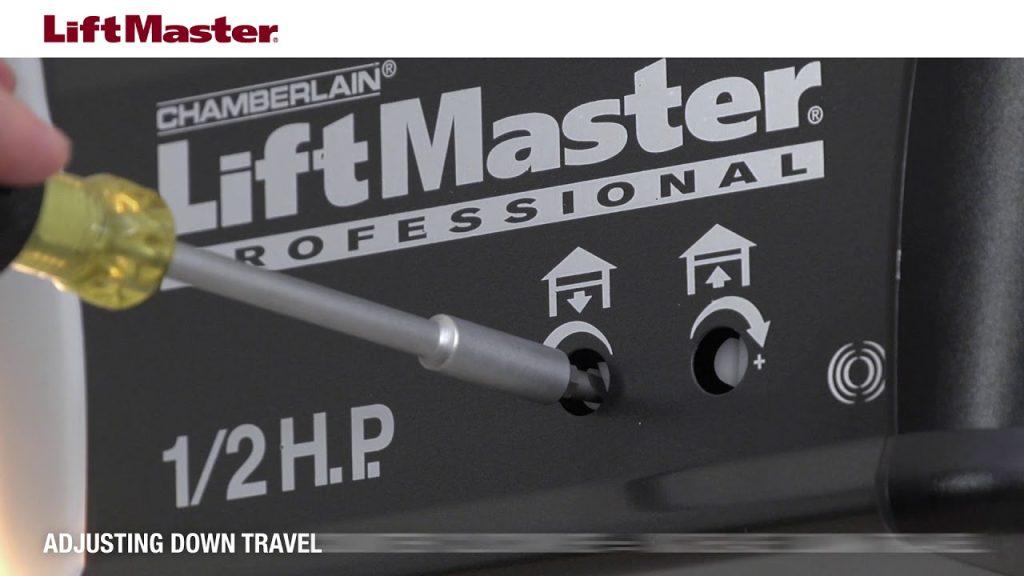
One of the primary areas to focus on when adjusting Liftmaster opener is the settings. Fortunately, Liftmaster provides user-friendly controls that allow you to make adjustments to the force and limit settings. These settings govern how the door moves and its stopping points. With the help of your opener’s user manual, carefully follow the step-by-step instructions to fine-tune these settings. Keep in mind that small adjustments can have a significant impact on the door’s overall performance, ensuring smooth and efficient operation.
Aligning the Safety Sensors
Proper alignment of the safety sensors is crucial for the safe operation of your Liftmaster garage door opener. Misaligned sensors can prevent the door from closing or cause it to reverse unexpectedly. To ensure proper alignment, inspect the sensors and make necessary adjustments to their positions. Refer to your opener’s user manual for specific instructions on how to align the sensors correctly. Once the alignment is complete, test the sensors to verify their functionality.
Lubrication and Maintenance
Regular lubrication is essential to maintain the smooth operation of your Liftmaster garage door opener. Consult the user manual to identify the recommended lubricants for your specific model. Apply the lubricant to the appropriate components, such as hinges, springs, and rollers, as per the instructions. Additionally, incorporate other maintenance tasks outlined in the manual, such as cleaning the tracks and inspecting cables and chains. By staying on top of lubrication and maintenance, you can ensure that your opener operates optimally for years to come.
Troubleshooting Common Issues
Despite your best efforts, you may encounter common issues with your Liftmaster garage door opener. Understanding how to troubleshoot these problems can save you time and money. If your door doesn’t close properly, ensure that there are no obstructions in the way and check for any misaligned tracks. For remote control or keypad issues, replace the batteries and ensure they are properly paired with the opener. By following the troubleshooting steps provided in your user manual, you can resolve most common issues efficiently.
Professional Assistance and Final Thoughts
While adjusting your Liftmaster garage door opener is manageable for most homeowners, there may be instances where professional assistance is necessary. If you encounter complex issues or are unsure about the adjustments required, reaching out to a trained professional can provide peace of mind. Additionally, periodic professional inspections and maintenance are recommended to ensure the longevity and optimal performance of your Liftmaster opener.
Taking control of adjusting your Liftmaster garage door opener empowers you to maintain a smoothly operating and secure garage access system. By following the guidelines outlined in this article and referring to your opener’s user manual, you’ll be able to master the art of adjustment and enjoy the benefits of a reliable Liftmaster garage door opener for years to come.


Leave a Reply