Can I Change The Code On My Garage Door Opener? Garage door openers provide a great level of convenience and security for homeowners, offering easy access to the garage at the press of a button. However, just as with any other access system, it’s essential to ensure that your garage door opener is secure, especially if you have multiple people accessing the garage. One of the best ways to enhance the security of your garage is by changing the code on your garage door opener regularly.
Many homeowners often ask, Can I change the code on my garage door opener? The answer is yes, and it’s a relatively simple process. This article will guide you through the steps involved in changing the code on your garage door opener, the benefits of doing so, and some useful tips to maintain a high level of security.
Can I Change The Code On My Garage Door Opener? Understanding the Basics
Most modern garage door openers, especially those made by popular brands like Chamberlain, LiftMaster, Genie, and Craftsman, come equipped with rolling code technology. Rolling code technology changes the access code every time the garage door is opened, making it difficult for potential intruders to gain unauthorized access. However, sometimes you may need to change the code manually for added security, or in case you feel your code has been compromised.
Read too: Door and Garage Door Companies: Choosing the Right Partner for Your Needs
Changing the code on your garage door opener usually involves accessing the opener’s control panel and entering a new code. Here’s what you need to know about the process.
Why Should I Change the Code on My Garage Door Opener?
Changing the code on your garage door opener is a good practice for the following reasons:
- Enhanced Security: If you believe someone has gained unauthorized access to your garage or if you have recently moved into a new home, changing the code will ensure that only authorized individuals can open the door.
- Lost or Stolen Remotes: If a garage door remote is lost or stolen, it’s crucial to change the code to prevent unauthorized access.
- Multiple Users: If several people have access to the same garage, it’s a good idea to change the code periodically to limit the risk of unauthorized access.
- After Repairs or Service: If your garage door opener has been serviced, it’s always a good idea to reset the code to maintain security, especially if repairs involved accessing the opener’s internal components.
How to Change The Code On My Garage Door Opener?
Now that we understand why changing the code is important, let’s walk through the process. Depending on the brand of your garage door opener, the exact steps may vary slightly. Below are general steps to change the code on your garage door opener.
Step 1: Identify Your Garage Door Opener Model
Before starting, you need to determine the brand and model of your garage door opener. Most manufacturers provide a manual with instructions on how to change the code, so checking the manual or brand-specific instructions will be helpful.
If you don’t have a manual, you can usually find your model number on the opener unit itself, typically on a label attached to the back of the motor unit. Common garage door opener brands include:
- Chamberlain
- LiftMaster
- Genie
- Craftsman
- Stanley
Each of these brands has slightly different steps to change the code.
Step 2: Locate the “Learn” Button
For most modern garage door openers, the “Learn” button is used to program remotes, keypads, and change codes. The location of the learn button varies by brand, but it’s usually located on the back of the motor unit.
- Chamberlain and LiftMaster: Look for a small button (often purple, red, or green) on the back of the opener’s motor unit, near the antenna wire.
- Genie: On Genie models, the learn button is often located on the back or side of the motor unit.
- Craftsman: On Craftsman openers, the learn button is typically on the back panel of the motor unit, near the antenna wire.
Once you locate the button, make sure the opener is powered on and that it is in standby mode (the door should be closed, and no activity should be happening).
Step 3: Press the Learn Button
Press and hold the learn button for a few seconds. The indicator light will blink or turn on, signaling that the opener is in programming mode. This will allow you to change the access code and program new remotes or keypads.
Step 4: Change the Code
Once the indicator light is on or blinking, you’re ready to change the code. The method for changing the code varies depending on the opener model:
- For Remote Control: Press the desired button on your remote and hold it until the indicator light on the opener blinks or turns off. This means the new code has been set and is now linked to the remote.
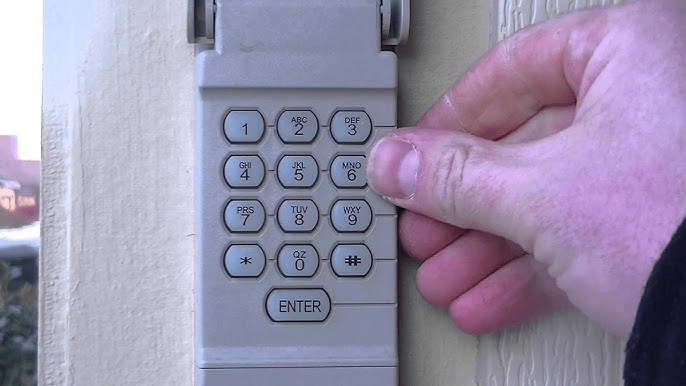
- For Keypad: If you’re using a wireless keypad, enter the new code directly into the keypad. The keypad will transmit the new code to the opener, which will save it once the process is completed.
Step 5: Test the New Code
Once the new code is programmed, it’s essential to test it. Press the button on the remote or enter the new code on the keypad to ensure the garage door opens and closes smoothly.
Step 6: Repeat the Process (If Needed)
If you have multiple remotes or keypads, you will need to repeat the process for each device to ensure all remotes are synchronized with the new code.
Additional Tips for Maintaining Your Garage Door Opener’s Security
- Change Your Code Regularly: It’s a good idea to change the code on your garage door opener periodically. A good rule of thumb is to change the code at least every six months.
- Use a Secure Code: Avoid using easy-to-guess codes, such as “1234” or your address. Instead, use a more random combination that is harder to guess.
- Secure the Learn Button: Some garage door openers allow you to disable the learn button to prevent unauthorized users from programming new remotes. If your opener has this feature, make use of it.
- Upgrade to Rolling Code Technology: If your garage door opener does not use rolling code technology, consider upgrading to one that does. Rolling code technology changes the access code after every use, providing added security.
- Monitor Access: If you have a smart garage door opener, consider using an app to monitor and control who has access to your garage.
Troubleshooting Common Issues When Changing Codes
If you encounter problems when changing the code on your garage door opener, here are a few common issues and solutions:
- The Opener Doesn’t Respond: If the opener doesn’t respond after pressing the learn button, check to ensure it’s plugged in, the circuit breaker is on, and there’s no obstruction blocking the signal.
- The Code Won’t Program: Ensure that you’re following the instructions carefully and that the remote or keypad is properly powered. If it still doesn’t work, try resetting the opener and starting over.
- Remote Not Working After Code Change: If your remote stops working after you change the code, it may need to be reprogrammed. Follow the programming steps again to sync the remote to the new code.
Conclusion
In answer to the question, Can I change the code on my garage door opener? the answer is a resounding yes! Changing the code on your garage door opener is an important part of keeping your home secure. Whether you’ve lost a remote, want to enhance security, or are simply upgrading your system, changing the code is a simple process that adds peace of mind.
Remember to regularly update your code and take steps to secure your opener, whether it’s by using rolling code technology, securing the learn button, or upgrading to a smart opener. With the right precautions, you can ensure that your garage remains safe and secure for years to come.


Leave a Reply