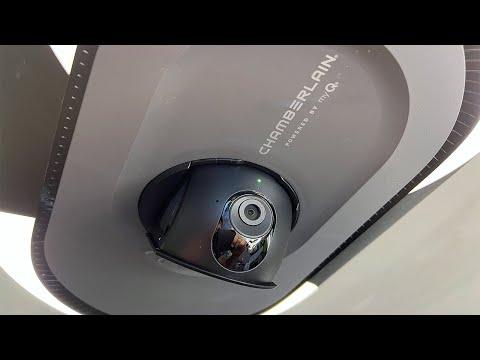
Are you facing difficulties with your Chamberlain garage door camera? Discover effective troubleshooting techniques to address common issues and restore functionality with this detailed guide on Chamberlain garage door camera not working.

Understanding Chamberlain Garage Door Camera Not Working
Chamberlain garage door cameras provide valuable security features, allowing homeowners to monitor their garage remotely. However, like any electronic device, these cameras may encounter problems that prevent them from functioning correctly. Here’s what you need to know about Chamberlain garage door camera issues:
Common Causes of Camera Malfunctions
- Connectivity Issues: Poor Wi-Fi signal or network connectivity problems can disrupt the camera’s operation.
- Power Interruptions: Power outages or fluctuations may affect the camera’s ability to function properly.
- Software Glitches: Firmware bugs or software updates can lead to unexpected behavior or malfunctions.
- Physical Damage: Damage to the camera hardware or wiring can impair its performance.
- Interference: Nearby electronic devices or wireless signals may interfere with the camera’s signal.
Read too: The Complete Guide to Tighten Chain On Garage Door Opener for Smooth Operation
Troubleshooting Chamberlain Garage Door Camera Not Working
If your Chamberlain garage door camera is experiencing issues, follow these troubleshooting steps to identify and resolve the problem:
1. Check Power Supply
Ensure that the camera is receiving power by checking the power adapter and outlet. Try plugging the adapter into a different outlet or using a different power source to rule out power-related issues.
2. Verify Connectivity
Check the Wi-Fi signal strength in the area where the camera is installed. If the signal is weak, consider relocating the camera or installing a Wi-Fi extender to improve connectivity. Additionally, verify that the camera is connected to the correct Wi-Fi network and that the network settings are configured correctly.
3. Reboot the Camera
Perform a soft reset or reboot of the camera by unplugging it from the power source for a few seconds and then plugging it back in. This can help resolve temporary software glitches or connectivity issues.
4. Update Firmware
Ensure that the camera’s firmware is up to date by accessing the Chamberlain app or website and checking for any available updates. Updating the firmware can address known bugs or compatibility issues that may be causing the camera to malfunction.
5. Reset to Factory Defaults
If other troubleshooting steps fail, consider resetting the camera to its factory defaults. This will restore the camera to its original settings and may resolve persistent issues. Refer to the camera’s user manual or manufacturer’s website for instructions on how to perform a factory reset.
Conclusion
Troubleshooting a Chamberlain garage door camera not working requires patience and attention to detail. By following the steps outlined in this guide, you can diagnose and address common issues, restoring your camera’s functionality and ensuring the security of your garage.


Leave a Reply