Are you puzzled by the Chamberlain garage door sensor yellow light and unsure what it means for the safety and operation of your garage door? Dive into our comprehensive guide to understand the significance of the Chamberlain garage door sensor yellow light and discover effective troubleshooting techniques to address this issue. Explore expert tips, common causes, and solutions to ensure the safety and functionality of your garage door.
Understanding Chamberlain Garage Door Sensor Yellow Light
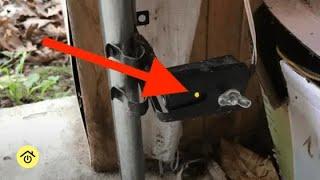
The Chamberlain garage door sensor yellow light indicates a potential issue with the safety sensors located near the bottom of the garage door tracks. These sensors are designed to detect obstructions in the door’s path and prevent accidents or damage by halting the door’s operation.
Read too: No Power to Genie Garage Door Opener – Resolving the Issue with Ease: Troubleshooting Guide
Common Causes of Chamberlain Garage Door Sensor Yellow Light
- Misalignment: Improper sensor alignment may cause the yellow light, indicating communication failure and a potential obstruction in the door’s path.
- Dirty or Blocked Sensors: Dust, dirt, or debris accumulation on the sensor lenses can obstruct the infrared beam, triggering the yellow light as a safety precaution.
- Interference: External factors such as sunlight, reflections, or electrical interference may disrupt the sensor’s operation, causing the yellow light to illuminate.
- Wiring Issues: Faulty wiring or connections between the sensors and the garage door opener can also lead to the yellow light indication.
Troubleshooting Chamberlain Garage Door Sensor Yellow Light
Sensor Alignment
- Visual Inspection: Inspect the alignment of the sensors to ensure that they are facing each other and are parallel to the ground.
- Adjustment: Use a level to align the sensors properly, making any necessary adjustments to ensure they are in line with each other.
Sensor Cleaning
- Cleaning Process: Carefully clean the sensor lenses with a soft, dry cloth to remove any dirt, dust, or debris that may be obstructing the infrared beam.
- Testing: After cleaning, test the sensors by opening and closing the garage door to see if the yellow light persists.
Interference Reduction
- Shade Sensors: Install shades or covers over the sensor lenses to minimize interference from sunlight or reflections.
- Avoidance: Identify and eliminate sources of electrical interference near the sensors, such as fluorescent lights or electronic devices.
Wiring Inspection
- Visual Inspection: Check the wiring and connections between the sensors and the garage door opener for any signs of damage or corrosion.
- Repair or Replacement: If you detect wiring issues, take action to repair or replace the affected components to restore proper functionality.
Conclusion
By understanding the causes and solutions for the Chamberlain garage door sensors yellow light, you can effectively troubleshoot this issue and ensure the safety and functionality of your garage door. Follow the troubleshooting steps outlined in this guide to address the yellow light indication and enjoy reliable operation of your Chamberlain garage door opener.
Now that you possess the knowledge to troubleshoot Chamberlain garage door sensors yellow lights, you can confidently maintain the safety and efficiency of your garage door system.


Leave a Reply