Your LiftMaster garage door opener is a critical part of your home’s security and convenience. But like any battery-powered device, it requires occasional maintenance to keep it functioning smoothly. One of the most common maintenance tasks homeowners face is changing the battery in a LiftMaster garage door opener.
Whether your remote is no longer working or you’re getting warning signals from the wall unit, this guide will walk you through everything you need to know about replacing the battery safely and efficiently. Plus, we’ll share helpful tips, signs to watch for, and how often to perform this simple yet important task.
Read too: Mastering the Art of Adjusting a Chamberlain Garage Door Opener for Smooth Operation and Safety
Why Changing The Battery In A Liftmaster Garage Door Opener Matters
Many homeowners underestimate the importance of timely battery replacement. While the LiftMaster opener is known for its reliability and durability, the remote control and backup battery still depend on functioning batteries to do their job.
If your garage door doesn’t respond to remote commands, it might not be a malfunction—it could be a dead battery. Regularly changing the battery in a LiftMaster garage door opener can prevent unexpected lockouts, maintain home security, and extend the life of your opener’s electronics.
How to Tell If Your LiftMaster Garage Door Opener Battery Needs Replacement
Before jumping into the replacement process, it’s essential to recognize the signs that your battery is nearing the end of its life. Some common indicators include:
- Remote Control Becomes Unresponsive: If your remote control doesn’t work from usual distances or at all, it’s likely due to a weak or dead battery.
- Wall Panel Beeping: Newer LiftMaster models emit a beeping sound when the backup battery is low.
- Flashing LED Lights: Some units will show a blinking red LED on the wall control panel or the opener unit itself.
- Inconsistent Operation: If the garage door opens slowly, partially, or closes erratically, low battery power may be the cause.
By keeping an eye on these signs, you can replace the battery before it becomes an urgent problem.
Understanding The Types of Batteries Used in LiftMaster Openers
LiftMaster garage door openers use two primary types of batteries, depending on the component:
- Remote Control Batteries
- Most LiftMaster remotes use a 3V lithium coin cell battery, typically CR2032 or CR2025.
- Some older remotes may use 12V alkaline batteries.
- Backup Battery Units
- Backup batteries for the motor unit are 12V rechargeable batteries, usually found in the opener housing.
It’s important to consult your owner’s manual to ensure you’re purchasing the correct battery type.
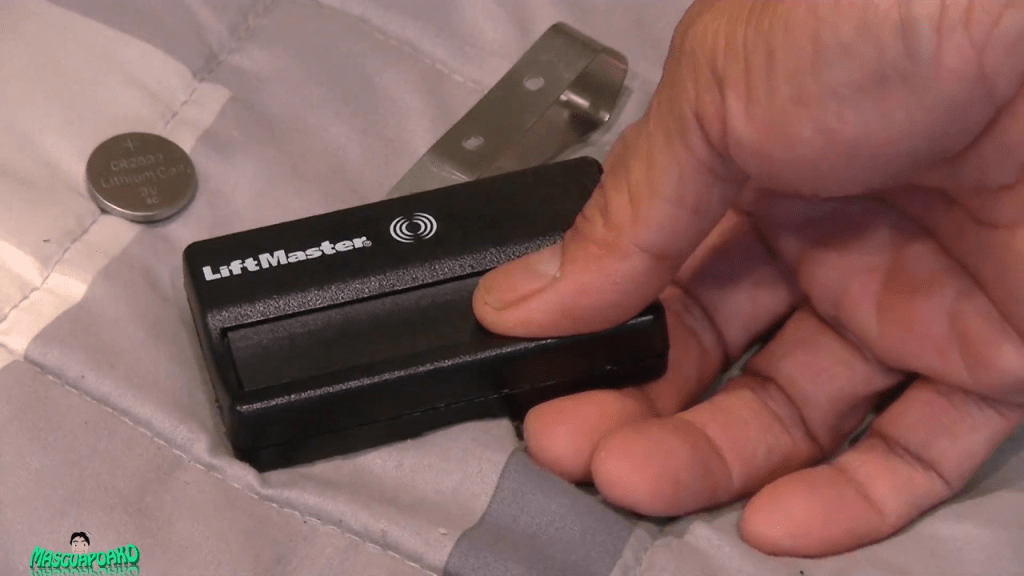
Step-by-Step Guide: Changing The Battery In A LiftMaster Garage Door Opener Remote
If your garage door remote has stopped working or the range has significantly decreased, it’s time to replace the battery. Follow these steps:
Tools You’ll Need:
- A small flathead screwdriver (or a coin)
- Replacement battery (CR2032 or other, depending on model)
Instructions:
- Open the Remote:
- Use a screwdriver or coin to pry open the remote casing.
- Be gentle to avoid damaging the plastic clips.
- Remove the Old Battery:
- Note the battery orientation before removing it.
- Take the battery out carefully.
- Insert the New Battery:
- Place the new battery in the same orientation (check the + and – sides).
- Snap the Remote Closed:
- Press both halves of the casing together until it clicks.
- Test the remote to confirm it works.
Most battery replacements take less than 5 minutes and instantly restore your remote’s performance.
Step-by-Step: Changing The Battery In A LiftMaster Garage Door Opener Backup Unit
LiftMaster openers with a built-in battery backup help operate your garage door during a power outage. However, these batteries typically last 1–3 years and require replacement when depleted.
How to Replace the Backup Battery:
- Unplug the Garage Door Opener:
- Always disconnect the power for safety.
- Open the Battery Compartment:
- The compartment is usually on the side or back of the motor unit.
- Use a screwdriver if necessary.
- Remove the Old Battery:
- Disconnect the wires and take out the battery.
- Most units use a 12V, 4.5Ah battery.
- Install the New Battery:
- Reconnect the wires and place the battery securely.
- Close the compartment and plug the opener back in.
- Test the Unit:
- Test by unplugging the opener and using the wall switch or remote to operate the door.
- If it works, the backup battery is functional.
Safety Tips When Changing Batteries
- Avoid touching metal contacts with your hands; use gloves if needed.
- Properly dispose of old batteries—do not throw them in the regular trash.
- Use only recommended batteries—non-compatible types can damage the unit or void your warranty.
- If you’re unsure, contact a certified LiftMaster technician.
Maintenance Tips to Extend Battery Life
Prevent frequent battery replacements with these tips:
- Avoid Extreme Temperatures: Store remotes inside your home when not in use to prevent battery drain.
- Regular Testing: Check functionality monthly, especially before winter.
- Keep Battery Contacts Clean: Dust or corrosion can affect performance.
- Unplug During Lightning Storms: Sudden power surges can drain or damage the battery backup.
When to Call a Professional
While changing a remote battery is straightforward, the backup battery may be harder to access, especially in older or high-mounted openers. If you encounter any of these issues, consider calling a pro:
- Difficulty reaching the opener
- Rusted or jammed battery compartments
- Unsure about wiring connections
- Frequent battery drain despite new batteries
Professional garage door services can inspect the opener and ensure all electrical components are functioning safely.
FAQs About Changing The Battery In A LiftMaster Garage Door Opener
Q1: How often should I change my LiftMaster remote battery?
A: Typically every 1–2 years, depending on usage.
Q2: How do I reset my garage door opener after changing the battery?
A: Usually, no reset is needed. But if issues persist, consult the manual or hold the “Learn” button to reprogram.
Q3: Can I use rechargeable batteries in my LiftMaster remote?
A: It’s not recommended unless the manual specifies. Most remotes are designed for disposable lithium cells.
Q4: What happens if I don’t replace the backup battery?
A: Your opener won’t work during power outages, and some models may beep or flash warnings until replaced.
Conclusion: Stay Prepared by Changing The Battery In A LiftMaster Garage Door Opener Regularly
Keeping your garage door opener in top shape is easier than you might think. By proactively changing the battery in a LiftMaster garage door opener, you avoid frustrating breakdowns and maintain peace of mind knowing your garage is secure and functional.
Whether you’re replacing a remote control battery or the main backup battery inside the opener, this simple maintenance task plays a crucial role in your garage system’s performance. With the right tools, knowledge, and timing, you’ll keep things running smoothly for years to come.


Leave a Reply