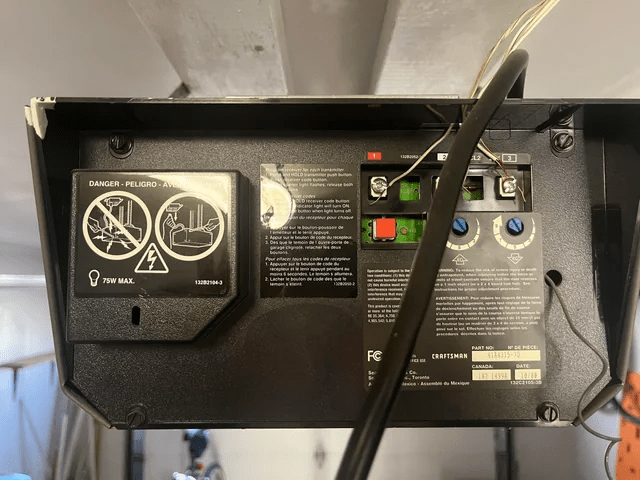
A Craftsman 1/2 HP Garage Door Opener 41A4315 7D is a reliable and efficient solution for residential garage doors. If you own this model, understanding the Craftsman 1/2 HP Garage Door Opener 41A4315 7D Manual is essential for proper installation, operation, and maintenance. This comprehensive guide will help you with step-by-step installation instructions, troubleshooting tips, and maintenance recommendations to ensure smooth and long-lasting performance.
Why Choose the Craftsman 1/2 HP Garage Door Opener 41A4315 7D?
Before diving into the manual, let’s explore why the Craftsman 1/2 HP Garage Door Opener 41A4315 7D is a popular choice among homeowners.
Read too: Mastering the Art of Adjusting a Chamberlain Garage Door Opener for Smooth Operation and Safety
1. Powerful and Durable Motor
This 1/2 HP garage door opener provides ample power to lift standard residential garage doors smoothly and efficiently.
2. Chain Drive System for Reliable Operation
The chain drive system ensures durability and long-term performance, making it ideal for frequent use.
3. Safety and Security Features
- Auto-Reverse Mechanism: Prevents accidents by reversing the door if an obstruction is detected.
- Rolling Code Technology: Changes the security code each time the remote is used, preventing unauthorized access.
4. Compatible with Keyless Entry and Smart Controls
This model supports keyless entry keypads and can be upgraded with smart home technology like myQ for remote control access via a smartphone app.
Craftsman 1/2 HP Garage Door Opener 41A4315 7D Manual: Installation Guide
Installing your Craftsman 1/2 HP Garage Door Opener 41A4315 7D properly is crucial for safe and efficient operation. Below is a step-by-step guide based on the Craftsman 1/2 HP Garage Door Opener 41A4315 7D Manual.
1. Tools and Materials Needed
Before you start, gather the following tools:
- Adjustable wrench
- Screwdrivers (Phillips and flathead)
- Drill with bits
- Level
- Ladder
- Measuring tape
- Safety glasses
2. Assemble the Rail and Attach the Chain Drive
- Connect the rail sections according to the Craftsman 1/2 HP Garage Door Opener 41A4315 7D Manual.
- Attach the chain drive system and ensure proper tension for smooth operation.
3. Mount the Powerhead
- Secure the garage door opener motor unit to the ceiling using the provided mounting bracket.
- Make sure the unit is level and properly supported.
4. Attach the Garage Door Bracket and Arm
- Connect the door bracket to the garage door.
- Attach the garage door arm to the opener unit for proper lifting and closing.
5. Install the Safety Sensors
- Position the safety sensors at the base of the garage door on both sides.
- Ensure they are aligned properly to prevent malfunctions.
6. Connect the Power Supply
- Plug the unit into a grounded power outlet.
- Avoid using extension cords, as recommended in the Craftsman 1/2 HP Garage Door Opener 41A4315 7D Manual.
7. Program the Remote and Keypad
- Follow the manual’s instructions to sync your garage door opener remote control and set up the keypad.
Maintaining Your Craftsman 1/2 HP Garage Door Opener 41A4315 7D
Regular maintenance ensures the longevity and efficiency of your Craftsman 1/2 HP Garage Door Opener 41A4315 7D. Here are some key maintenance tasks:
1. Lubricate the Chain and Moving Parts
Apply garage door lubricant to the chain drive, rollers, and hinges every 6 months to prevent wear and noise.
2. Test the Safety Sensors
Ensure that the infrared safety sensors are properly aligned and free from obstructions.
3. Inspect the Chain Tension
- A loose chain can cause jerky movements.
- Adjust the chain tension if you notice excessive slack.
4. Test the Auto-Reverse Feature
- Place an object (such as a block of wood) under the door and close it.
- If the garage door does not reverse, adjust the force settings as per the manual.
Troubleshooting the Craftsman 1/2 HP Garage Door Opener 41A4315 7D
Even with regular maintenance, issues may arise. Here are some common problems and their solutions:
1. Garage Door Won’t Open or Close
Possible Causes:
- Power issues (breaker tripped or unplugged)
- Remote control battery is dead
- Misaligned safety sensors
Solution:
- Check the power source and replace remote batteries.
- Realign and clean the garage door safety sensors.
2. Garage Door Closes and Then Reopens
Possible Causes:
- Sensor obstruction
- Force settings need adjustment
Solution:
- Remove any objects blocking the sensors.
- Adjust the downward force setting as per the Craftsman 1/2 HP Garage Door Opener 41A4315 7D Manual.
3. Loud Noises from the Opener
Possible Causes:
- Lack of lubrication
- Loose chain drive
Solution:
- Apply lubricant to the chain and rollers.
- Tighten the chain tension if necessary.
4. Remote Control Not Working
Possible Causes:
- Interference from other devices
- Remote needs reprogramming
Solution:
- Reset and reprogram the remote control using the Learn button on the motor unit.
Frequently Asked Questions (FAQs)
1. Where Can I Download the Craftsman 1/2 HP Garage Door Opener 41A4315 7D Manual?
The manual is available on the official Craftsman website or included with the product packaging.
2. How Long Does a Craftsman 1/2 HP Garage Door Opener Last?
With proper maintenance, a Craftsman garage door opener can last between 10 to 15 years.
3. Can I Use LED Bulbs in My Garage Door Opener?
Yes, but make sure to use garage door-compatible LED bulbs to prevent signal interference.
4. How Do I Reset My Craftsman Garage Door Opener?
Press and hold the Learn button on the motor unit until the LED light turns off. This erases all programmed remotes and keypads.
Final Thoughts
A Craftsman 1/2 HP Garage Door Opener 41A4315 7D is a reliable and powerful solution for residential garages. By following the Craftsman 1/2 HP Garage Door Opener 41A4315 7D Manual, you can ensure proper installation, maintenance, and troubleshooting for long-lasting performance. Whether setting up a new unit or fixing an issue, this guide helps you get the best out of your garage door opener.
For additional support, visit the Craftsman official website or consult a professional.


Leave a Reply