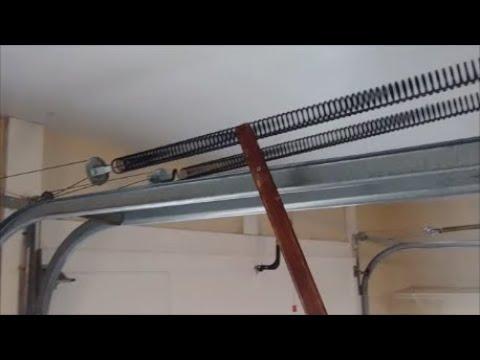
Mastering Garage Door Extension Spring Cable Replacement. Are you facing issues with your garage door extension spring cables? Don’t let malfunctioning cables disrupt your daily routine. In this comprehensive guide, we’ll walk you through the process of replacing garage door extension spring cables, ensuring smooth and reliable operation of your garage door.

Understanding Garage Door Extension Spring Cable Replacement
Importance of Functioning Cables
Garage door extension spring cables play a crucial role in the smooth operation of your garage door. They help distribute the weight of the door and provide balance during opening and closing. Malfunctioning or damaged cables can lead to serious issues, including door misalignment and failure to open or close properly.
Signs of Cable Damage
It’s essential to be aware of the signs indicating that your garage door extension spring cables need replacement. These signs may include:
- Fraying or unraveling cables
- Visible wear and tear
- Difficulty in opening or closing the garage door
- Uneven movement of the door
Read too: The Complete Guide to Tighten Chain On Garage Door Opener for Smooth Operation
Garage Door Extension Spring Cable Replacement: Step-by-Step Guide
Step 1: Gather Necessary Tools and Materials
Before you begin the replacement process, gather the following tools and materials:
- Replacement extension spring cables
- Safety gloves and goggles
- Adjustable wrench or socket wrench
- Vice grips or locking pliers
- Ladder or step stool
Step 2: Disconnect Power and Release Tension
To ensure safety during the replacement process, disconnect power to the garage door opener and release tension from the extension springs. Follow the manufacturer’s instructions for releasing tension safely.
Step 3: Remove Old Cables
Using the adjustable wrench or socket wrench, loosen the nuts securing the old cables to the bottom brackets. Once the nuts are removed, carefully detach the cables from the brackets and extension springs.
Step 4: Install New Cables
Attach the new extension spring cables to the bottom brackets and extension springs, ensuring they are securely fastened. Use the vice grips or locking pliers to hold the cables in place while tightening the nuts.
Step 5: Test the Door
After installing the new cables, test the operation of the garage door to ensure that it opens and closes smoothly. If necessary, make any adjustments to the tension of the extension springs.
Expert Tips for Cable Replacement
- Always wear safety gloves and goggles to protect yourself from injury during the replacement process.
- Inspect the entire garage door system for any signs of damage or wear and address any issues promptly.
- If you’re unsure about any aspect of the replacement process, consult a professional garage door technician for assistance.
Conclusion
Replacing garage door extension spring cables is a manageable task with the right tools, knowledge, and safety precautions. By following the step-by-step instructions provided in this guide and paying attention to expert tips, you can ensure smooth and reliable operation of your garage door for years to come.


Leave a Reply