Garage door springs are unsung heroes, quietly facilitating the daily opening and closing of your garage door. But like any mechanical component, they have a finite lifespan. In this article, we’ll explore the world of garage door springs, their types, and how long you can expect them to last. By understanding the lifespan of these crucial parts, you can ensure your garage door remains in good working order.
The Role of Garage Door Springs
Supporting Smooth Operation
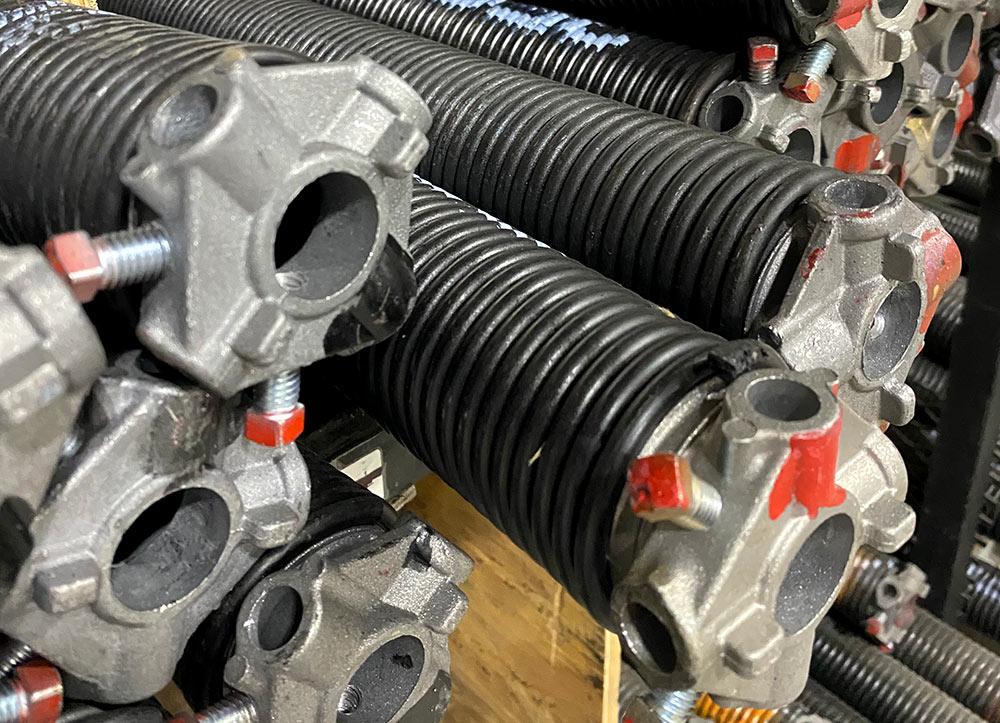
Garage door springs are responsible for counterbalancing the weight of the door, making it easier to open and close. Without these springs, manually lifting a garage door would be an arduous task. They come in two primary types:
1. Torsion Springs:
- Mounted above the door, torsion springs wind and unwind to provide the lifting force.
2. Extension Springs:
- Installed on either side of the door, extension springs expand and contract to assist in lifting.
The Lifespan of Garage Door Springs
How Long Can You Count on Them?
The lifespan of springs can vary depending on several factors, including the type of spring, usage, and maintenance. Let’s delve into these aspects.
1. Type of Spring:
- Torsion springs generally have a longer lifespan than extension springs. Torsion springs are designed to endure more cycles of use, often exceeding 20,000 cycles, while extension springs may have a lifespan of around 10,000 cycles.
2. Usage Frequency:
- The more frequently your garage door is used, the shorter the lifespan of the springs. If your garage door sees multiple daily cycles, the springs may wear out more quickly.
3. Maintenance:
- Regular maintenance and lubrication can extend the lifespan of springs. Neglecting maintenance can lead to premature failure.
Signs of Failing Springs
When to Take Action
As springs approach the end of their lifespan, they may exhibit warning signs:
1. Squeaking or Creaking:
- Springs may become noisy as they wear out, producing squeaking or creaking sounds.
2. Imbalance:
- The garage door may appear unbalanced, with one side hanging lower than the other.
3. Slow Operation:
- Sluggish or slower garage door operation can indicate worn-out springs.
4. Visible Damage:
- Visibly damaged or frayed springs should be replaced immediately.
Replacing Garage Door Springs
Professional vs. DIY
Replacing springs is a task best left to professionals. These springs are under high tension, and attempting to replace them without the necessary skills and tools can be dangerous.
When you notice signs of failing springs, it’s advisable to contact a reputable garage door technician. They will assess the situation, determine the appropriate type of spring replacement, and install it safely.
Prolonging Spring Life
Best Practices
To extend the lifespan of your springs, consider these best practices:
1. Regular Inspection:
- Perform visual inspections of your garage door springs, cables, and pulleys. Look for any signs of wear or damage.
2. Maintenance:
- Apply garage door lubricant to the springs and other moving parts as recommended by the manufacturer.
3. Balanced Door:
- Ensure that your garage door is properly balanced to reduce strain on the springs.
4. Professional Tune-Ups:
- Schedule periodic professional maintenance and tune-ups to keep your garage door in optimal condition.
Conclusion:
Garage door springs are essential components of your garage door system, and understanding their lifespan is crucial for maintaining a functional and safe setup. By recognizing the type of spring you have, monitoring usage, conducting regular inspections, and seeking professional assistance when needed, you can prolong the life of your springs and enjoy reliable and smooth operation for years to come.


Leave a Reply