A Chamberlain garage door opener is a reliable and convenient way to control your garage door with ease. If you’ve recently purchased a new remote or need to replace a lost one, learning how to add a remote to a Chamberlain garage door opener is essential. Thankfully, programming a new remote is a straightforward process that requires just a few simple steps.
In this guide, we’ll walk you through the exact process of adding a new remote to your Chamberlain garage door opener, including troubleshooting tips and expert recommendations.
Read too: Door and Garage Door Companies: Choosing the Right Partner for Your Needs
Why You Might Need to Add a New Remote
Before we dive into the step-by-step process, let’s explore some common reasons why you might need to add a new remote to your Chamberlain garage door opener:
- Lost or broken remote: If your existing remote has been misplaced or damaged, you’ll need a replacement.
- Additional users: If a family member, roommate, or friend needs access to the garage, programming a new remote is necessary.
- Upgrading to a universal remote: Some homeowners prefer to use a universal remote to control multiple garage doors or gates.
- Replacing an old remote with a new one: If your old remote stops working, adding a new one is a quick fix.
Regardless of the reason, the process of adding a remote remains the same. Let’s get started!
How To Add A Remote To Chamberlain Garage Door Opener
Adding a remote to your Chamberlain garage door opener involves programming the remote to communicate with the opener. Here’s how to do it:
Step 1: Locate the “Learn” Button on Your Chamberlain Garage Door Opener
- Find the garage door opener unit mounted on the ceiling of your garage.
- Look for the “Learn” button, typically located on the back or side of the opener.
- The “Learn” button may be yellow, purple, red, or green, depending on your Chamberlain model.
Step 2: Press the “Learn” Button
- Press and release the “Learn” button on your garage door opener.
- A small LED light next to the button will turn on, indicating the unit is ready to pair with a remote.
💡 Note: You have about 30 seconds to complete the next step before the programming mode times out.
Step 3: Program the Remote
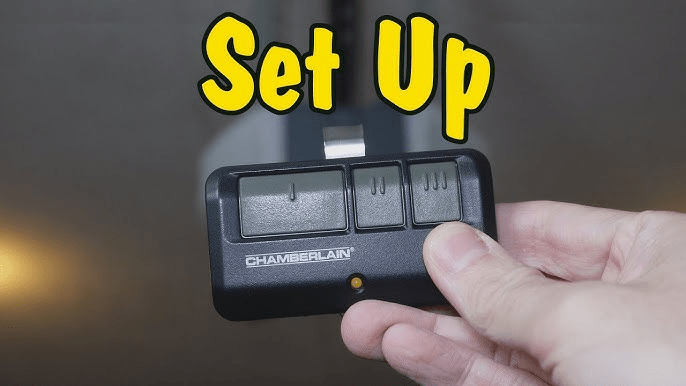
- Take your Chamberlain garage door remote and locate the “Program” button (if applicable).
- Press and hold the button you wish to program on the remote for about 3–5 seconds.
- When the garage door opener light blinks or you hear a clicking sound, it means the remote has been successfully paired.
Step 4: Test the Remote
- Stand a few feet away from the garage door opener.
- Press the programmed button on the remote.
- If the garage door opens or closes, the remote is successfully added!
🎉 Congratulations! You’ve now successfully added a remote to your Chamberlain garage door opener.
Troubleshooting Common Issues
Sometimes, the remote may not pair correctly on the first attempt. Here are some common issues and how to fix them:
1. The Remote Is Not Working After Programming
✅ Solution:
- Make sure the remote’s battery is installed properly and has enough charge.
- Repeat the programming steps, ensuring you press the correct button on the remote.
- Check if your opener has reached the maximum remote capacity (some models allow only a certain number of remotes).
2. The Garage Door Opener Light Doesn’t Blink
✅ Solution:
- Ensure you pressed the “Learn” button properly.
- Try holding the remote button a little longer.
- Check if the opener’s LED light is functioning. If not, the opener may need troubleshooting.
3. The Remote Works Inconsistently
✅ Solution:
- Replace the battery in the remote.
- Check for interference from nearby electronic devices.
- Make sure you’re within the operating range of the garage door opener.
Alternative Ways to Control Your Chamberlain Garage Door
If adding a new remote isn’t the best option for you, consider these alternative methods:
1. Use the MyQ App
Many Chamberlain openers are compatible with MyQ technology, which allows you to control the garage door via a smartphone app.
2. Get a Universal Remote
A universal garage door remote can be programmed to work with Chamberlain and other brands, making it a flexible option.
3. Install a Keypad Entry System
For keyless access, install a Chamberlain garage door keypad that allows you to enter a PIN code instead of using a remote.
Final Thoughts
Learning how to add a remote to a Chamberlain garage door opener is a simple process that takes just a few minutes. Whether you’re replacing a lost remote or adding an extra one for convenience, following these steps will ensure seamless programming.
If you encounter issues, check for common troubleshooting solutions like battery replacement, interference, or range limitations. Additionally, consider alternative access options such as the MyQ app, universal remotes, or a keypad entry system for added convenience.
Now that you’ve successfully programmed your remote, enjoy the convenience of easy and secure access to your garage!
Leave a Reply