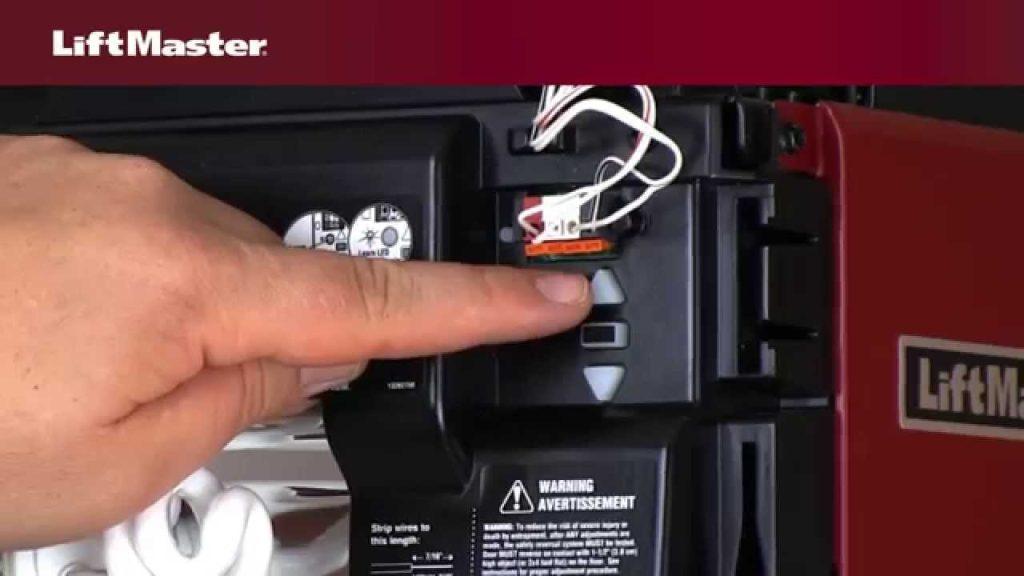
Is your garage door not functioning as smoothly as it used to? Learn the art of fine-tuning with “How To Adjust Liftmaster Garage Door Opener” for seamless operation.

How To Adjust Liftmaster Garage Door Opener: A Guide to Precision
Your Liftmaster garage door opener is a precision device that ensures the smooth and efficient operation of your garage door. Explore the comprehensive guide on “How To Adjust Liftmaster Garage Door Opener” to maintain optimal performance and address common issues.
The Importance of Proper Adjustment
Enhancing Safety Features
Adjusting your Liftmaster garage door opener is not just about functionality; it’s also about safety. Fine-tuning the settings ensures that safety features, such as obstruction sensors, are calibrated correctly, preventing accidents and damage to property.
Extending the Lifespan of Components
Regular adjustment and maintenance contribute to the longevity of your garage door opener. By addressing minor issues promptly, you reduce wear and tear on components, extending the lifespan of the entire system and minimizing the need for major repairs.
Step-by-Step Guide: How To Adjust Liftmaster Garage Door Opener
Inspecting and Testing Safety Sensors
Start by inspecting the safety sensors located on each side of the garage door. Ensure they are aligned and free from any obstructions. Test the sensors by closing the door and interrupting the sensor beam with an object. Adjust as necessary to guarantee proper functioning.
Fine-Tuning Travel Limits
Adjusting the travel limits determines how far the garage door opens and closes. Locate the travel limit adjustment screws on the opener unit. Using a screwdriver, turn the limit adjustment screws slightly to increase or decrease the travel distance. Test the door’s movement after each adjustment.
Read too: Genie Garage Door Opener Blue Light Flashing – Decoding the Signal: Troubleshooting the Mystery
Troubleshooting Common Issues
Addressing Unusual Noises
If your Liftmaster garage door opener produces unusual noises during operation, it may indicate misalignment or wear on certain components. Inspect the tracks, rollers, and drive belt or chain for any signs of damage. Lubricate moving parts to reduce friction and noise.
Fixing Uneven Closing or Opening
An uneven closing or opening of the garage door may be due to an imbalance in the tension of the torsion springs. Consult the Liftmaster manual or seek professional assistance for adjusting the spring tension to achieve balanced door movement.
Advanced Adjustments for Specific Models
Adjusting Force Settings
Newer Liftmaster models feature force adjustment settings that control the amount of force exerted by the opener to open and close the door. Fine-tune these settings to ensure optimal force without causing unnecessary strain on the system.
Programming Travel Limits on Smart Openers
If you own a smart Liftmaster garage door opener, adjustments can often be made through a smartphone app. Follow the manufacturer’s instructions to access the settings and program travel limits, force settings, and other adjustments conveniently from your mobile device.
Regular Maintenance Practices for Long-Term Performance
Lubricating Moving Parts
Proper lubrication is crucial for the smooth operation of your garage door opener. Regularly apply a recommended lubricant to the rollers, hinges, and other moving parts to reduce friction and ensure optimal performance.
Checking and Tightening Hardware
Inspect the hardware, including nuts, bolts, and screws, for any signs of loosening. Tighten any loose hardware to prevent unnecessary vibrations and maintain the stability of the garage door opener.
Conclusion: Mastering the Art of Garage Door Opener Adjustment
Regular adjustment of your Liftmaster garage door opener is a proactive measure that contributes to safety, longevity, and optimal performance. By following this comprehensive guide on “How To Adjust Liftmaster Garage Door Opener,” you empower yourself to address issues promptly and ensure the seamless operation of your garage door for years to come.


Leave a Reply