Introduction
A malfunctioning garage door opener can disrupt your daily routine and pose a security risk. If you’re wondering how to change circuit board on garage door opener, this guide is for you. Circuit boards are the brains of modern openers, controlling sensors, remotes, and safety features. Replacing a faulty board is not only cost-effective compared to replacing the entire unit but also restores full functionality to your garage system. This article will walk you through the process safely, step by step.
Signs You Need To Replace The Circuit Board
Identifying a failing circuit board early can save time and money. Common signs include:
- Garage door not responding to remote or wall switch
- Intermittent operation or random stops
- Lights on the opener blinking irregularly
- Safety sensors failing to detect obstacles
According to a 2022 Home Repair Survey, over 30% of garage opener failures are linked to faulty circuit boards, highlighting the importance of timely replacement.
Tools and Materials Needed
Before beginning, gather the following:
- Replacement circuit board compatible with your opener model
- Screwdrivers (Phillips and flathead)
- Needle-nose pliers
- Gloves for safety
- Multimeter (optional, for testing connections)
Read too: Mastering Quantum Garage Door Opener Programming: A Comprehensive Guide
Pro Tip: Always check your opener model number and purchase a board specifically designed for it (Garage Door Opener – Wikipedia). Using the wrong board can damage your unit.
Step-By-Step Instructions: How To Change Circuit Board On Garage Door Opener
Step 1: Disconnect Power
Always unplug the opener or turn off the circuit breaker. This is crucial to avoid electric shock and accidental activation.
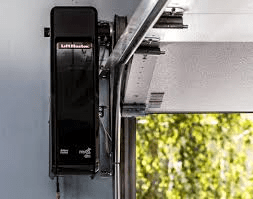
Step 2: Remove the Opener Cover
- Use a screwdriver to remove screws securing the opener’s plastic or metal cover.
- Carefully lift off the cover to expose the internal components.
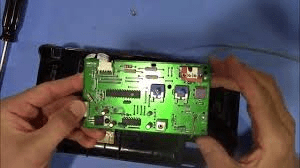
Step 3: Locate the Circuit Board
- The circuit board is usually a green or brown PCB with various connectors.
- Take note of all attached wires or take a photo to ensure proper reconnection.
Step 4: Disconnect Wires
- Gently unplug each wire from the circuit board.
- Use needle-nose pliers if connectors are tight but avoid pulling on wires themselves.
Step 5: Remove the Old Board
- Unscrew or unclip the board from its mounting position.
- Carefully lift it out without touching other components.
Step 6: Install the New Circuit Board
- Place the new board in the same orientation as the old one.
- Secure with screws or clips.
- Reconnect all wires exactly as they were on the original board. Double-check connections.
Step 7: Replace the Cover and Restore Power
- Reattach the opener cover.
- Plug in the opener or turn the circuit breaker back on.
- Test the opener with the wall switch and remote to ensure proper operation.
Troubleshooting Common Issues
| Problem | Cause | Solution |
|---|---|---|
| Opener not responding | Loose wires | Recheck connections |
| Lights flicker | Incorrect board installation | Ensure correct board orientation and secure mounting |
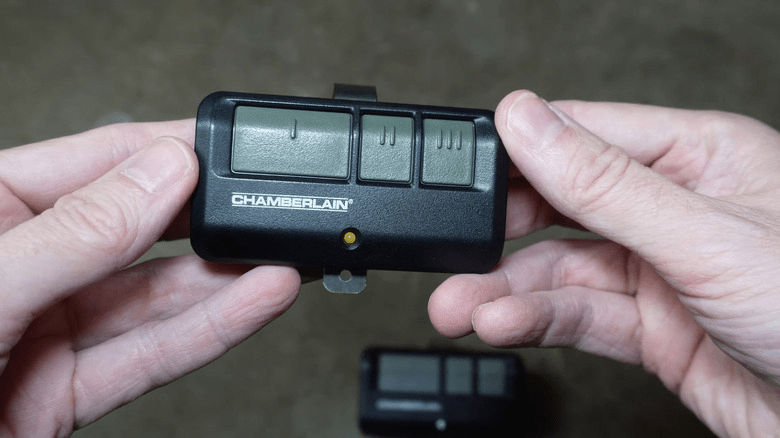
| Remote not working | Board not synced | Follow manufacturer instructions to reprogram remotes |
| Safety sensors fail | Board miscommunication | Verify sensor wiring and alignment |
Tips for Smooth Replacement
- Label Wires: Use tape or markers to avoid mistakes.
- Handle Board Carefully: Avoid touching electronic components to prevent static damage.
- Use LED Bulbs: If your opener has a built-in light, upgrading to LED can reduce energy usage.
- Keep Spare Screws: Small screws can easily get lost during reassembly.
Replacing the circuit board yourself is safer and more affordable than hiring a technician, as long as safety precautions are followed.
Frequently Asked Questions (FAQ)
Q1: Can I replace the circuit board on any garage door opener?
A1: No. Boards are model-specific. Always use a replacement compatible with your opener.
Q2: How long does it take to replace the board?
A2: Typically 20–40 minutes for an experienced DIYer.
Q3: Do I need special tools for this replacement?
A3: Standard screwdrivers and optional needle-nose pliers are sufficient. A multimeter helps but is not mandatory.
Q4: How can I test if the new board is working?
A4: Plug in the opener and operate it using the wall switch and remote. All functions, including lights and sensors, should work.
Q5: Is it safer to hire a professional?
A5: While DIY replacement is possible, professionals are recommended if you’re uncomfortable with electrical components.
Conclusion
Knowing how to change circuit board on garage door opener ensures your garage remains functional, secure, and convenient. With the right tools, safety measures, and careful attention to detail, this DIY task is straightforward and cost-effective. Regular maintenance of your garage opener extends its lifespan and prevents unexpected failures. Share this guide with friends or family to help them troubleshoot and maintain their garage openers safely!

Leave a Reply