Garage door openers operate on specific radio frequencies to communicate with remotes, ensuring smooth and secure functionality. However, there are situations where changing the frequency of your garage door opener becomes necessary. Whether you’re facing interference issues, upgrading your security, or troubleshooting problems, this guide will walk you through how to change the frequency of a garage door opener.
Why Change the Frequency of Your Garage Door Opener?
Understanding why you might need to change the frequency is essential:
- Interference Problems: Nearby devices or other garage doors operating on the same frequency can cause signal disruption.
- Security Concerns: Changing the frequency reduces the risk of unauthorized access due to code theft or duplication.
- Technical Issues: Malfunctioning remotes or outdated frequencies might require reprogramming.
Read too: The Complete Guide to Tighten Chain On Garage Door Opener for Smooth Operation
Understanding Garage Door Opener Frequencies
Garage door openers typically operate on radio frequencies in the range of 300 MHz to 400 MHz. Modern openers use rolling code technology, where the frequency changes dynamically after each use for added security.
Older models may have fixed frequencies, making them more susceptible to interference or unauthorized access.
How To Change The Frequency Of A Garage Door Opener
The exact process to change the frequency depends on the model and manufacturer of your garage door opener. Below are the general steps and considerations.
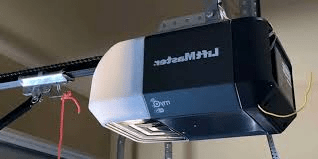
1: Identify Your Garage Door Opener Model
- Locate the user manual for your opener or check the label on the motor unit for model information.
- Determine if your unit uses fixed or rolling code technology.
Tip: Rolling code units might not allow direct frequency changes but can resolve interference through reprogramming.
2: Access the Control Panel
- Disconnect the power supply to the garage door opener for safety.
- Use a ladder or step stool to access the motor unit, where the control panel is typically located.
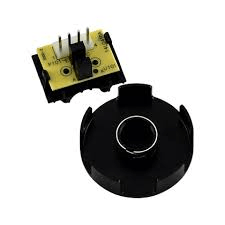
3: Locate the Frequency Adjustment Settings
- On older models:
- Find the DIP switches inside the motor unit or on the remote.
- Adjust these switches to match the desired frequency.
- On newer models:
- Look for a Learn button or similar feature on the motor unit.
- This button is used to sync remotes or reset rolling codes.
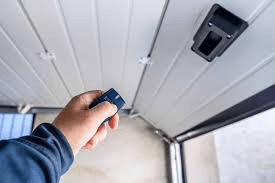
4: Reprogram the Remote Control
- After adjusting the frequency, reprogram your remote control:
- Press the Learn button on the opener.
- Within 30 seconds, press and hold the button on your remote.
- Release when the opener light blinks or clicks, indicating successful programming.
- Test the remote to ensure it works with the new frequency settings.
5: Resolve Interference Issues
If interference persists after changing the frequency:
- Relocate the antenna wire on the motor unit for better reception.
- Eliminate potential sources of interference, such as cordless phones or Wi-Fi routers.
Additional Tips for Changing Frequencies
- Upgrade to Rolling Code Technology: If your opener uses fixed frequencies, consider upgrading to a rolling code system for enhanced security.
- Replace Batteries: Weak batteries in remotes can cause signal issues, so replace them during reprogramming.
- Consult the Manufacturer: If you’re unsure about compatibility or technical specifications, refer to the manufacturer’s website or support team.
Benefits of Changing Garage Door Opener Frequency
- Improved Security: Reduces the risk of unauthorized access.
- Better Performance: Resolves interference issues, ensuring smooth operation.
- Enhanced Compatibility: Matches the frequency of replacement remotes or additional devices.
Common Problems and Troubleshooting
1. Frequency Doesn’t Change
- Ensure you followed the steps correctly and saved the new settings.
- Some units may not allow manual frequency changes; consult the manual.
2. Remote Not Working After Frequency Change
- Reprogram the remote using the new frequency settings.
- Replace the remote’s battery if necessary.
3. Interference Persists
- Move potential sources of signal disruption, such as electronics or metal objects, away from the opener.
Alternatives to Changing Frequency
If changing the frequency isn’t possible or practical, consider these alternatives:
1. Upgrade to a New Opener
Modern openers with rolling code technology offer better security and adaptability.
2. Use a Signal Booster
A signal booster can enhance the range and strength of your opener’s signal, reducing interference.
3. Install a Smart Garage Door System
Smart systems use Wi-Fi or Bluetooth for control, bypassing traditional radio frequencies.
Frequently Asked Questions
Q: Can all garage door openers change frequencies?
A: Not all models allow manual frequency changes, especially those with rolling code technology.
Q: How do I know if my opener has rolling code technology?
A: Check the user manual or look for branding like Security+ or Rolling Code Technology on the unit.
Q: What should I do if I lose my remote?
A: Erase all codes from the opener and reprogram it with a new remote to prevent unauthorized access.
Final Thoughts
Changing the frequency of a garage door opener is a practical solution to improve security, resolve interference, and maintain smooth operation. By following the steps outlined in this guide, you can confidently address issues and ensure your garage door opener functions effectively.
Whether you’re working with a Craftsman, Chamberlain, or another brand, the key is to understand your specific model and follow the appropriate steps.

Leave a Reply