If your remote suddenly stops working, you’re likely frustrated—especially when you need your garage door to open right now. Many homeowners search for how to fix a LiftMaster garage door opener remote because the solution is often simple: weak batteries, signal issues, or lost programming. This guide walks you through every proven fix so you can solve the problem quickly and safely.
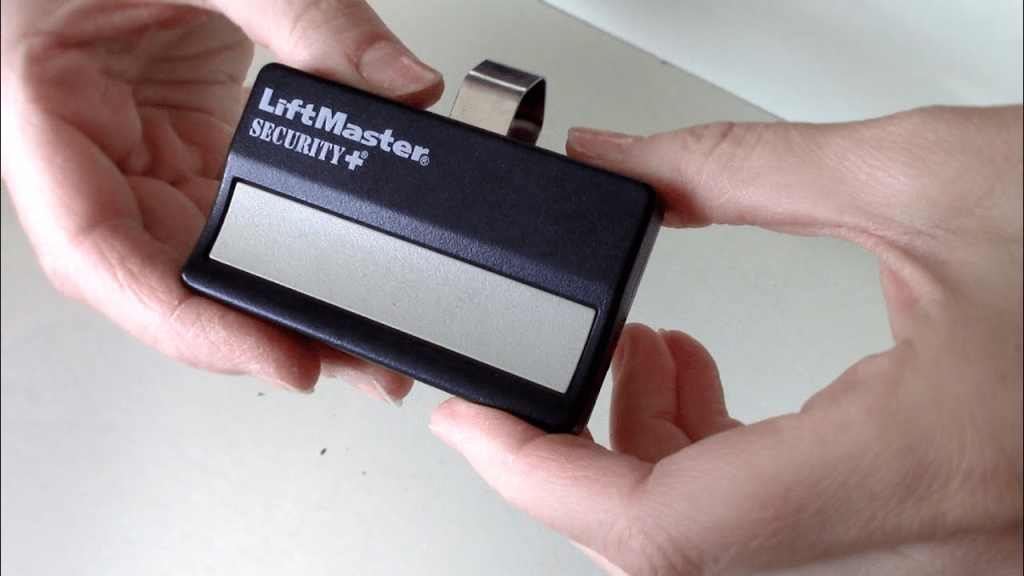
How To Fix a LiftMaster Garage Door Opener Remote
Troubleshooting a LiftMaster remote is easier when you understand how the system works. LiftMaster, Chamberlain, and Craftsman share similar technology, meaning the steps below apply to all three brands.
Read too: Door and Garage Door Companies: Choosing the Right Partner for Your Needs
1. Replace the Remote Battery (Most Common Fix)
Around 45% of remote failures are caused by low or dead batteries, according to garage door service statistics.
Signs of a Weak Battery
- LED on the remote is dim or flickers
- The garage door opens only intermittently
- Remote works only at very close range
How To Fix
- Remove the battery cover (slide or pry gently).
- Replace with a fresh CR2032 or CR2025 battery (check your model).
- Make sure the positive (+) side faces upward.
- Clean corrosion with a cotton swab dipped in rubbing alcohol.
Pro Tip:
A battery can still light the LED but fail to transmit a strong enough signal.
2. Reprogram the Remote to the Opener
If the battery is fine, the next most common issue is lost programming.
This occurs after power outages, surges, or a system reset.
How To Reprogram a LiftMaster Remote
- Locate the Learn button on the opener.
- Under the light cover
- Or on the back panel near the antenna
- Press and release the Learn button.
- LED turns on or blinks.
- Within 30 seconds, press the remote button.
- Hold for 2–3 seconds, then release.
- Opener light blinks or clicks = success.
Learn Button Color Chart (LiftMaster & Chamberlain)
| Color | Technology | Years |
|---|---|---|
| Yellow | Security+ 2.0 | 2011–Present |
| Purple | Security+ | 2001–2011 |
| Red/Orange | Basic Security | 1997–2005 |
| Green | Rolling Code | 1993–1997 |
The color determines which remote types are compatible.
To learn more about radio signal systems and remote pairing, refer to Wikipedia’s “Remote Control” article.
3. Check Your Distance and Signal Range
LiftMaster remotes typically operate within 50–120 feet.
If the Remote Works Only Up Close
The issue is likely:
- Weak battery
- Opener antenna folded or missing
- RF interference
Common Interference Sources
- LED garage bulbs
- Wi-Fi routers
- Wireless security cams
- Bluetooth car systems
- Neighbor’s garage openers
How To Fix
- Replace interfering LED bulbs with “garage-safe” versions
- Straighten the opener’s antenna wire
- Move Wi-Fi router further from the opener
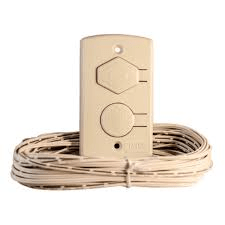
4. Disable the Garage Door Lock (Vacation Mode)
LiftMaster wall consoles have a lock feature.
If activated, remotes will not function.
How To Fix
- Go to your wall control (Smart Control Panel or Basic Wall Console).
- Press and hold the Lock button for 3–5 seconds.
- LED should turn off, indicating remotes are re-enabled.
Many homeowners mistakenly think their remote is broken when the lock mode is simply turned on.
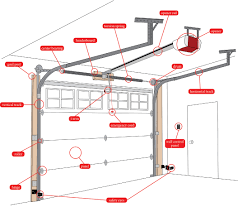
5. Inspect the Opener’s Antenna Wire
The hanging antenna wire receives remote signals.
If it’s bent, broken, or tucked inside the opener, the range will drop dramatically.
How To Check
- Look for a thin wire hanging 4–6 inches from the opener.
- It should be straight, undamaged, and pointing downward.
How To Fix
- Straighten it gently
- Ensure it’s not wrapped or hidden
- Replace only with original manufacturer parts
6. Check for Stuck or Damaged Buttons on the Remote
Over time, dirt and wear can prevent the button from making solid contact.
How To Inspect
- Open the remote casing.
- Check the rubber button pad for wear.
- Examine the contact points for dirt or oxidation.
How To Fix
- Clean with isopropyl alcohol
- Gently scrape corrosion with a toothpick
- Add a small piece of aluminum foil under the pad (DIY contact boost)
7. Reset the Garage Door Opener
If none of the above fixes work, the opener itself may need a reboot.
How To Reset
- Unplug the unit.
- Wait 30 seconds.
- Plug it back in.
- Reprogram the remote.
This clears minor software glitches.
8. Clear All Codes and Reprogram Everything
If you recently moved into a new home or suspect interference from old remotes, do a full memory wipe.
How To Clear All Remotes
- Press and hold the Learn button for 6–10 seconds.
- LED will turn off.
- All remotes and keypads are erased.
Reprogram Each Remote
Follow the programming steps above.
9. Check the Safety Sensors (If Door Won’t Close)
Sometimes the remote works, but the door still will not close.
Safety Sensor Issues
- Misalignment
- Dirt or spider webs
- Loose wires
Fix
- Align until both LEDs are solid
- Clean the lenses
- Reconnect loose wires
This issue mimics a “broken remote,” but the remote isn’t the problem at all.
Troubleshooting Table: Problems & Fixes
| Symptom | Most Likely Cause | Solution |
|---|---|---|
| Remote doesn’t respond | Dead battery | Replace battery |
| LED lights but opener silent | Lost programming | Reprogram via Learn button |
| Remote works only near door | Bad antenna or interference | Straighten antenna, remove interference |
| Wall button works, remote doesn’t | Lock mode on | Disable lock/vacation mode |
| Remote works occasionally | Dirty contacts | Clean button pads |
| Nothing works | Hardware failure | Replace remote |
Why LiftMaster Remotes Fail: Detailed Explanations
A. Battery Voltage Drop
Even a 0.2V drop affects RF output.
Extreme temperatures accelerate battery drain.
B. Power Surges or Outages
These can erase remote memory on specific LiftMaster logic boards.
C. RF Interference
Urban environments show 20–30% higher interference rates due to dense electronics.
D. Worn Internal Components
Older remotes (5+ years) commonly experience:
- Worn button membranes
- Cracked solder joints
- Damaged circuit traces
E. Compatibility Confusion
Not all remotes work with all Learn button colors.
Symptom-Based Diagnosis Guide
If the LED Lights but the Door Doesn’t Move
Try:
- Reprogramming
- Resetting opener
- Checking lock switch
If LED Does NOT Light
Likely:
- Dead battery
- Damaged LED
- Internal board failure
If Only One Remote Works
Possible:
- Opener memory full
- Other remote unpaired
- Interference affecting specific remote location
If the Remote Works Inside but Not Outside
This indicates:
- Bad antenna
- Interference from LED bulbs
- Low battery
Step-by-Step: Full Reprogram Procedure (Complete Guide)
1. Clear the Opener Memory
- Hold Learn button 6–10 seconds.
- LED goes off.
2. Reprogram Remote
- Press Learn button once.
- Press and hold remote button for 2–3 seconds.
- Release.
- Door operator lights blink.
3. Verify
Test remote from 10–20 feet away.
FAQ Section
1. Why is my LiftMaster remote not working but the wall button is?
Because the remote signal is blocked or the remote is unpaired, but the wall console is hardwired. Check lock mode, antenna, and reprogramming.
2. Can I reset a LiftMaster remote?
Not directly. You reset the opener’s memory using the Learn button, then reprogram the remote.
3. How long do LiftMaster remotes last?
Typically 5–10 years, depending on usage and battery care.
4. Do LiftMaster remotes work on Craftsman and Chamberlain?
Yes, if the Learn button color matches and frequency matches.
5. Why does my remote only work sometimes?
This is usually caused by:
- Weak battery
- Interference
- Bent antenna
- Worn buttons
6. Should I replace or repair a broken remote?
If internal contacts are damaged or board is cracked, replace it.
Remotes are inexpensive—typically $25–$40.
Conclusion
Fixing a LiftMaster garage door opener remote is usually simple once you identify the cause. Whether it’s a weak battery, signal interference, lost programming, or worn components, this guide gives you every proven solution. If this article helped you, don’t forget to share it on your social media so others can troubleshoot their LiftMaster remotes easily.
Leave a Reply