If you’re looking to upgrade or replace your current garage door opener, the Genie Chain Drive Garage Door Opener is a reliable, durable, and cost-effective solution. Known for its power and long-lasting performance, the chain drive opener is ideal for heavy or older garage doors. In this guide, we’ll walk you through how to install a Genie chain drive garage door opener yourself, step by step.
With the right tools and a bit of patience, you can save on professional installation fees and take pride in completing this handy home improvement project on your own.
Read too: Door and Garage Door Companies: Choosing the Right Partner for Your Needs
Why Choose a Genie Chain Drive Garage Door Opener?
Before we dive into installation, it’s helpful to understand why the Genie chain drive opener is such a popular choice among homeowners:
- Powerful lifting capacity – Ideal for heavier garage doors.
- Long-term durability – Chain drives typically last longer under regular use.
- Affordable – Less expensive than belt drive or wall-mount openers.
- Standard compatibility – Works with most single and double garage doors.
- Smart features available – Many Genie models are Wi-Fi compatible and integrate with smart home systems.
Whether you’re installing it in a detached garage or in your main home, Genie’s chain drive models are engineered for strength, reliability, and value.
What You’ll Need for Installation
Tools:
- Power drill
- Level
- Adjustable wrench
- Stepladder
- Screwdrivers (flathead and Phillips)
- Tape measure
- Socket wrench set
- Wire stripper/cutter
- Safety glasses
- Pliers
- Stud finder
Included Materials (from Genie kit):
- Rail sections and chain assembly
- Motor unit
- Safety sensors
- Door bracket
- Trolley and hardware
- Mounting straps
- Wall control panel
- Remote controls
- Installation manual
Make sure all parts are included by checking against the instruction manual before starting.
How To Install A Genie Chain Drive Garage Door Opener
Let’s get started with the full installation process. These steps will help you safely and effectively complete the job in about 4–6 hours.
Step 1: Assemble the Rail and Chain System
- Lay the rail sections on the floor and connect them per the instructions.
- Slide the trolley (carriage) onto the rail.
- Attach the chain around the sprocket at the motor unit and loop it through the trolley and the idler pulley.
- Use the chain tensioner bolt to tighten the chain—ensure there’s minimal sag, but don’t overtighten.
The chain should be firm but still flexible enough to move smoothly.
Step 2: Attach the Rail to the Opener Motor
Mount the fully assembled rail to the motor unit using the supplied bracket. This part may be heavy, so a second person can help ensure proper alignment and safety.
At this stage, also screw in a light bulb if your Genie model has a built-in light.
Step 3: Install the Header Bracket Above the Garage Door
- Find the center of the garage door header.
- Attach the header bracket using lag screws into the wall stud or header beam.
- Lift the front end of the rail and connect it to the header bracket with the clevis and cotter pins.
Ensure the rail is level across its entire length from the door to the motor.
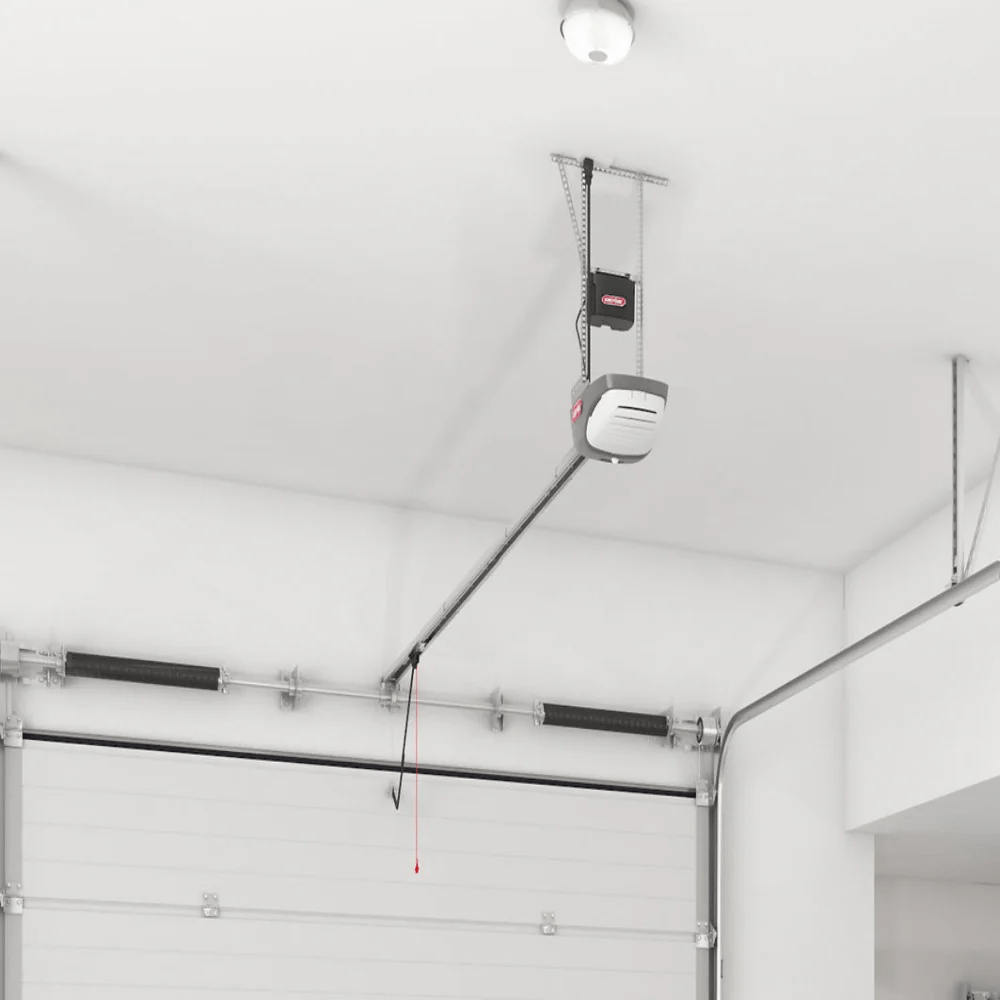
Step 4: Hang the Motor Unit from the Ceiling
Use the hanging straps or angle iron provided to secure the motor unit to ceiling joists. The unit should be level and mounted at the proper height, usually about 7 feet from the floor or as recommended in the manual.
Avoid using drywall anchors—always screw directly into wood framing or use metal support braces for stability.
Step 5: Connect the Trolley to the Door
- Close the garage door completely.
- Attach the straight and curved arms to the trolley and door bracket.
- Secure with the provided bolts and pins.
Test the manual operation by disconnecting the trolley and sliding it back and forth to ensure smooth motion.
Step 6: Install the Safety Sensors
These are a required safety feature that prevents the door from closing on people, pets, or objects.
- Mount one sensor on each side of the garage door frame, 5–6 inches above the floor.
- Ensure they are aligned perfectly—blinking lights indicate misalignment.
- Run the sensor wires along the walls and ceiling back to the opener unit, and connect them to the appropriate terminals.
Secure the wires using insulated staples or cable clips to prevent them from dangling.
Step 7: Mount and Wire the Wall Control Panel
- Choose a spot near the garage entry door for convenience.
- Mount the wall console using included screws.
- Run the low-voltage wires along the wall and ceiling to the opener motor.
- Strip the wires and insert them into the matching terminals.
Press the wall button to test that the opener responds.
Step 8: Plug in and Test the Opener
- Plug the motor unit into a nearby grounded power outlet.
- Test the opener using the wall control—observe the up/down motion.
- Adjust if necessary using the travel limit controls.
If your model includes a Genie Intellicode remote, press the Learn button on the opener motor and sync the remote.
Step 9: Adjust Travel Limits and Force Settings
Your opener must know where to stop opening and closing:
- Use the travel limit screws or buttons to set how far the door opens or closes.
- Adjust the force settings to ensure the opener reverses if it meets resistance.
To test the safety reverse, place a 2×4 or similar object under the door—it should reverse upon contact.
Step 10: Set Up Smart Features (Optional)
Many Genie chain drive openers come with Wi-Fi and smart features:
- Download the Genie Aladdin Connect app.
- Follow pairing instructions to connect the opener to your home Wi-Fi.
- Use your smartphone to open, close, and monitor your garage door remotely.
You can also integrate Genie with smart assistants like Amazon Alexa or Google Assistant.
Maintenance Tips for Genie Chain Drive Garage Door Openers
Regular maintenance extends the life and performance of your opener. Here’s what to check:
- Lubricate the chain every 6 months with a non-drip garage door lubricant.
- Tighten bolts and inspect brackets annually.
- Wipe the photo eyes clean monthly.
- Test auto-reverse safety every few months.
- Replace remote batteries when range decreases.
With proper upkeep, your Genie opener can last 10–15 years or longer.
Common Questions About Genie Chain Drive Installation
Q: How long does installation take?
A: Between 4 to 6 hours, depending on experience and garage layout.
Q: Do I need to hire a professional?
A: Not necessarily—most homeowners with basic tools and DIY skills can do it themselves.
Q: Is a chain drive better than a belt drive?
A: Chain drives are louder but more durable and affordable—ideal for detached garages.
Q: What should I do if the opener doesn’t work after installation?
A: Recheck wiring, sensor alignment, and power connections. If needed, consult Genie support or a local technician.
Final Thoughts on How To Install A Genie Chain Drive Garage Door Opener
Learning how to install a Genie chain drive garage door opener is a valuable skill that pays off in convenience, safety, and satisfaction. Whether you’re replacing an old opener or setting one up for a new home, following these instructions will help you get the job done right.
Genie’s chain drive models offer strength and reliability at an affordable price point, and with smart features available, you don’t have to sacrifice tech for durability.
Take your time, follow safety instructions, and you’ll soon enjoy the comfort of a garage door that opens and closes smoothly with the touch of a button.


Leave a Reply