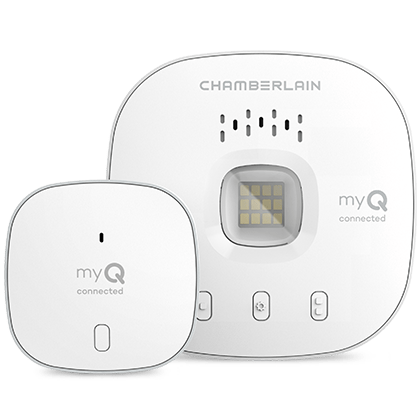
Are you ready to enhance your garage with smart technology? Dive into our detailed guide on “How To Install Myq Garage Door Opener” and enjoy the benefits of seamless control and monitoring.

How To Install Myq Garage Door Opener: A User-Friendly Guide
Transforming your garage into a smart space begins with the installation of a Myq garage door opener. Follow this step-by-step guide to seamlessly integrate the Myq system and elevate your garage experience.
Understanding Myq Garage Door Opener Components
Before diving into the installation process, familiarize yourself with the key components of the Myq garage door opener kit. This typically includes the Myq Smart Garage Hub, door sensors, mounting hardware, and a user manual.
Step 1: Preparing Your Garage Door
Ensure Compatibility
Check the compatibility of your garage door with the Myq system. Most garage doors are compatible, but it’s essential to confirm to avoid any complications during installation.
Clearing the Garage Door Area
Clear the area around your garage door, removing any obstructions or clutter. This ensures a safe and efficient installation process.
Step 2: Mounting the Myq Smart Garage Hub
Locate a Suitable Mounting Spot
Choose a location for mounting the Myq Smart Garage Hub. It’s typically installed on the ceiling near the garage door opener motor. Ensure it is within range of a power outlet and has a stable Wi-Fi connection.
Securely Mount the Hub
Use the provided mounting hardware to securely attach the Myq Smart Garage Hub. Follow the guidelines in the user manual for the recommended distance from the garage door opener motor and any other specifications.
Step 3: Installing Door Sensors
Identify Sensor Placement
Door sensors are crucial for monitoring the position of the garage door. Place one sensor on the top panel of the garage door and the other on the garage door frame.
Align and Secure Sensors
Ensure the sensors are aligned correctly to communicate with each other. Securely attach the sensors using the provided adhesive or screws, depending on your preference.
Step 4: Connecting to Wi-Fi
Power Up the Myq Smart Garage Hub
Plug in the Myq Smart Garage Hub to power it up. Follow the instructions in the user manual to connect the hub to your home Wi-Fi network using the Myq app on your smartphone.
Step 5: Syncing with the Garage Door Opener
Locate the “Learn” Button
Most garage door openers have a “Learn” button. Locate this button on your garage door opener motor.
Sync the Myq Smart Garage Hub
Press the “Learn” button on your garage door opener and follow the instructions in the Myq app to sync the Myq Smart Garage Hub with your garage door opener.
Step 6: Testing and Troubleshooting
Test Remote Control Functionality
Use the Myq app to test the remote control functionality. Open and close the garage door to ensure that the Myq system is working correctly.
Troubleshoot Any Issues
If you encounter any issues during the testing phase, consult the troubleshooting section in the user manual or visit the Myq support website for assistance.
Step 7: Additional Features and Integration
Explore Smart Home Integration
If you have a smart home ecosystem, explore integration options with platforms like Google Assistant or Amazon Alexa. This allows you to control your garage door using voice commands.
Set Up Alerts and Notifications
Take advantage of Myq’s features by setting up alerts and notifications. Receive notifications when your garage door is opened or closed, adding an extra layer of security.
Conclusion: Enjoying a Smarter Garage
With the successful installation of your Myq garage door opener, you’ve transformed your garage into a smart and connected space. Experience the convenience of remote control, monitoring, and additional features that Myq brings to your fingertips.
This user-friendly guide on “How To Install Myq Garage Door Opener” empowers you to navigate the installation process with confidence, ensuring a seamless integration of smart technology into your garage.
Read too: Genie Garage Door Opener Blue Light Flashing – Decoding the Signal: Troubleshooting the Mystery


Leave a Reply