A garage door opener is one of the most important components of your home, providing convenience, safety, and security. If you’ve installed a Chamberlain wall-mount garage door opener, you might be wondering how to program a Chamberlain Wall Mount Garage Door Opener to work seamlessly with your home. Whether you need to program your remote, the wall control panel, or integrate your smart home devices, understanding the programming process is essential for smooth operation.
In this article, we will guide you through the steps on how to program a Chamberlain Wall Mount Garage Door Opener and explain some helpful tips for troubleshooting common issues. Let’s dive in!
Read too: How To Replace Garage Door Roller Like a Pro? Step-by-Step Guide
What Is a Chamberlain Wall Mount Garage Door Opener?
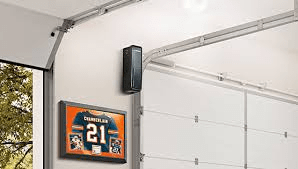
The Chamberlain Wall Mount Garage Door Opener is a space-saving, reliable system designed to be mounted on the wall beside your garage door, instead of being installed on the ceiling like traditional openers. This setup makes it an excellent choice for homes with low ceilings or limited overhead space. It uses a belt or chain drive mechanism to operate the garage door, but its compact design is ideal for tighter spaces.
One of the standout features of these openers is their advanced programming capabilities. This includes the ability to sync multiple remotes, control the door from your smartphone, and program security features like rolling codes. For the most part, programming a Chamberlain Wall Mount Garage Door Opener is easy and intuitive.
Why You Should Program Your Chamberlain Wall Mount Garage Door Opener
Programming your Chamberlain Wall Mount Garage Door Opener is essential for ensuring that it functions optimally. Proper programming allows you to:
- Control your garage door with ease: Whether you are using a remote, smartphone app, or a wall control panel, programming helps ensure you have reliable access to your garage.
- Set up multiple users: If your household includes multiple people or you need to give access to a neighbor or contractor, you can program multiple remotes to operate the same garage door.
- Secure your garage: With rolling code technology, programming your opener ensures that the code is changed every time you open or close the door, enhancing security and preventing unauthorized access.
- Integrate smart technology: Many Chamberlain openers work with home automation systems like Google Assistant or Amazon Alexa, allowing you to control your garage door remotely through voice commands.
Step-by-Step Guide on How to Program a Chamberlain Wall Mount Garage Door Opener
Programming a Chamberlain Wall Mount Garage Door Opener is a straightforward process. Below, we outline the essential steps you need to follow to get your system set up and working:
1. Prepare Your Remote or Wall Control
Before you begin programming, make sure you have your remote control or wall control panel in hand, depending on which device you need to program.
2. Locate the “Learn” Button on the Opener
The first step in programming is to find the learn button on the garage door opener unit itself. This button is typically located on the back or side of the motor unit, behind the light cover. The button is often colored, with options like green, red, or purple, depending on the model.
Pressing the learn button triggers the system to “learn” or recognize a new remote or device.
3. Press the “Learn” Button
Once you have located the learn button, press it briefly. The indicator light on the opener will begin to blink, indicating that the system is in programming mode. You have about 30 seconds to complete the next step, so be ready!
4. Program the Remote or Wall Control
- For Remote Control: Within 30 seconds of pressing the learn button, press and hold the button on your remote that you want to program. Hold the button until the light on the opener flashes or you hear two clicks. This indicates the remote is programmed successfully.
- For Wall Control: If you are programming a wall control panel, press and hold the desired button on the wall control panel. Again, you should see the light on the opener flash or hear a click to confirm the programming is successful.
5. Test the Remote
After programming, press the button on your remote or wall control to ensure it operates the garage door. The door should open or close when you press the button. If it doesn’t, you may need to repeat the process or troubleshoot the issue.
Additional Programming Features for Chamberlain Wall Mount Openers
Besides programming your remote, Chamberlain wall-mount openers come with additional features that you may want to configure. Here are a few more programming options you can explore:
1. Programming a Keypad
Many Chamberlain openers are compatible with a wireless keypad, which allows you to open the garage door with a personal access code. To program the keypad:
- Press the learn button on the opener.
- Within 30 seconds, enter your desired access code on the keypad and press enter.
- The opener should confirm that the code has been programmed.
2. Programming Multiple Remotes
If you have multiple garage door remotes for your home, you can program up to four remotes. Simply repeat the programming process for each remote, pressing the learn button for each new device.
3. Smartphone Integration
If you have a Chamberlain MyQ smart garage door opener, you can sync your opener with the MyQ app to control your door from your smartphone. To do this, you will need to follow the instructions in the app to connect the opener to your home Wi-Fi network.
Troubleshooting Tips: How to Program a Chamberlain Wall Mount Garage Door Opener
Although programming the Chamberlain Wall Mount Garage Door Opener is usually straightforward, some users may encounter issues. Below are a few common problems and their solutions:
1. The Remote Won’t Program
If your remote isn’t programming, ensure the following:
- The learn button was pressed properly and that the light indicator began flashing.
- You pressed the button on the remote within the 30-second window after pressing the learn button.
- The remote is in good working condition with a fresh battery.
2. The Garage Door Doesn’t Respond
If the remote or wall control is programmed but the door doesn’t open or close:
- Check the battery in your remote.
- Ensure the opener motor is plugged in and working.
- Verify that the garage door is not obstructed or jammed.
3. Remote Button Doesn’t Work After Programming
If the remote was programmed successfully but the button doesn’t work after a while, the battery may be low, or there could be an issue with the frequency or code synchronization. Replace the battery and try reprogramming.
How to Maintain Your Chamberlain Wall Mount Garage Door Opener
To ensure the longevity of your Chamberlain Wall Mount Garage Door Opener, regular maintenance is important. Here are some basic tips for maintaining your opener:
- Lubricate moving parts: Regularly lubricate the chain or belt and the moving parts to prevent wear and tear.
- Check the sensors: Clean the photo-eye sensors to ensure they are free of dust and dirt, which could prevent the opener from operating correctly.
- Inspect the opener: Periodically check the opener’s motor and components to ensure they are functioning correctly.
Conclusion
In conclusion, programming your Chamberlain Wall Mount Garage Door Opener is a simple process that can make your garage door more convenient and secure. Whether you’re programming a remote, wall control, or smartphone, following these steps will ensure a smooth and successful setup. By troubleshooting common issues and performing regular maintenance, you can keep your system running efficiently for years to come.

Leave a Reply