If your opener is noisy, unreliable, or simply outdated, learning how to replace a chain drive garage door opener can save you hundreds in installation costs. Many homeowners assume this job is too technical, but with proper preparation and clear steps, it’s a manageable DIY project. This guide walks you through the entire process—from removal to installation—using beginner-friendly language and practical tips.
What Is a Chain Drive Garage Door Opener?
A chain drive garage door opener uses a metal chain to pull a trolley along a rail, opening and closing the garage door.
Key characteristics:
- Strong and durable
- Ideal for heavy or oversized garage doors
- More affordable than belt-drive systems
- Slightly noisier than modern alternatives
Read too: How To Replace Garage Door Roller Like a Pro? Step-by-Step Guide
Chain drive openers are still widely used in U.S. homes because of their reliability and cost efficiency.
When Should You Replace a Chain Drive Garage Door Opener?
Knowing when replacement makes sense helps avoid unnecessary repairs.
Common signs it’s time to replace:
- Opener is 15–20 years old
- Excessive noise or vibration
- Inconsistent opening or closing
- Safety sensors malfunctioning
- Lack of modern safety features
Industry data shows most residential openers have a practical lifespan of 10–15 years under regular use.
Is It Safe to Replace a Chain Drive Opener Yourself?
Yes—if you follow safety rules carefully.
DIY replacement is safe when:
- The garage door itself is balanced and in good condition
- You are not adjusting torsion springs
- You follow manufacturer instructions
Call a professional if:
- The door is extremely heavy or unbalanced
- Torsion springs need adjustment
- Structural framing must be modified
⚠️ You are replacing the opener, not the springs. Never touch torsion springs.
Tools and Materials You’ll Need
Prepare everything before you start to keep the project smooth.
Required tools:
- Step ladder (6–8 ft)
- Socket wrench set (7/16″ & 1/2″ common)
- Adjustable wrench
- Phillips and flat-head screwdrivers
- Power drill with bits
- Measuring tape
- Level
- Safety gloves and glasses
Materials:
- New chain drive garage door opener kit
- Angle iron (if existing mounting is inadequate)
- Lag screws and bolts (often included)
Step-by-Step: How To Replace a Chain Drive Garage Door Opener
Step 1: Disconnect Power and Secure the Door
Safety always comes first.
- Unplug the existing opener
- Turn off the breaker if hardwired
- Fully close the garage door
- Pull the emergency release cord
This disconnects the door from the opener trolley.
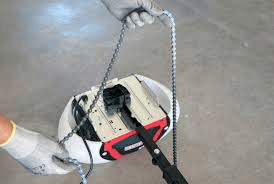
Step 2: Remove the Old Chain Drive Opener
Carefully disassemble the existing unit.
Remove components in this order:
- Rail and trolley from the door bracket
- Hanging brackets from the ceiling
- Motor unit (support it—weight is 30–50 lbs)
- Wiring for wall button and sensors
Label wires or take photos before disconnecting.
Step 3: Assemble the New Chain Drive Rail
Most new openers require partial assembly.
- Lay rail sections on the floor
- Connect sections according to instructions
- Install the chain around sprockets
- Set chain tension (snug, not tight)
Proper chain tension prevents noise and premature wear.
Step 4: Mount the New Motor Unit
Lift the motor unit into position.
- Align with existing ceiling brackets (or install new ones)
- Ensure the opener is centered above the door
- Secure with lag screws into ceiling joists
- Use a level to confirm alignment
A misaligned motor causes vibration and poor operation.
Step 5: Attach the Rail to the Door Header
The rail must connect securely to the header bracket.
- Bracket should be 2–3 inches above the door opening
- Use heavy-duty lag screws
- Ensure the rail slopes slightly upward toward the opener
This allows smooth door travel.
Step 6: Connect the Door Arm
The door arm links the trolley to the garage door.
- Attach the straight arm to the door bracket
- Connect the curved arm to the trolley
- Adjust length so the door closes fully without strain
This step ensures correct door movement.
Step 7: Install Safety Sensors
Modern openers require photo-eye sensors.
- Mount sensors 4–6 inches above the floor
- Place one on each side of the door
- Align them so indicator lights stay solid
Sensors prevent the door from closing on people or objects.
Step 8: Wire the Wall Control and Sensors
Reconnect low-voltage wiring.
- Wall button wires to opener terminals
- Sensor wires to matching terminals
- Secure wires neatly along walls and ceiling
Keep wiring away from moving parts.
Step 9: Plug In and Program the Opener
Restore power and set limits.
- Plug in the opener
- Program open and close limits
- Adjust force settings per instructions
- Test safety reversal
The door should reverse when hitting a solid object.
Chain Drive vs Belt Drive (Quick Comparison)
| Feature | Chain Drive | Belt Drive |
|---|---|---|
| Noise level | Louder | Quiet |
| Cost | Lower | Higher |
| Strength | Very high | High |
| Maintenance | Moderate | Low |
Chain drive openers are best for detached garages or heavy doors.
Common Mistakes to Avoid
- Overtightening the chain
- Mounting opener off-center
- Skipping sensor alignment
- Using drywall anchors instead of joists
- Ignoring door balance issues
Avoiding these mistakes improves longevity and safety.
How Long Does Replacement Take?
Most DIY homeowners complete replacement in:
- 4–6 hours (first-time DIY)
- 2–3 hours (experienced DIYer)
Taking your time reduces errors and rework.
Maintenance Tips for Chain Drive Openers
Extend the life of your new opener with simple care.
- Lubricate chain annually
- Tighten mounting bolts yearly
- Test safety reversal monthly
- Clean sensor lenses
Routine maintenance prevents premature failure.
Helpful Technical Insight
Garage door openers use electric motors, rails, and control systems to automate door movement. For a general explanation of how these systems work, see Wikipedia:
https://en.wikipedia.org/wiki/Garage_door_opener
FAQ: How To Replace a Chain Drive Garage Door Opener
Q1: Can I reuse my old rail with a new opener?
Usually no. Most manufacturers require their own rail system.
Q2: Do I need to replace the garage door too?
No, as long as the door is balanced and in good condition.
Q3: Is chain drive replacement harder than belt drive?
Not significantly—the steps are nearly identical.
Q4: How much money can I save doing it myself?
DIY replacement can save $300–$600 in labor costs.
Q5: Can I convert from chain drive to belt drive?
Yes, but you’ll need a full belt-drive opener kit.
Conclusion
Learning how to replace a chain drive garage door opener empowers homeowners to upgrade their garage safely, affordably, and confidently. With the right tools, careful steps, and attention to safety, this DIY project delivers long-term reliability and smoother operation.
If this guide helped you, share it on social media so other homeowners can tackle garage upgrades with confidence. 🚪🔧


Leave a Reply