If you’ve lost your garage door opener remote, it’s broken, or you simply need a spare, you might be wondering how to replace a garage door opener remote control without hiring a professional. The good news is that replacing a remote is easier than most people think, and you can often do it yourself with just a few tools and a bit of knowledge.
This comprehensive guide will walk you through the step-by-step process of identifying, purchasing, programming, and maintaining a new garage door opener remote control. We’ll also explore some helpful tips and troubleshooting techniques so you’re never stuck outside your garage again.
Read too: Mastering Quantum Garage Door Opener Programming: A Comprehensive Guide
Why You Might Need to Replace Your Garage Door Opener Remote
There are several reasons why homeowners search for how to replace a garage door opener remote control:
- Lost or stolen remote
- Damaged or broken remote (due to water, impact, etc.)
- Dead battery or circuit failure
- Upgrading to a universal or multi-button remote
- Need for an extra remote for another driver in the household
Regardless of the reason, a functioning remote is essential for the convenience and security of modern garage door systems.
Types of Garage Door Opener Remotes
Before learning how to replace a garage door opener remote control, you should understand the basic types available:
1. Manufacturer-Specific Remotes
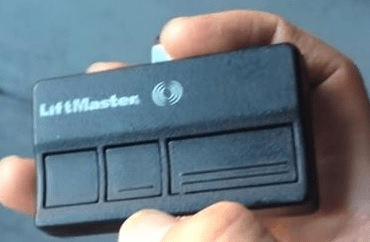
These are designed by brands like Chamberlain, LiftMaster, Genie, Craftsman, etc., and are compatible only with their own openers or specific model ranges.
2. Universal Remotes
Compatible with a wide variety of brands and models, universal remotes are ideal if you’ve lost the original and want flexibility.
3. Multi-Button Remotes
These allow you to control multiple garage doors or even gates from one device—perfect for households with more than one opener.
4. Smartphone-Controlled Systems
Some modern garage door systems allow you to use your phone as a remote through apps like MyQ, though these typically supplement—not replace—a physical remote.
How To Replace A Garage Door Opener Remote Control — Step-by-Step Instructions
Now let’s walk through how to replace a garage door opener remote control in a way that’s simple and efficient. This process includes identifying the correct remote, purchasing a replacement, and programming it to your opener.
Step 1: Identify Your Garage Door Opener Brand and Model
Check your garage door opener motor (mounted on the ceiling) for a label or sticker that lists:
- Manufacturer (e.g., Genie, Chamberlain, LiftMaster)
- Model number
- Serial number
- Year of manufacture
This information will determine whether you need a brand-specific remote or can use a universal remote.
Step 2: Determine Frequency and Compatibility
Most garage door openers use a specific radio frequency (RF) to communicate with remotes. This is often:
- 315 MHz
- 390 MHz
- 433 MHz
Older systems may use a fixed code, while newer models use rolling code technology for enhanced security. Compatibility matters, so refer to your user manual or the manufacturer’s website for exact specs.
Tip: Some remotes have color-coded “Learn” buttons. For example, LiftMaster uses purple, yellow, or red/orange buttons to denote rolling code types.
Step 3: Purchase the Correct Replacement Remote
You have two main choices:
A. OEM (Original Equipment Manufacturer) Remote
- Order from the manufacturer’s website or hardware stores.
- Matches your opener exactly.
B. Universal Garage Door Remote
- Available at home improvement stores, online retailers, and some auto shops.
- Can be programmed for multiple brands.
When buying, confirm:
- Compatible frequency
- Rolling code or fixed code match
- Number of buttons needed
Step 4: Program the New Remote
Here’s the heart of how to replace a garage door opener remote control—the programming process.
A. For Most Openers With a “Learn” Button:
- Locate the “Learn” button on the opener unit (often near the light or antenna wire).
- Press and release the “Learn” button. A small LED light will illuminate.
- Within 30 seconds, press the button on your new remote that you want to program.
- Hold it for a few seconds until the opener light flashes or you hear a click.
Success! Your remote is now linked to your garage door.
B. For Older Systems Without a “Learn” Button:
- Dip switch remotes use small toggles that need to match those on the opener unit.
- Open both the opener cover and the remote, and manually match the switch positions.
Step 5: Test the Remote
Stand within range (20–50 feet) and press the programmed button to see if your garage door responds. If not:
- Double-check programming steps
- Replace the remote battery
- Reset the opener and try again
Optional: Erase All Previous Remotes (For Lost/Stolen Remotes)
If your old remote was stolen or lost, it’s wise to clear the memory of your opener to prevent unauthorized access.
How to Erase All Codes:
- Press and hold the “Learn” button on your opener until the LED light turns off (usually 6–10 seconds).
- All remotes are now disconnected.
- Reprogram the new remote(s) using the steps above.
Tips for Choosing the Right Replacement Remote
- Read online reviews for reliability and ease of programming.
- Stick with the same brand if unsure about compatibility.
- Opt for a multi-button remote if you control multiple doors or gates.
- Consider remotes with visor clips for easy car installation.
Troubleshooting Replacement Remote Issues
If you follow all steps but your remote still doesn’t work, consider these issues:
1. Dead or Weak Batteries
Replace with a fresh CR2032, A23, or similar (check your model’s requirements).
2. Interference
Nearby Wi-Fi routers, LED lights, or metal obstructions can block signals.
3. Wrong Remote Model
Verify compatibility before purchasing.
4. Outdated Opener Unit
Some older openers may not support modern remotes. An opener upgrade may be needed.
Maintaining Your New Remote
Once you’ve figured out how to replace a garage door opener remote control, keeping it in good shape ensures longevity:
- Store it in a dry place
- Avoid drops or crushing pressure (especially in car consoles)
- Replace the battery annually
- Wipe clean with a dry cloth regularly
When to Consider Replacing the Entire Garage Door Opener
Sometimes a non-responsive remote may be a sign of a failing opener. Consider a full replacement if:
- The opener is over 15–20 years old
- It uses outdated fixed codes (less secure)
- It doesn’t support universal remotes
- Repair parts are unavailable
Modern openers offer Wi-Fi features, battery backups, and greater compatibility with smart home systems.
Summary: How To Replace A Garage Door Opener Remote Control the Right Way
Replacing a garage door opener remote is one of the easiest DIY home maintenance tasks when done correctly. By following this guide, you can:
- Identify your opener’s brand, model, and compatibility
- Choose the right remote (OEM or universal)
- Program it easily using the Learn button or dip switches
- Troubleshoot and test the remote
- Maintain or secure your opener system
With your new remote in hand, you’ll regain convenience, security, and peace of mind.


Leave a Reply