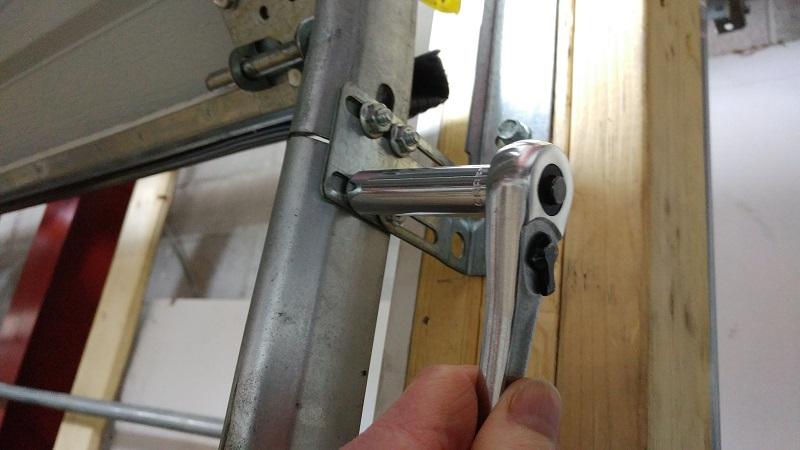
Maintaining a functional garage door is essential for the smooth operation of your daily routines. Among the various components of a garage door, the rollers play a vital role. Over time, rollers can wear out or become damaged, resulting in noisy operation, difficulty in opening or closing the door, and increased strain on the garage door opener. The good news is that replacing garage door rollers is a cost-effective DIY project that can save you money on professional repairs. In this step-by-step guide, we’ll walk you through the process of replacing rollers on your garage door, ensuring smooth sailing for years to come.

I. Understanding Garage Door Rollers
Before diving into the roller replacement process, let’s familiarize ourselves with the importance of garage door rollers. Garage door rollers are small wheels that allow the door to move up and down along the tracks smoothly. They bear the weight of the door and help distribute the load evenly, reducing stress on other parts of the system. There are different types of rollers available, including nylon, steel, and ball-bearing rollers.
Nylon rollers are commonly used due to their durability, quiet operation, and resistance to rust. Steel rollers, on the other hand, are more economical and offer sufficient strength for standard residential doors. Ball-bearing rollers provide the smoothest operation, with built-in bearings that reduce friction. However, they are generally more expensive.
Rollers, regardless of the type, have a limited lifespan and may need replacement over time. Signs indicating the need for replacement include excessive noise, uneven movement, or visible wear and tear. Don’t worry; replacing rollers is a relatively straightforward process that can be accomplished with a few simple tools.
II. Preparing for Roller Replacement
Before embarking on the roller replacement journey, it’s crucial to prioritize safety. Begin by disconnecting the power to the garage door opener to avoid accidental activation during the process. Next, ensure the garage door is secured in the fully open position using clamps or locking mechanisms. This step will prevent the door from unexpectedly closing while you’re working on it.
Now that you’ve taken the necessary safety precautions, let’s gather the tools and materials required for the roller replacement:
- Adjustable wrench
- Screwdriver
- Pliers
- New rollers (compatible with your garage door)
- Lubricant (specifically designed for garage door use)
If possible, consider enlisting the help of a friend or family member. Having an extra set of hands not only makes the process safer but also more convenient.
III. Step-by-Step Roller Replacement Guide
Step 1: Release Tension and Remove Old Rollers
Safety should always be the priority when working with garage door components. To begin, release tension from the garage door springs following the manufacturer’s instructions. This step is crucial to prevent accidents and potential injuries.
Next, locate the bottom roller bracket attached to the bottom corner of the garage door. Use an adjustable wrench or pliers to remove the bolts securing the bracket. Once the bracket is free, carefully detach the old roller from it. Take note of how the roller is positioned before removing it to ensure proper installation of the new one.
Step 2: Installing the New Rollers
Before installing the new rollers, apply a generous amount of lubricant to each roller’s bearings. This lubrication will enhance their performance and reduce noise during operation.
Position the new roller into the roller bracket, ensuring it aligns with the track properly. The roller stem should be inserted into the track, allowing the roller to move freely. Repeat this process for each roller, one at a time, working your way up from the bottom of the door to the top.
Step 3: Reattach the Bottom Roller Bracket
With all the new rollers installed, it’s time to reattach the bottom roller bracket. Align the bracket with the corresponding holes on the garage door and secure it tightly using the bolts or screws previously removed. If the bracket had any cables or tension systems attached, reconnect them as well.
Before proceeding to the next roller, double-check the stability of the bottom roller bracket. Make sure it is firmly in place, providing adequate support for the roller and the entire door.
Step 4: Repeat the Process for Remaining Rollers
Continue following Steps 1-3 for the remaining rollers on your garage door. Take your time and pay attention to detail. Inspect the condition of each roller as you go, and replace any additional worn-out rollers you encounter. By the end of this step, all the old rollers should be replaced, and the new ones should be securely in place.
IV. Testing and Final Adjustments
Now that you’ve successfully replaced all the rollers on your garage door, it’s time to test its functionality. Carefully remove any clamps or locking mechanisms that were holding the door in the open position.
Operate the garage door a few times to ensure smooth and quiet movement. Pay attention to any unusual noises or jerky motions. If you notice any issues, double-check the installation of the rollers and make necessary adjustments.
Additionally, inspect the overall balance of the garage door. It should open and close smoothly without any excessive force. If you encounter difficulties or the door still exhibits problems after adjustments, consider seeking professional assistance to ensure the door is in optimal condition.
Conclusion
Congratulations! By following this step-by-step guide, you have successfully replaced the rollers on your garage door. Regular maintenance and addressing issues promptly will help prolong the life of your garage door, ensuring its reliable performance for years to come. Remember to prioritize safety during the process and seek professional help if needed. Now, enjoy the smooth sailing of your garage door and the peace of mind that comes with a properly functioning home essential.


Leave a Reply