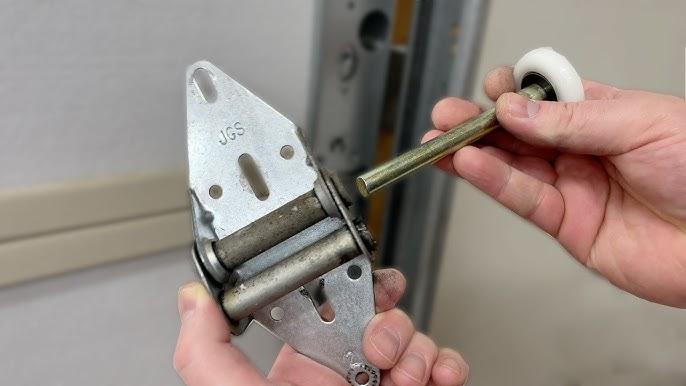
Garage doors are essential components of our homes, providing security and convenience. Over time, the rollers on a garage door can wear out, affecting the smooth operation of the door. If you’re experiencing issues with your garage door rollers, you might be wondering, “How to replace the rollers on a garage door?” In this comprehensive guide, we’ll walk you through the process, offering valuable insights and tips to enhance the performance of your garage door.

Understanding the Importance of Garage Door Rollers
Before delving into the replacement process, it’s crucial to understand the role of garage door rollers. Rollers are the small wheels attached to the sides of the garage door that allow it to move smoothly along the tracks. When these rollers become worn or damaged, they can impede the door’s operation, causing it to become noisy or, in some cases, fail to move altogether.
Read to: How To Change Battery In Liftmaster Garage Door Opener
How To Replace the Rollers on a Garage Door: A Step-by-Step Guide
1. Gather the Necessary Tools and Materials
Before starting the replacement process, ensure you have the right tools and materials. This may include a wrench, pliers, new rollers compatible with your door, and a sturdy ladder.
2. Safety First
Disconnect the power to the garage door opener to ensure it won’t accidentally activate during the replacement process. Additionally, use caution and wear safety gear, including gloves and safety glasses.
3. Identify the Type of Rollers
Garage doors typically use one of two types of rollers: nylon or steel. Identify the type of rollers your door has, as this will determine the replacement process.
4. Secure the Garage Door
Use a clamp or locking pliers to secure the garage door in place, preventing it from accidentally falling while you work.
5. Remove the Old Rollers
Locate the roller bracket and use a wrench to loosen the bolts securing it. Once loosened, slide the old roller out of the bracket. Repeat this process for each roller.
6. Install the New Rollers
Slide the new rollers into the brackets, ensuring they are properly aligned. Tighten the bolts to secure the new rollers in place. If you’re replacing all the rollers, repeat this step for each one.
7. Lubricate the Rollers
Apply a lubricant specifically designed for garage door rollers to ensure smooth operation. Proper lubrication reduces friction, extending the lifespan of the rollers and improving overall performance.
8. Test the Garage Door
Once the new rollers are in place and lubricated, test the garage door to ensure it moves smoothly along the tracks. Listen for any unusual sounds and observe the door’s movement to identify any potential issues.
Benefits of Replacing Garage Door Rollers
Replacing the rollers on your garage door offers several benefits, including:
1. Improved Operation
New rollers contribute to smoother door movement, reducing noise and ensuring a quieter operation.
2. Enhanced Safety
Well-functioning rollers contribute to the overall safety of your garage door, preventing unexpected malfunctions.
3. Extended Lifespan
Regular maintenance, including roller replacement, can extend the lifespan of your garage door, saving you money on potential major repairs or replacements.
When To Seek Professional Help
While replacing garage door rollers is a manageable DIY task, certain situations may warrant professional assistance. If you encounter challenges or if your garage door exhibits complex issues beyond roller replacement, consulting a professional is recommended to ensure proper diagnosis and resolution.
Conclusion
In conclusion, learning how to replace the rollers on a garage door is a valuable skill for any homeowner. Regular maintenance, including roller replacement, can enhance the overall performance and lifespan of your garage door. By following the step-by-step guide provided, you can tackle this task with confidence and enjoy the benefits of a smoothly operating garage door. Remember, safety should always be a priority, and if in doubt, seek professional assistance for a thorough inspection and maintenance of your garage door system.


Leave a Reply