A malfunctioning garage door opener can be a real inconvenience. If you own a Liftmaster garage door opener and find yourself in this situation, you’re probably wondering, “How to reset a Liftmaster garage door opener?” In this article, we’ll walk you through the process step by step, so you can quickly resolve the issue and get your garage door back in working order.
Understanding Liftmaster Garage Door Openers
Liftmaster is a well-known brand that produces a wide range of garage door openers known for their reliability and durability. However, like any electronic device, they may encounter problems, including issues related to the remote control or the garage door’s operation.
Common Reasons for Resetting a Liftmaster Garage Door Opener
Before we delve into the reset process, let’s identify some common reasons why you might need to reset your Liftmaster garage door opener:
- Remote Control Issues: If your remote control isn’t working correctly, resetting the opener can often solve the problem.
- Programming Errors: Sometimes, programming errors or glitches can affect the operation of your garage door opener.
- Security Concerns: In situations where you’ve lost a remote control or there’s a security breach, you might need to reset the opener to clear all existing codes.
Step-by-Step Guide to Resetting Your Liftmaster Garage Door Opener
Follow these steps to reset your Liftmaster garage door opener:
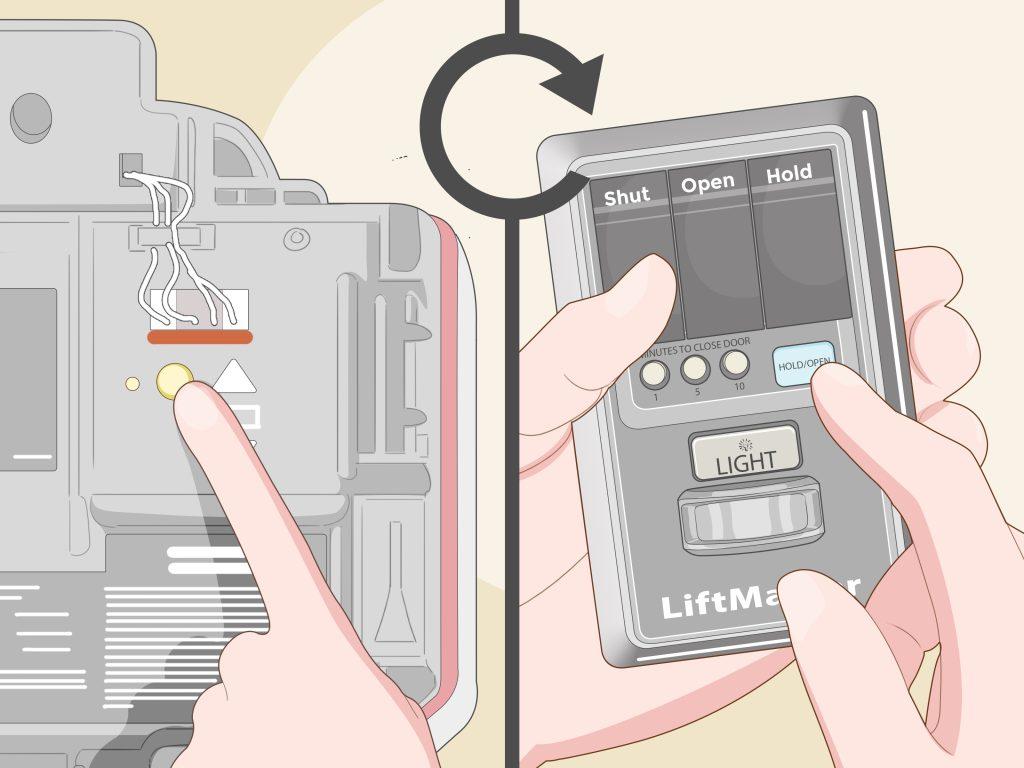
Locate the “Learn” Button
- Look for the “Learn” button on your garage door opener. It is typically located on the back or side of the opener unit. Press and release this button.
Press and Release the “Learn” Button
- Within 30 seconds of pressing the “Learn” button, you need to press and release it again. The indicator light on the opener should light up.
Program the Remote Control
- With the indicator light on, press and hold the button on the remote control that you want to program. Hold it down until the indicator light blinks.
Test the Remote Control
- Test the remote control to ensure it’s functioning correctly. If it works, the programming was successful.
Erasing All Codes
- If you need to erase all codes due to a security concern or to start fresh, locate the “Learn” button again. This time, press and hold it for about 10 seconds until the indicator light goes out. Release the button.
Re-program Remotes
- After erasing all codes, follow steps 3 and 4 to re-program your remote controls.
Additional Tips and Troubleshooting:
- Make sure to change the batteries in your remote control before attempting a reset. Weak or dead batteries can cause communication issues.
- If you’re still experiencing problems after resetting the opener, consult the user manual or Liftmaster’s customer support for further guidance.
Conclusion: Quick and Simple Reset Process
Resetting your Liftmaster garage door opener doesn’t need to be a complicated task. With the step-by-step guide provided, you can resolve common issues and have your garage door functioning smoothly in no time. Remember to refer to your specific model’s user manual for any model-specific instructions or troubleshooting.


Leave a Reply