How to Rewind a Garage Door Spring? Garage door springs play a crucial role in the smooth operation of your garage door, providing the necessary tension to lift and lower the door. However, over time, these springs may lose tension or become worn out, requiring adjustment or replacement. In this comprehensive guide, we’ll walk you through the process of rewinding a garage door spring safely and effectively, ensuring optimal performance for your garage door.

Understanding Garage Door Springs
Before we delve into the process of rewinding a garage door spring, let’s take a moment to understand the different types of garage door springs commonly used.
1. Torsion Springs:
- Torsion springs are mounted above the garage door and are wound tightly to store mechanical energy. When the door is opened, the springs unwind, lifting the door, and when the door is closed, they rewind, lowering the door.
2. Extension Springs:
- Extension springs are typically installed on either side of the garage door and stretch and contract to facilitate door movement. They work in conjunction with cables and pulleys to lift and lower the door.
Both types of springs are under significant tension and require careful handling to avoid injury or damage.
How to Rewind a Garage Door Spring: Step-by-Step Guide
Now that we have a basic understanding of garage door springs, let’s dive into the process of rewinding them. Please note that this process can be dangerous and should only be attempted by individuals with the necessary knowledge and experience. If you’re unsure about how to proceed, it’s best to seek professional assistance.
1. Gather Your Tools and Safety Equipment:
- Before you begin, make sure you have the following tools and safety equipment:
- Safety goggles
- Leather gloves
- Winding bars
- Adjustable wrench
- Vice grips
- Ladder (if necessary)
2. Disconnect the Garage Door Opener:
- Before working on the springs, disconnect the garage door opener to prevent any accidental activation.
3. Release the Tension from the Spring:
- Using winding bars, carefully unwind the tension from the garage door spring by inserting the bars into the winding cone and turning them in the direction opposite to the spring’s wind.
4. Remove the Spring from the Door:
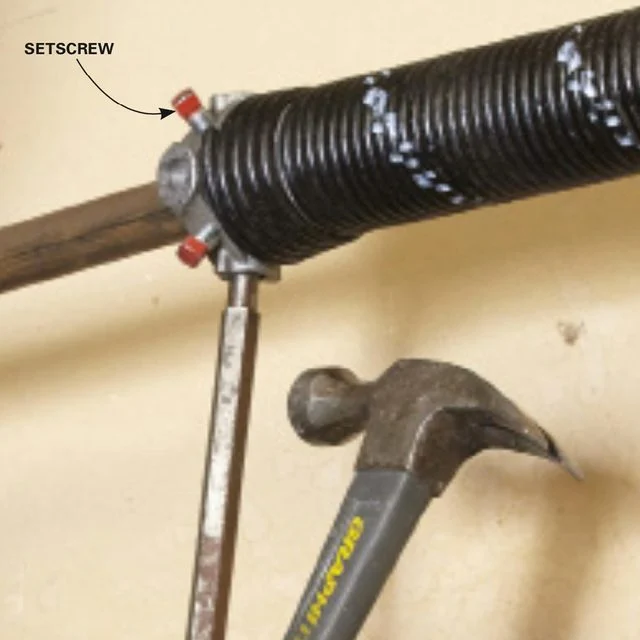
- Once the tension is released, use an adjustable wrench to loosen the set screws on the spring cones. Then, carefully remove the spring from the garage door.
5. Measure and Rewind the Spring:
- Measure the length and diameter of the existing spring to determine the number of turns required for rewinding. Use winding bars to gradually rewind the spring, ensuring that each turn is made evenly and with the appropriate amount of tension.
6. Reinstall the Spring:
- Once the spring is rewound to the correct specifications, carefully reinstall it on the garage door, making sure it is securely fastened in place.
7. Test the Door:
- After the spring is reinstalled, manually lift and lower the garage door to ensure that it operates smoothly and without any issues.
8. Reconnect the Garage Door Opener:
- Once you’ve confirmed that the door is functioning correctly, reconnect the garage door opener and test it to ensure proper operation.
Read too: No Power to Genie Garage Door Opener – Resolving the Issue with Ease: Troubleshooting Guide
Conclusion:
Rewinding a garage door spring is a task that requires precision, caution, and attention to detail. By following the steps outlined in this guide and taking the necessary safety precautions, you can successfully rewind your garage door spring and restore optimal functionality to your garage door.
However, if you’re unsure about performing this task yourself or if you encounter any difficulties along the way, it’s always best to seek the assistance of a qualified professional. Your safety should always be the top priority when working on garage door springs or any other components of your garage door system.


Leave a Reply