Garage door springs play a crucial role in the smooth operation of your garage door, counterbalancing its weight and enabling effortless opening and closing. However, over time, these springs may lose tension or become worn, requiring adjustment or replacement. One essential maintenance task every homeowner should know is how to rewind a garage door spring. In this comprehensive guide, we’ll walk you through the step-by-step process, empowering you to tackle this task with confidence and safety.
Understanding Garage Door Springs
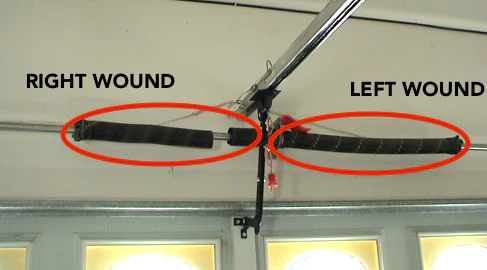
Before diving into the rewinding process, it’s essential to understand the two main types of garage door springs: torsion springs and extension springs.
- Torsion Springs: Typically mounted above the garage door, torsion springs use torque to lift and lower the door. They are wound tightly to store energy when the door is closed and release it when the door is opened.
- Extension Springs: Found on either side of the door tracks, extension springs stretch and contract to assist in opening and closing the garage door. They are often visible when the door is in the closed position.
Safety Precautions
Working with garage door springs can be dangerous, as they are under high tension and can cause injury if mishandled. Before attempting to rewind a garage door spring, be sure to take the following safety precautions:
- Wear safety goggles and gloves to protect yourself from potential injury.
- Disconnect the power to the garage door opener to prevent accidental activation.
- Use sturdy ladders and stable footing to reach the springs safely.
- If unsure or uncomfortable with the process, consider hiring a professional garage door technician.
Read too: No Power to Genie Garage Door Opener – Resolving the Issue with Ease: Troubleshooting Guide
How to Rewind a Torsion Spring
Step 1: Gather Tools and Materials
Before beginning the rewinding process, gather the necessary tools and materials, including winding bars, vice grips, and a tape measure.
Step 2: Release Tension
Using winding bars, release the tension on the existing torsion spring by inserting the bars into the winding cones and turning them slowly in the opposite direction of the spring’s wind.
Step 3: Measure and Remove
Measure the length and diameter of the existing torsion spring to ensure you purchase a replacement of the correct size. Once measured, carefully remove the old spring from the torsion tube.
Step 4: Install New Spring
Slide the new torsion spring onto the torsion tube, ensuring it is centered and aligned properly. Use vice grips to secure the spring in place temporarily.
Step 5: Wind the Spring
Using winding bars, slowly wind the new torsion spring by inserting the bars into the winding cones and turning them in the appropriate direction, following the manufacturer’s recommendations for the number of turns based on the weight of the garage door.
Step 6: Test and Adjust
After winding the spring, test the garage door’s operation to ensure it opens and closes smoothly. Make any necessary adjustments to the spring tension to achieve the desired balance.
Conclusion
Learning how to rewind a garage door spring is a valuable skill for any homeowner, allowing you to maintain the functionality and safety of your garage door. By following the step-by-step process outlined in this guide and taking appropriate safety precautions, you can tackle this task confidently and effectively. Remember, if you’re unsure or uncomfortable with the process, it’s always best to seek professional assistance to ensure the job is done safely and correctly.


Leave a Reply