A garage door rough opening often looks unfinished, uneven, or vulnerable to water if it isn’t trimmed properly. Many homeowners struggle with gaps, poor alignment, or trim that rots too quickly. In this guide, you’ll learn How To Trim Out A Garage Door Rough Opening step by step, using proven methods that improve durability, weather protection, and curb appeal.
What Is a Garage Door Rough Opening?
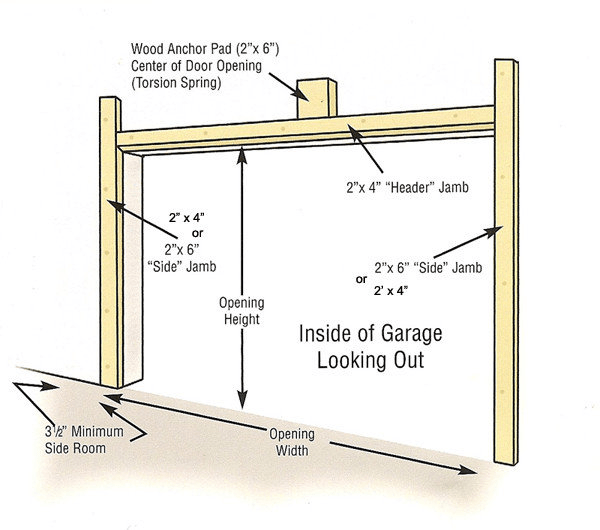
A rough opening is the framed opening in the wall where the garage door system is installed. It includes:
- King studs
- Jack studs
- Header
- Exposed sheathing or house wrap
According to building standards summarized on Wikipedia, a rough opening is intentionally built slightly larger than the finished component to allow for adjustments and structural movement.
Source: https://en.wikipedia.org/wiki/Rough_opening
Read too: Door and Garage Door Companies: Choosing the Right Partner for Your Needs
Without proper trim, this area is exposed to:
- Water intrusion
- UV damage
- Insect entry
- Premature framing rot
Why Trimming a Garage Door Rough Opening Is Important
Trimming isn’t just decorative—it’s functional.
Key benefits:
- Seals gaps between siding and door frame
- Directs water away from framing
- Improves energy efficiency
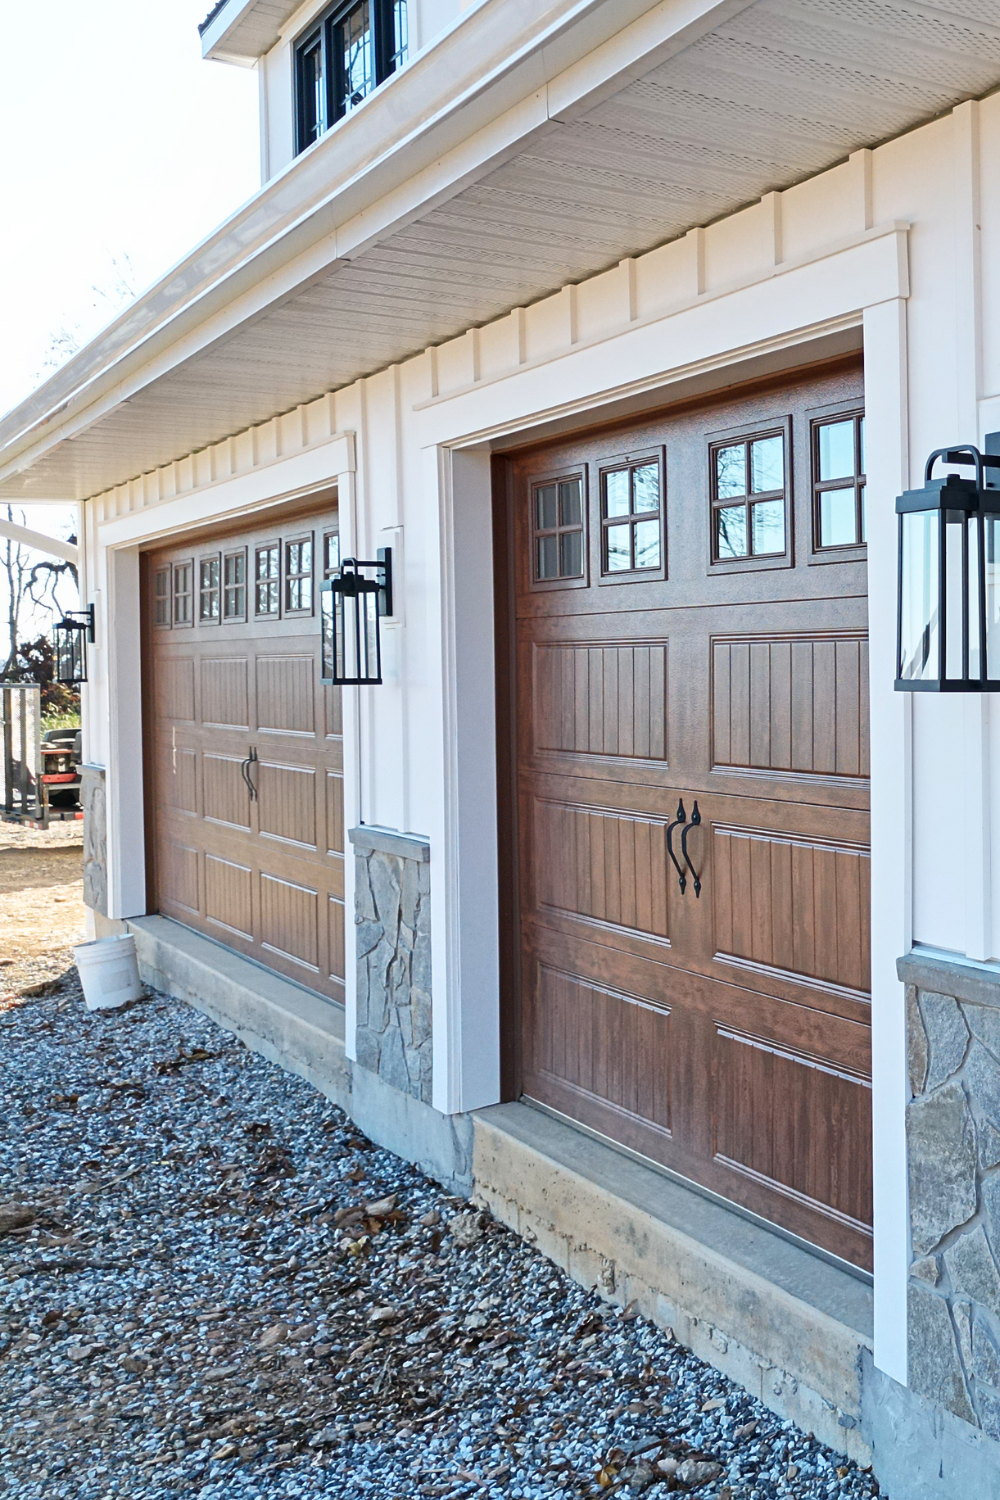
- Boosts curb appeal and resale value
Industry remodeling data shows exterior trim upgrades can improve perceived home value by 5–8%, especially on street-facing features like garage doors.
What Materials Are Best for Garage Door Trim?
Common Trim Material Options
| Material | Durability | Maintenance | Best Use |
|---|---|---|---|
| PVC trim | Very high | Low | Most climates |
| Primed pine | Medium | Medium | Budget projects |
| Cedar | High | Medium | Traditional homes |
| Fiber cement | Very high | Low | Modern exteriors |
Pro recommendation:
PVC trim boards are the most popular choice today because they don’t rot, resist insects, and hold paint extremely well.
What Size Trim Should You Use Around a Garage Door?
Most professionals use:
- 3½″ to 5½″ wide trim boards
- Thickness: ¾″ (standard)
Wider trim works best for:
- Large garage doors
- Modern or craftsman homes
Narrow trim suits:
- Minimalist designs
- Smaller single-car garages
Tools and Supplies You’ll Need
Before starting, gather everything to avoid delays.
Tools:
- Miter saw
- Level (at least 4 ft)
- Caulking gun
- Tape measure
- Finish nailer or exterior screws
Materials:
- Exterior trim boards
- Exterior-grade fasteners
- Paintable exterior caulk
- Exterior primer & paint
How To Trim Out A Garage Door Rough Opening (Step-by-Step)
Step 1: Measure the Opening Accurately
Measure:
- Full height from slab to header
- Full width from left to right framing
Important:
Measure in at least 3 spots vertically and horizontally to account for framing irregularities.
Step 2: Install the Side Trim First
- Cut both vertical trim boards to equal length
- Dry-fit before fastening
- Keep trim ⅛″–¼″ away from the garage door frame to allow movement
- Fasten every 12–16 inches
Use a level to ensure both sides are perfectly plumb.
Step 3: Install the Top Trim (Header Casing)

You have two common options:
- Square-cut joints (simpler, modern)
- 45° miter joints (traditional look)
Steps:
- Cut top trim to width
- Ensure slight slope outward (about 2–3 mm) for water shedding
- Secure into header framing
Step 4: Seal All Joints Properly
Apply exterior-grade caulk to:
- Trim-to-siding joints
- Trim-to-sheathing gaps
- Miter or butt joints
Tip:
Use a caulk rated for ±25% movement to prevent cracking.
Step 5: Prime and Paint for Longevity
- Prime all raw cuts
- Apply 2 coats of exterior paint
- Ideal temperature: 50–85°F (10–30°C)
- Dry time between coats: 4–6 hours
This step can double the lifespan of your trim.
Brickmold vs Flat Trim: Which Is Better?
| Feature | Brickmold | Flat Trim |
|---|---|---|
| Style | Traditional | Modern |
| Water protection | Good | Excellent (with flashing) |
| Installation | Easy | Easy |
| Visual weight | Medium | Customizable |
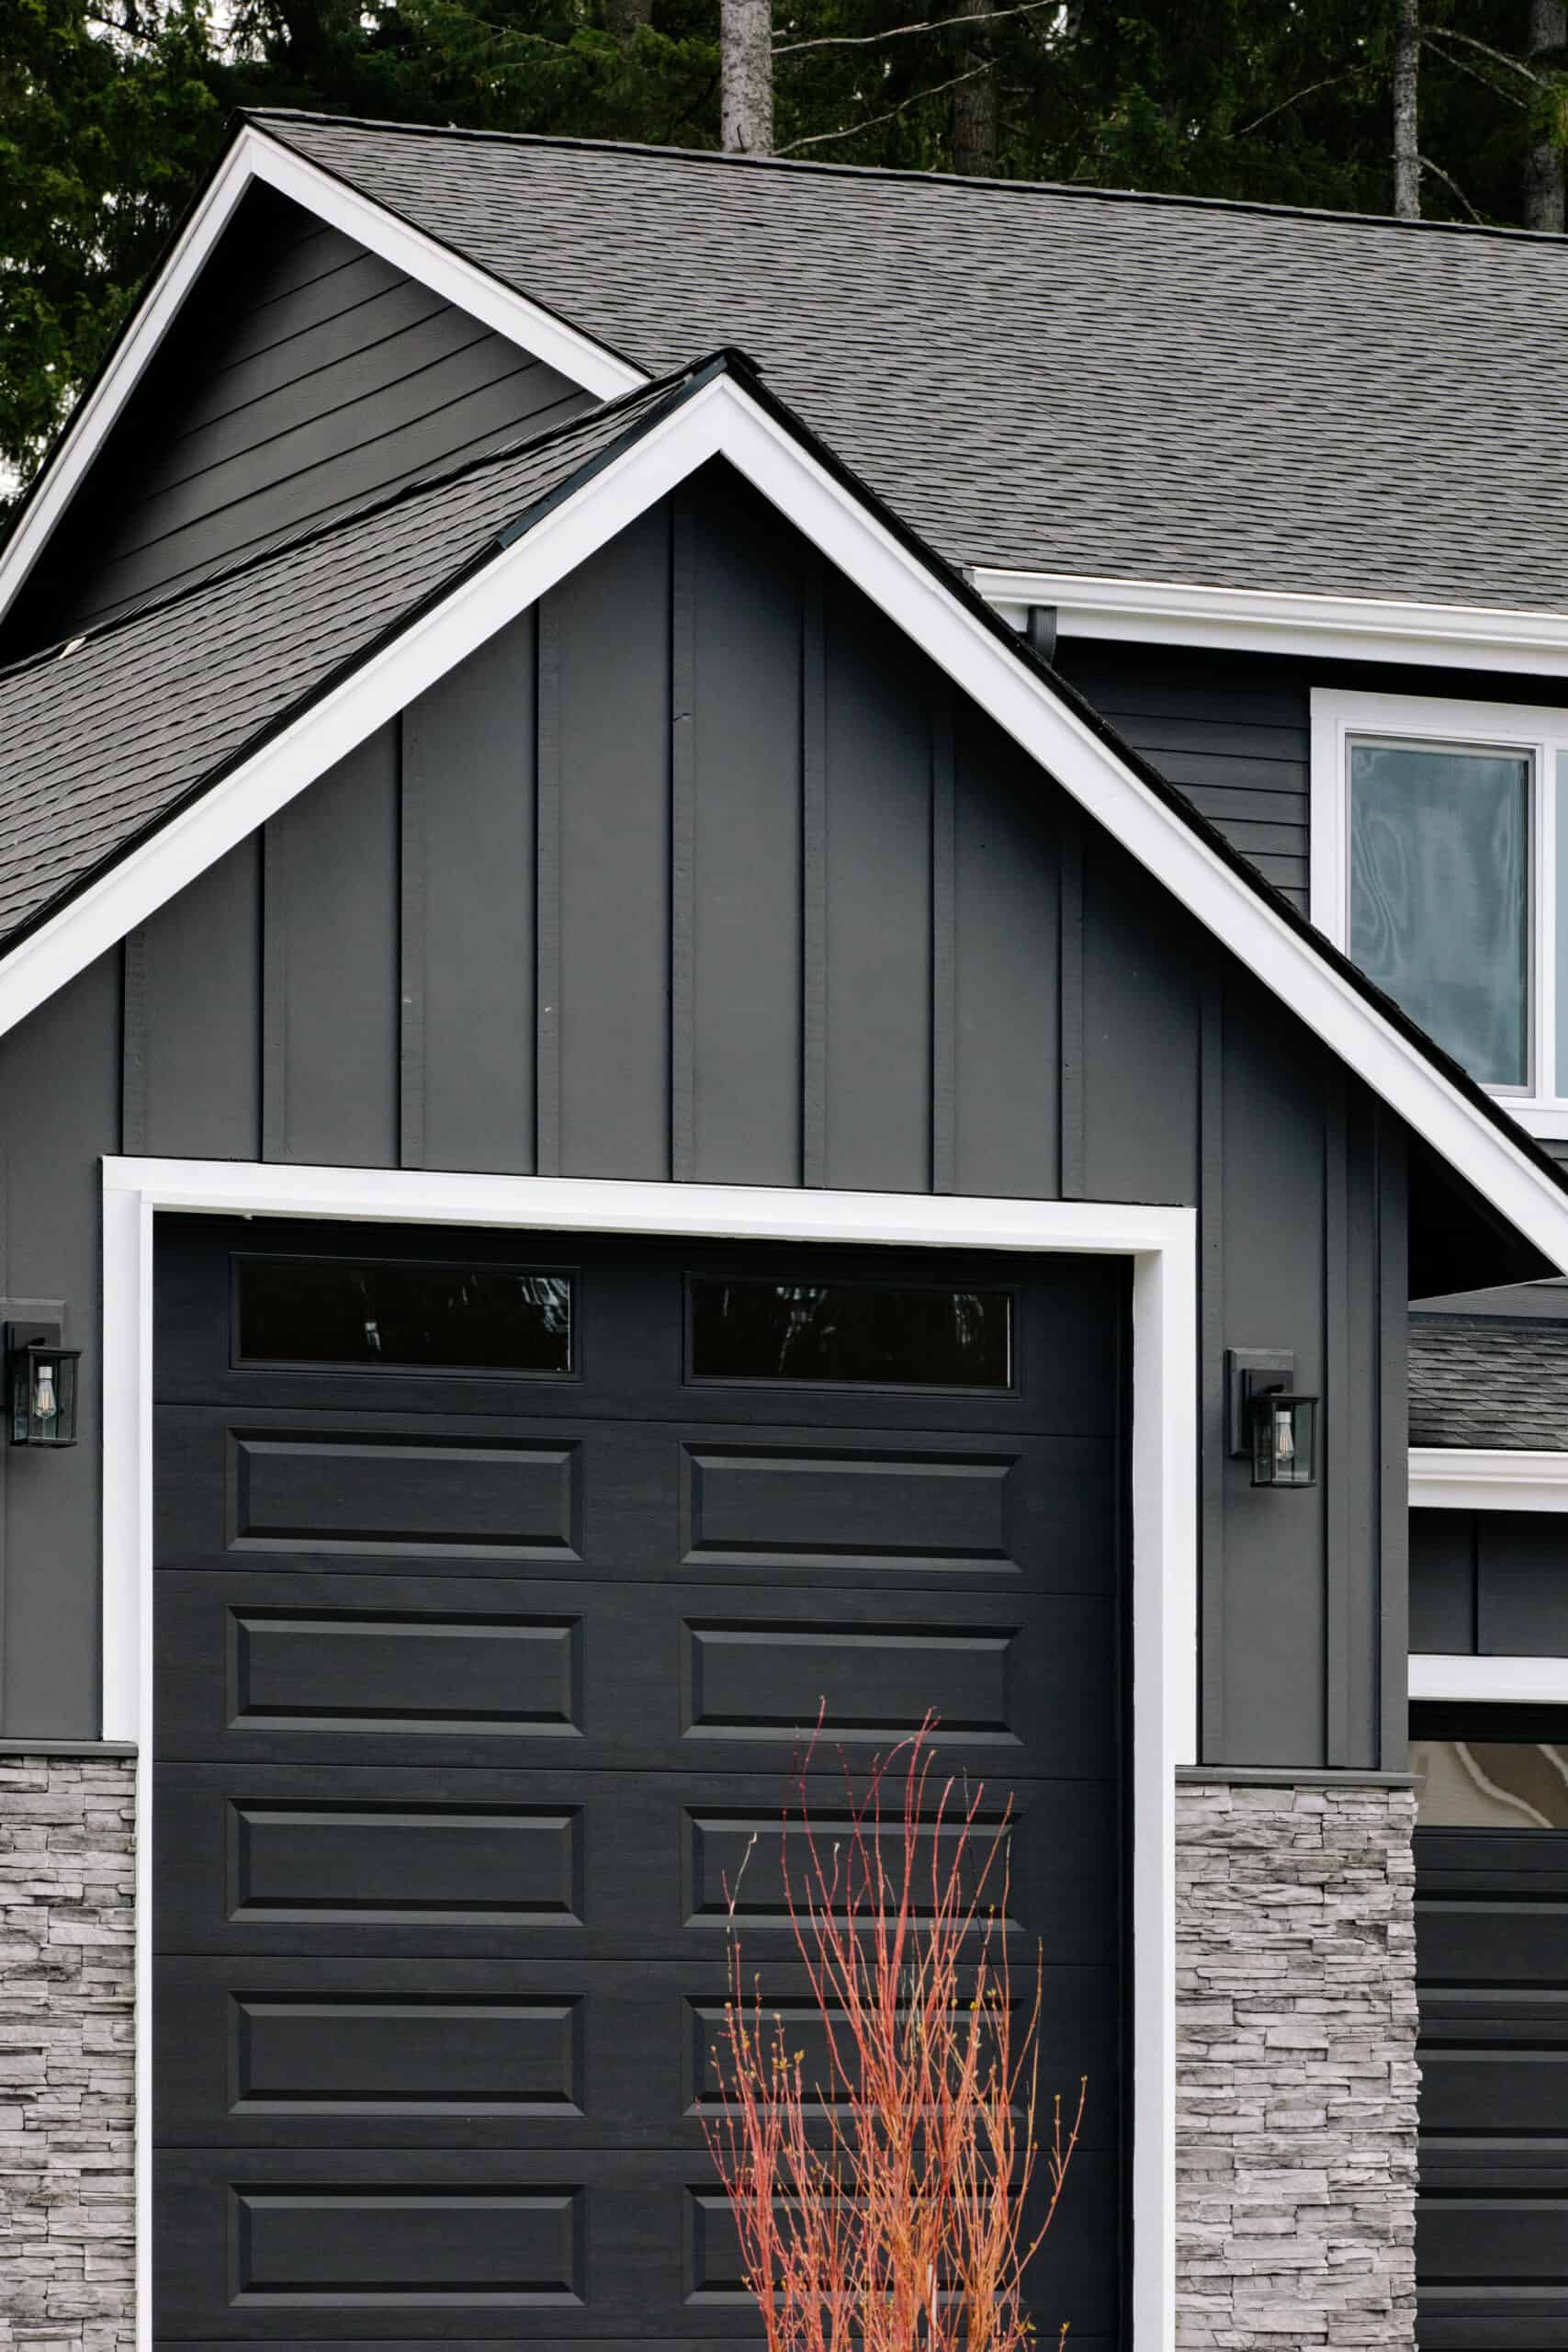
Flat trim is more versatile and pairs well with modern siding styles.
Common Mistakes to Avoid
Avoid these frequent errors:
- Skipping caulk behind trim
- Nailing only into sheathing (not framing)
- Using interior-grade materials
- Forgetting to prime cut ends
These mistakes are responsible for most premature trim failures within 3–5 years.
How Long Does Garage Door Trim Last?
Approximate lifespan:
- PVC trim: 20–30 years
- Fiber cement: 25+ years
- Wood trim: 10–15 years (with maintenance)
Annual inspection and touch-up painting can extend life significantly.
When Should You Replace Garage Door Trim?
Replace trim if you notice:
- Soft or spongy wood
- Peeling paint exposing bare material
- Visible mold or mildew
- Gaps wider than ¼″
FAQ – How To Trim Out A Garage Door Rough Opening
Q1: Do I need flashing behind garage door trim?
A: Yes. Flashing or properly lapped house wrap behind trim is essential to prevent water intrusion.
Q2: Can I trim a garage door before siding is installed?
A: Ideally no. Trim should be installed after siding or integrated with it for proper water management.
Q3: Should trim touch the concrete slab?
A: No. Leave at least ½″ clearance above concrete to prevent moisture wicking.
Q4: Is PVC trim better than wood?
A: In most climates, yes. PVC resists rot, insects, and moisture far better than wood.
Q5: How wide should garage door trim be?
A: Typically 3½″–5½″, depending on door size and architectural style.
Conclusion
Learning How To Trim Out A Garage Door Rough Opening correctly protects your home from moisture, improves energy efficiency, and gives your garage a clean, professional finish. With the right materials, accurate measurements, and proper sealing, this is a project most homeowners can complete confidently.
If this guide helped you, share it on social media so others can avoid common garage trim mistakes and get long-lasting results.


Leave a Reply