How to Easily Perform Liftmaster Garage Door Change Code? Learn the step-by-step process for enhancing your home security by changing the code on your Liftmaster garage door opener.
Introduction
Your garage door opener code is a crucial aspect of your home security, providing access to your garage and, potentially, your home. Changing the code periodically is a simple yet effective way to enhance security and safeguard against unauthorized access. In this comprehensive guide, we’ll walk you through the process of changing the code on your Liftmaster garage door opener, ensuring that your home remains safe and secure.
Understanding Liftmaster Garage Door Openers
Before we delve into the code-changing process, let’s take a moment to familiarize ourselves with Liftmaster garage door openers:
- Security Features: Liftmaster openers are equipped with advanced security features, including rolling code technology, which generates a new code each time the remote control is used.
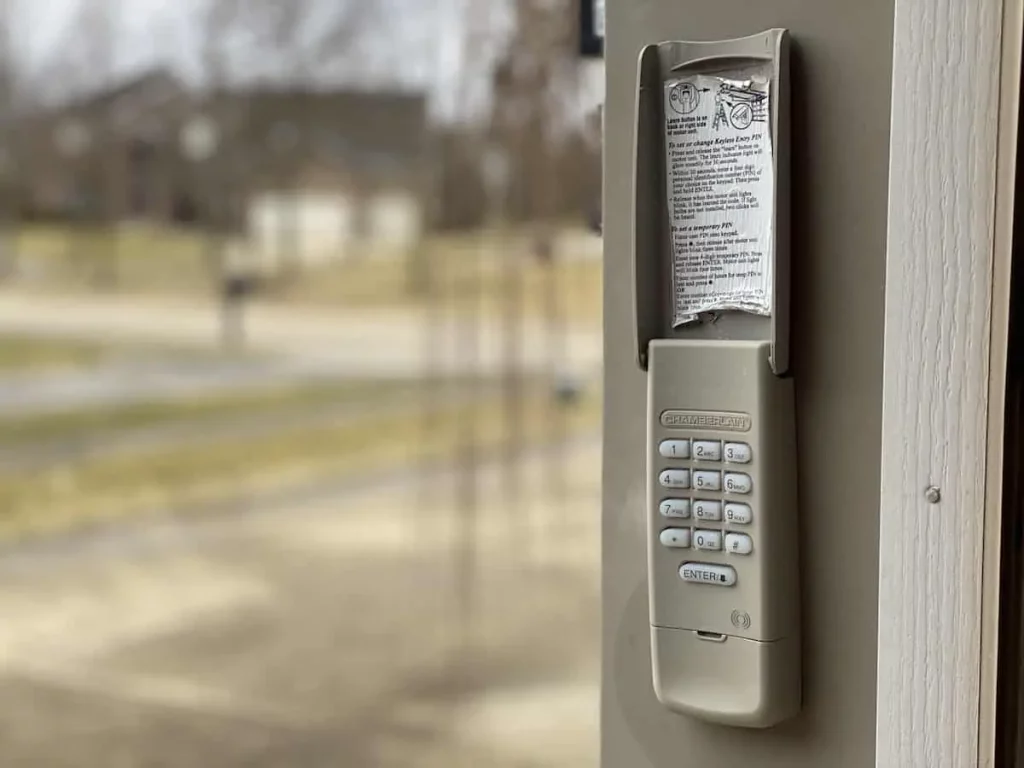
- Keypad Entry: Many Liftmaster openers come with a keypad entry system, allowing you to enter a code directly into the keypad to open the garage door.
- Remote Controls: Liftmaster remotes allow you to open and close your garage door from the convenience of your vehicle or home.
Liftmaster Garage Door Change Code: Step-by-Step Guide
Now, let’s walk through the process of changing the code on your Liftmaster garage door opener:
- Access the Opener: Locate the “Learn” button on your Liftmaster garage door opener. This button is typically located on the back or side of the opener unit.
- Press the Learn Button: Press and hold the “Learn” button for approximately 10 seconds until the indicator light next to the button turns on.
- Enter New Code: Within 30 seconds of pressing the “Learn” button, enter your desired new code on the keypad or remote control. The indicator light will flash to confirm that the new code has been accepted.
- Test the New Code: Test the new code by entering it into the keypad or remote control and pressing the appropriate button to open the garage door. Ensure that the door operates smoothly and that the new code works as expected.
- Reset Keypad Code (If Applicable): If you have a keypad entry system, you may need to reset the keypad code separately. Consult your Liftmaster opener’s manual for instructions on how to do this.
- Securely Store the New Code: Once you’ve changed the code, make sure to securely store it in a safe place. Consider using a password manager or writing it down and keeping it in a secure location.
Conclusion
Changing the code on your Liftmaster garage door opener is a simple yet effective way to enhance your home security. By following the step-by-step guide outlined in this article, you can ensure that your garage remains secure and protected against unauthorized access.
Read too: No Power to Genie Garage Door Opener – Resolving the Issue with Ease: Troubleshooting Guide


Leave a Reply