A garage door that won’t close can be frustrating and inconvenient, especially when you rely on it for security and easy access to your home. If you’re experiencing issues with your Liftmaster garage door not going down, you’re not alone. This article will provide a comprehensive troubleshooting guide to help you diagnose and fix common problems that could be preventing your garage door from closing properly.
Understanding the Problem: Why Your Liftmaster Garage Door Won’t Go Down
Before diving into troubleshooting, it’s essential to understand the potential reasons why your Liftmaster garage door won’t go down. Common causes include sensor misalignment, obstructions in the door’s path, issues with the opener’s settings, and hardware malfunctions. Let’s explore these issues in detail and provide step-by-step solutions to get your garage door functioning smoothly again.
Check for Obstructions
One of the most common reasons a garage door won’t close is due to an obstruction in its path. Liftmaster garage doors are equipped with safety sensors that prevent the door from closing if something is blocking its path.
- Inspect the Path: Look for any objects, debris, or dirt that might be obstructing the door’s path. This can include small items like tools, leaves, or even cobwebs.
- Clear the Area: Remove any obstructions you find. Ensure that the area around the sensors is clean and free of debris.
- Test the Door: After clearing the path, try closing the door again to see if the problem is resolved.
Sensor Alignment Issues
Liftmaster garage doors have photo-eye sensors on either side of the door near the floor. These sensors must be aligned correctly to function properly. If the sensors are misaligned, the door will not close.
- Check Sensor Alignment: Look at the sensors to see if they are aligned. Both sensors should be facing each other directly. If one is angled or out of position, it could cause the door to malfunction.
- Adjust the Sensors: Gently adjust the sensors until they are correctly aligned. Some models have an indicator light that will turn on when the sensors are properly aligned.
- Clean the Sensors: Dirt or debris on the sensors can also cause them to malfunction. Use a soft cloth to clean the lenses.
- Test the Door: Once the sensors are aligned and clean, try closing the door again.
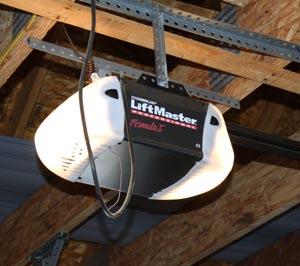
Check the Opener’s Settings
Sometimes, the issue may lie within the settings of the garage door opener itself. Here’s how to check and adjust these settings:
- Locate the Travel Limits: The travel limit adjustment screws are usually located on the side of the opener. These controls adjust how far the door goes up and down.
- Adjust the Down Limit: Use a screwdriver to adjust the down limit. Turn the screw in small increments and test the door’s operation after each adjustment until it closes properly.
- Adjust the Force Settings: The force settings control how much force the opener uses to close the door. If it’s set too low, the door might not close completely. Increase the force slightly and test the door again.
Inspect the Garage Door Opener’s Hardware
The issue might also be mechanical. Here are some hardware components to check:
- Springs and Cables: Look for signs of wear or damage on the torsion springs and cables. If these components are broken or worn out, they can prevent the door from closing properly.
- Tracks: Inspect the tracks for bends, obstructions, or dirt. Misaligned or dirty tracks can cause the door to malfunction.
- Rollers: Check the rollers for wear and tear. Damaged rollers can cause the door to bind and not close correctly.
- Hinges: Ensure all hinges are in good condition and properly lubricated.
Electrical Issues
Sometimes, electrical issues can prevent your garage door from closing. Here are some steps to diagnose and fix electrical problems:
- Check the Power Source: Ensure the garage door opener is plugged in and receiving power. Check the circuit breaker or fuse box for any tripped breakers or blown fuses.
- Inspect the Wiring: Look for any loose or damaged wires connecting the opener to the sensors and control panel. Replace or repair any damaged wiring.
- Remote and Wall Controls: Ensure the remote control and wall-mounted switch are working correctly. Replace the batteries in the remote if necessary.
When to Call a Professional
While many garage door issues can be resolved with DIY troubleshooting, some problems require professional intervention. Here are scenarios where you should consider calling a professional:
- Broken Springs: Torsion springs are under high tension and can be dangerous to repair without proper tools and knowledge.
- Severe Track Misalignment: If the tracks are severely bent or damaged, professional realignment or replacement may be necessary.
- Persistent Electrical Issues: If you cannot identify the electrical issue, it’s best to consult a professional to avoid further complications.
- Complex Mechanical Problems: For complex mechanical issues involving the motor or intricate components of the opener, professional repair ensures safety and accuracy.
Preventive Maintenance Tips
To prevent future issues with your Liftmaster garage door, regular maintenance is key. Here are some tips to keep your garage door in good working condition:
- Regular Cleaning: Clean the tracks, sensors, and other components regularly to prevent dirt and debris buildup.
- Lubrication: Lubricate the moving parts, including rollers, hinges, and springs, with a silicone-based lubricant every six months.
- Inspect Components: Periodically inspect the door’s components for signs of wear and tear. Address minor issues before they become major problems.
- Test Safety Features: Regularly test the door’s auto-reverse and other safety features to ensure they are functioning correctly.
Read too: The Complete Guide to Tighten Chain On Garage Door Opener for Smooth Operation
Conclusion
Experiencing a malfunction with your garage door can be frustrating, but understanding the potential causes and solutions can help you resolve the issue efficiently. This guide provides a comprehensive overview of common problems and troubleshooting steps for when your Liftmaster garage door won’t go down. By following these tips and maintaining your garage door regularly, you can ensure smooth and reliable operation for years to come.


Leave a Reply