The Liftmaster garage door is an essential part of your home’s security and convenience. However, you may encounter issues with the yellow light that appears on the garage door opener. In this article, we will delve into the problem of the Liftmaster garage door yellow light and provide you with troubleshooting steps to resolve it.
Understanding the Liftmaster Garage Door Yellow Light
The Liftmaster garage door is equipped with a yellow light indicator that holds specific meaning. The yellow light indicates a problem with the garage door opener system. Some common causes for the yellow light to appear include power supply issues, malfunctioning safety sensors, damaged garage door springs, misaligned tracks, remote control problems, or issues with the control panel and wiring.
Troubleshooting Steps for the Liftmaster Garage Door Yellow Light
If you are experiencing issues with the Liftmaster garage door yellow light, you can follow these steps to troubleshoot and resolve the problem:
Step 1: Checking the Power Source
The first step is to check the power supply to the garage door opener. Ensure that the power source is properly connected and there are no disruptions to the electricity flow to the garage door opener.
Step 2: Inspecting the Safety Sensors
Inspect the safety sensors installed near the garage door. Make sure that both sensors are functioning correctly and there are no obstacles obstructing the infrared beam between them. If there is any dust or dirt on the sensors, carefully clean them. Also, ensure that both sensors are properly aligned and positioned.
Step 3: Examining the Garage Door Springs
The garage door springs play a crucial role in ensuring the smooth opening and closing of the door. Check the condition of the springs and ensure that there are no damages or breaks. If any issues are found with the springs, it is advisable to replace them with new ones to ensure proper functioning of the garage door.
Step 4: Checking the Garage Door Tracks
Inspect the tracks of the garage door to ensure there is no misalignment or obstructions. Clean the tracks from any debris or dried lubricants. Also, ensure that the tracks are properly installed and there are no loose components.
Step 5: Verifying Remote Control Functionality
Check the functionality of the remote control for the garage door opener. Ensure that the batteries in the remote control have sufficient power. If needed, reset or reprogram the remote control to ensure a good connection between the remote and the garage door opener.
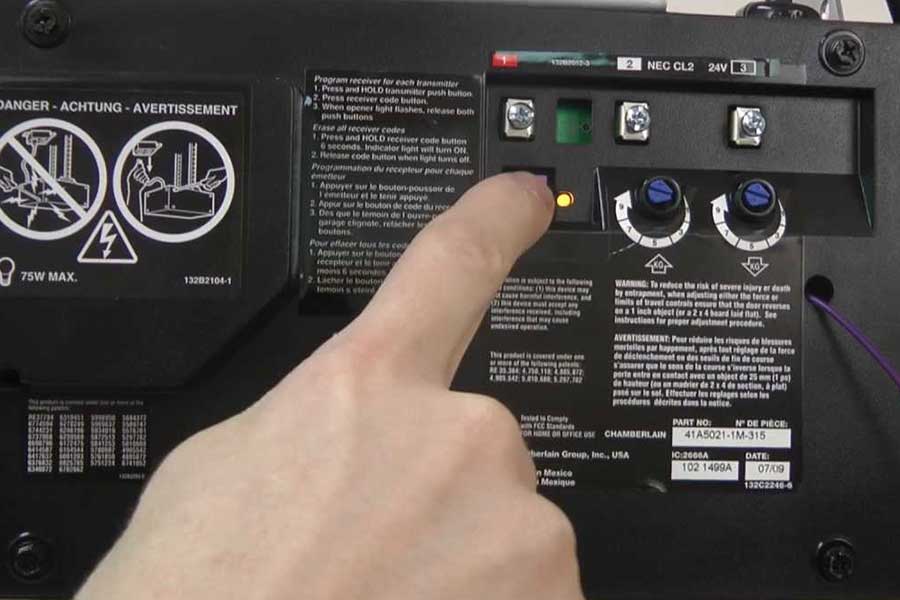
Step 6: Assessing the Control Panel and Wiring
Inspect the control panel of the garage door opener. Look for any error codes displayed or any damages to the control panel. Also, check the wiring connected to the garage door opener for any loose connections or damages. If any issues are found with the control panel or wiring, promptly repair or replace them.
Step 7: Consulting the Liftmaster Manual or Customer Support
Refer to the Liftmaster’s official documentation, such as the manual or online resources, for additional troubleshooting guidance. If the issue persists, consider contacting Liftmaster’s customer support for further assistance and guidance.
Step 8: Seeking Professional Help
If all the troubleshooting steps have been followed and the yellow light issue persists, it may be necessary to seek professional help. A professional garage door technician will have the expertise and knowledge to diagnose and resolve complex issues with the garage door opener system. They will ensure that the repairs are done safely and effectively.
Additional Tips and Safety Precautions
In addition to troubleshooting the yellow light issue, here are some additional tips and safety precautions to consider:
- Perform regular maintenance on your Liftmaster garage door opener to prevent issues and ensure smooth operation.
- Follow safety precautions while troubleshooting or performing repairs on the garage door opener. Disconnect power and exercise caution to avoid any accidents.
- Schedule periodic professional inspections and maintenance to keep your Liftmaster garage door opener in optimal condition and prevent future problems.
By following these troubleshooting steps, you can identify and resolve the Liftmaster garage door yellow light issue, ensuring the proper functioning and security of your garage door. Remember to prioritize safety and seek professional help when needed.
Leave a Reply