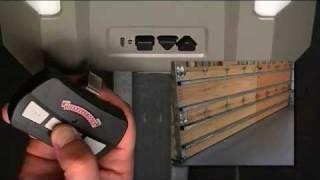
Garage door openers have revolutionized the way we access our homes, providing convenience, security, and peace of mind. However, to make the most of these devices, it’s essential to understand how to program them effectively. In this comprehensive guide, we’ll delve into the intricacies of Overhead Door garage door opener programming, empowering you to take control of your garage access with confidence.

Understanding Overhead Door Garage Door Opener Programming
Before we dive into the programming process, let’s explore the fundamentals of Overhead Door garage door openers and the importance of proper programming.
Overhead Door offers a range of garage door openers equipped with advanced features such as remote operation, wireless connectivity, and security encryption. To harness these capabilities fully, users must program their garage door openers to suit their specific needs and preferences.
How to Program Your Overhead Door Garage Door Opener
Step 1: Read the Manual
The first step in programming your Overhead Door garage door opener is to familiarize yourself with the owner’s manual. The manual contains detailed instructions specific to your model, including programming procedures, troubleshooting tips, and safety guidelines.
Read too: Why Your Liftmaster Garage Door Won’t Stay Closed and How to Fix It? Troubleshooting Tips
Step 2: Prepare Your Remote Control
If you’re programming a remote control for your Overhead Door garage door opener, ensure that the batteries are installed and functioning correctly. Replace any depleted batteries to prevent interruptions during the programming process.
Step 3: Access the Programming Mode
Most Overhead Door garage door openers feature a programming button or switch located on the motor unit. Press or toggle this button to enter programming mode, indicated by a flashing light or audible signal.
Step 4: Program the Remote Control
Once in programming mode, follow the specific instructions outlined in your owner’s manual to program the remote control. This typically involves pressing a sequence of buttons or holding down a button until the opener acknowledges the programming signal.
Step 5: Test the Remote Control
After programming the remote control, test its functionality by pressing the designated button to operate the garage door opener. Ensure that the door opens and closes smoothly and that the remote control responds promptly to commands.
Step 6: Program Additional Features (Optional)
Depending on your Overhead Door garage door opener model, you may have the option to program additional features such as wireless keypads, wall consoles, or smartphone connectivity. Refer to the owner’s manual for detailed instructions on programming these features.
Professional Assistance
If you encounter any difficulties during the programming process or are unsure about any steps, don’t hesitate to seek assistance from a qualified technician. Professional garage door service providers have the expertise and tools to ensure that your Overhead Door garage door opener is programmed correctly and operates smoothly.
Conclusion
Mastering Overhead Door garage door opener programming is essential for maximizing the functionality and convenience of your garage access system. By following the steps outlined in this guide and referring to your owner’s manual, you can program your garage door opener with confidence and enjoy seamless operation for years to come.


Leave a Reply