Is your garage keypad suddenly unresponsive, making it impossible to open your garage door the usual way? If you’ve been frustrated and wondering why the keypad on my garage door opener is not working, you’re not alone. This is a common issue faced by homeowners, and fortunately, it’s often something you can fix yourself without calling a technician.
In this detailed guide, we’ll break down all the possible reasons behind a malfunctioning garage keypad, offer step-by-step troubleshooting tips, and help you decide when it’s time to replace or repair your unit. Let’s get started.
Read too: How to Perform a Chamberlain Garage Door Opener Code Change? Mastering Security
Why the Keypad on My Garage Door Opener Is Not Working: Common Causes
Understanding why your garage door opener keypad has stopped working is the first step toward a solution. The problem can be as simple as a dead battery or as complex as internal circuitry damage.
Here are the most common reasons your keypad may have stopped working:
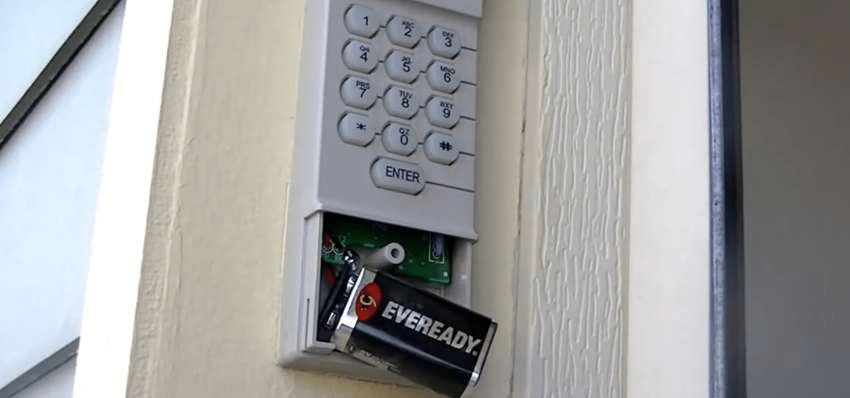
- Dead or Weak Batteries
- The number one culprit behind a non-functional garage door keypad.
- Even if the backlight still turns on, weak batteries may not provide enough power to transmit the code.
- Worn Out Keypad Buttons
- Frequent use over time can wear down the rubber membrane or switches under the keys.
- Signal Interference or Range Issues
- Wireless interference from nearby electronics can block the keypad’s signal from reaching the opener.
- Programming Issues
- Your keypad may have lost its pairing with the opener, especially after a power outage or reset.
- Damaged Wiring (For Hardwired Units)
- If your system isn’t wireless, check for loose or corroded wires inside the keypad.
- Environmental Damage
- Extreme weather, dust, and moisture can damage external keypads over time.
How to Troubleshoot When the Keypad on My Garage Door Opener Is Not Working
If you’re thinking, “The keypad on my garage door opener is not working and I don’t know where to start,” this section will walk you through the logical steps to pinpoint the problem and fix it quickly.
Step 1: Check and Replace the Batteries
- Remove the battery cover (usually on the bottom or back).
- Replace the batteries with fresh ones (often 9V or AA depending on the model).
- Test the keypad by entering your PIN to see if the door responds.
Tip: Use brand-new alkaline batteries to ensure sufficient power for signal transmission.
Step 2: Inspect the Keypad for Physical Damage
- Look for cracks, worn-out keys, or missing buttons.
- Gently clean the keypad surface using a soft cloth and rubbing alcohol.
- If certain numbers don’t respond, the internal button pad might need replacement.
Step 3: Reprogram the Keypad
- Locate the “Learn” button on your garage door opener motor (usually under the light cover).
- Press and release the “Learn” button.
- Within 30 seconds, enter your desired PIN on the keypad and press “Enter.”
- Wait for the garage door to respond (usually a light blink or a click).
Note: Consult your keypad’s manual for model-specific programming instructions.
Step 4: Check for Signal Interference
- Remove nearby wireless devices (baby monitors, routers, etc.) and test again.
- Ensure the opener’s antenna is hanging straight down and not damaged.
Step 5: Reset the System
- Unplug the garage door opener for 30 seconds and plug it back in.
- Reprogram the keypad after the reset and test its function.
When Should You Replace Your Garage Door Keypad?
If you’ve tried all the above troubleshooting methods and your garage keypad still doesn’t work, it might be time to consider replacing it.
Signs You Need a New Keypad:
- Multiple buttons don’t register or respond.
- The keypad is physically broken or cracked.
- Reprogramming fails consistently.
- Battery replacements and resets don’t help.
- You see water damage or corrosion on the circuit board.
Tip: Replacing a keypad is generally affordable and much cheaper than replacing the entire garage door opener system.
Compatible Replacement Keypads: What to Look For
When shopping for a new garage door keypad, you’ll need to ensure compatibility with your opener. Here’s what you should check:
1. Brand Compatibility
- Match the keypad to your opener’s brand (e.g., Chamberlain, LiftMaster, Genie, Craftsman).
- Universal keypads are available and work with multiple brands.
2. Frequency Match
- Garage door openers operate at frequencies like 315 MHz or 390 MHz.
- Check your opener’s frequency and ensure the keypad matches.
3. Wired vs. Wireless
- Modern systems are usually wireless, but older homes may still have hardwired keypads.
4. Security Features
- Look for rolling code technology or Security+ 2.0 for enhanced security.
Preventive Maintenance Tips for Garage Door Keypads
To avoid running into the same issue again, it’s wise to follow a few preventive steps.
Maintenance Checklist:
- Replace batteries every 6–12 months.
- Clean the keypad surface monthly with a soft cloth.
- Seal the keypad housing properly to prevent moisture intrusion.
- Test functionality weekly to ensure reliability.
- Keep the keypad shaded or install a small protective cover if exposed to direct sunlight or rain.
These steps can extend the life of your garage door keypad and reduce the risk of unexpected failures.
FAQs About Garage Keypad Malfunctions
Q: Why does my garage keypad light up but not open the door?
A: This usually means the keypad has power (batteries are good) but isn’t communicating with the opener. Try reprogramming it.
Q: How long do garage door keypads typically last?
A: On average, garage keypads last 8–12 years with proper maintenance and usage.
Q: Can cold weather affect my garage keypad?
A: Yes. Freezing temperatures can affect battery performance and damage internal components.
Q: Is it possible to fix a non-working keypad without replacing it?
A: In many cases, yes. Reprogramming, cleaning, and replacing the battery can resolve most issues.
The Keypad on My Garage Door Opener Is Not Working? Don’t Panic—Here’s the Bottom Line
When you’re stuck wondering why the keypad on my garage door opener is not working, remember that this is a common issue with simple solutions. From replacing batteries and reprogramming the unit to checking for physical damage or signal issues, most fixes are straightforward and cost-effective.
If you’ve followed all the troubleshooting steps and your keypad still isn’t functioning, it may be time for a replacement. Luckily, universal keypads and brand-specific replacements are easy to install and often more secure and advanced than older models.
A working keypad isn’t just a convenience—it’s part of your home’s security and ease of access. So don’t delay repairs, and stay proactive with maintenance to keep everything functioning smoothly.


Leave a Reply