Garage door openers are one of the most convenient features in a modern home, offering remote access to your garage with the push of a button. If you’ve ever looked closely at your garage door remote or wall-mounted opener and wondered, What are the 3 buttons on a garage door opener?, you’re not alone. Many homeowners don’t fully understand the purpose of each button and how to utilize them effectively.
In this detailed article, we’ll explore exactly what these three buttons do, how to program them, and how they enhance your garage door opener’s versatility and security.
Read too: How to Perform a Chamberlain Garage Door Opener Code Change? Mastering Security
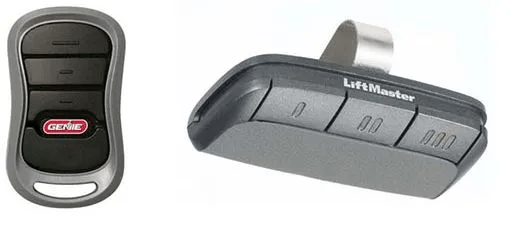
What Are The 3 Buttons On A Garage Door Opener?
If your garage door opener remote or wall unit features three buttons, you’re probably curious about what each one does. Simply put, the three buttons typically correspond to the following functions:
- Controlling Multiple Garage Doors
- Programming for Different Devices
- Smart Lock and Lighting Features
Let’s explore each function in detail.
Understanding the Functions of the Three Buttons
1. Multi-Door Operation
The most common reason a garage door opener remote or panel has three buttons is to control multiple garage doors. For example, if you have a three-car garage, each button can be programmed to operate a separate door opener.
Each button is typically programmable to a different receiver or motor unit. This feature is incredibly useful for families with multiple vehicles, shared garages, or detached garage spaces.
2. Security and Smart Lock Integration
In many modern garage door openers, the second or third button is used to activate Smart Lock features or control garage lighting. Some openers allow you to set vacation lock modes that disable remote access entirely for added security.
These advanced features help enhance the safety of your home, allowing you to control lighting, temporarily disable remotes, or lock the system entirely at night or while you’re away.
3. Light Control and Home Automation
One of the three buttons can often be programmed to control the garage’s built-in lighting or an external accessory light. This is ideal if you want the garage lights to turn on separately from the door opening.
In smart garage door systems integrated with platforms like MyQ, Genie Aladdin Connect, or HomeLink, one of the buttons may act as a command to sync or trigger other smart devices, adding convenience and automation to your home.
How to Program the 3 Buttons on Your Garage Door Opener
Whether you’re installing a new opener or want to reprogram an existing one, understanding how to program the three buttons is key to getting the most from your garage system.
Step-by-Step Programming Guide:
- Locate the “Learn” Button
Most garage door motors (the units installed in the ceiling of the garage) have a “Learn” or “Program” button. This button is usually located under the light cover. - Press the Learn Button
Press and release the “Learn” button on the motor unit. A small indicator light will begin to blink, signaling it is in pairing mode. - Select the Remote Button to Program
Press and hold one of the three buttons on your remote within 30 seconds of pressing the Learn button. Hold until the garage door motor light blinks or clicks. - Repeat for Additional Buttons
You can repeat the process using the other two buttons to program them for different doors or functions.
Tip: Refer to your opener’s manual for brand-specific programming instructions. Brands like LiftMaster, Chamberlain, and Genie may have slightly different procedures.
When to Use Each Button on a Garage Door Remote
Still wondering, what are the 3 buttons on a garage door opener actually used for in everyday scenarios? Here are common examples:
- Button 1 – Main garage door (most frequently used)
- Button 2 – Detached garage or secondary door
- Button 3 – Garage lights, gate opener, or security lock feature
If you’re only using one garage door but have three buttons, consider programming the extra buttons for home automation functions like lights or setting a timer to close the garage after a period of inactivity.
Benefits of a Multi-Button Garage Door Opener
Having three buttons on a garage door opener might seem like overkill if you only have one garage. However, there are many reasons why this design is beneficial:
1. Future-Proofing
If you ever add a second garage or get a gate installed, the extra buttons are ready to be programmed.
2. Smart Home Integration
Buttons can be programmed to trigger routines such as turning on the lights when you open the door at night.
3. Security Enhancements
Dedicated buttons can engage lock modes, especially during long trips away from home.
4. Shared Use
Different family members can use separate buttons if your garage has multiple zones or shared spaces.
Troubleshooting: When the 3 Buttons Aren’t Working Properly
If one or more of your garage door opener buttons stop functioning, consider these troubleshooting tips:
Common Problems:
- Dead Batteries – Replace the battery in the remote (often a coin cell battery).
- Lost Programming – Reprogram the button using the Learn function.
- Interference – Ensure there’s no signal interference from LED lights or other wireless devices.
- Faulty Button Pad – If a specific button doesn’t respond, the internal contact pad may be damaged.
Reminder: Always test each button after programming to ensure it’s functioning as intended.
What Are The 3 Buttons On A Garage Door Opener Doing in Smart Systems?
With the rise of smart home technology, the three buttons on a garage door opener have taken on new functions beyond just opening doors.
Smart Features Include:
- Voice Activation via Alexa or Google Assistant
- Scheduled Operations (auto-open or close)
- Geofencing (triggered by GPS location of your phone)
- Remote Access via Smartphone App
Manufacturers like LiftMaster, Genie, and Chamberlain now offer app integration where one of the buttons may also serve to sync or reset smart features.
How to Identify the Function of Each Button
Not all garage door openers label the buttons clearly, which can lead to confusion. Here’s how to identify what each button does:
- Test Each Button – Press one button at a time and observe which door opens or if the lights turn on.
- Check Manufacturer Manual – Most user guides include a section that maps button functionality.
- Reprogram to Customize – If you’re unsure or want to reassign buttons, go through the reprogramming steps.
FAQs About Garage Door Opener Buttons
Q: Can I reprogram a button that’s already in use?
A: Yes, just go through the Learn button process again to assign a new function.
Q: What if I only have one garage door but three buttons?
A: You can leave the other two unassigned or use them for lights and smart functions.
Q: Are these buttons universal across all brands?
A: Not necessarily. While many follow similar patterns, some brands have proprietary systems.
Final Thoughts: Make the Most of the Buttons on Your Garage Door Opener
So, what are the 3 buttons on a garage door opener really for? They offer far more than just access to your garage. From multi-door control and lighting to enhanced security and smart home features, those three small buttons pack a lot of functionality into a compact space.
Understanding their purpose not only enhances the convenience of your daily routine but also contributes to home safety, automation, and efficiency. Whether you’re setting up a new remote, troubleshooting a malfunction, or exploring smart upgrades, those three buttons are your gateway to a more intelligent garage.


Leave a Reply