When installing or repairing a garage door opener, one of the most common but often overlooked questions is: What type of wire is used for garage door opener systems? Choosing the correct type of wire is crucial for the functionality, safety, and durability of your garage door system.
Whether you’re wiring a new opener, replacing an old unit, or troubleshooting an existing installation, understanding which wire to use is essential to ensure optimal performance and prevent malfunctions or hazards.
Read too: How to Perform a Chamberlain Garage Door Opener Code Change? Mastering Security
This comprehensive guide covers everything you need to know about garage door opener wiring: the types of wire used, how to install them, safety considerations, and tips to avoid common mistakes.
Why Choosing the Right Wire for Your Garage Door Opener Matters
Garage door openers require electrical wiring to connect various components such as the power source, wall switch, safety sensors, and sometimes smart home devices. Using the wrong type of wire can lead to several issues, including:
- Poor signal transmission between components
- Fire hazards due to inadequate insulation
- Intermittent or failed functionality
- Voiding of product warranties
Knowing what type of wire is used for garage door opener installations ensures not just reliable operation but also compliance with safety codes and manufacturer requirements.
What Type Of Wire Is Used For Garage Door Opener – Complete Breakdown
Let’s dive into the different types of wire commonly used in garage door opener installations, including their applications, specifications, and why each is important.
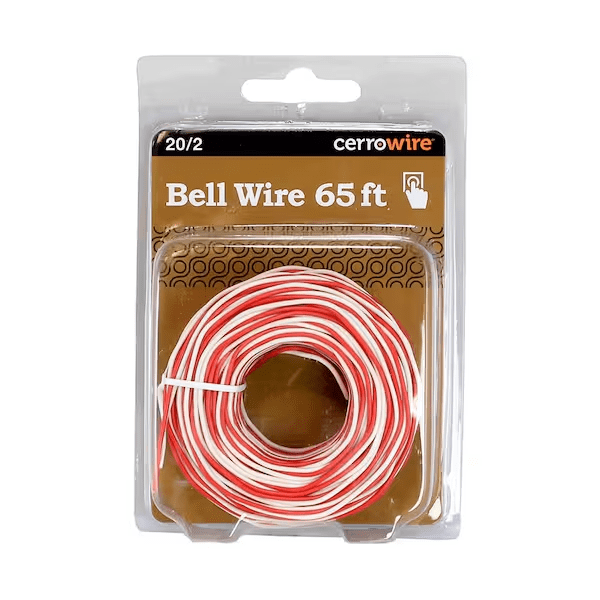
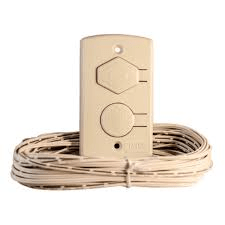
1. 18/2 Low-Voltage Wire for Wall Control Panels
The most commonly used wire for connecting a garage door opener to a wall-mounted control panel is 18/2 thermostat wire (18-gauge, 2-conductor).
- Application: Connects wall button or wall station to the opener unit
- Type: Solid copper, low-voltage
- Insulation: PVC jacket
- Color coding: Usually red and white or black and white wires
This wire handles low-voltage signals and provides reliable communication between the wall control and the opener unit. Its gauge and insulation are suitable for most residential garage setups.
2. 22/2 or 22/4 Wire for Safety Sensors
If you’re wiring safety sensors (photo eyes), you’ll typically use 22-gauge wire. These sensors require very little power and are usually wired with either 2 or 4 conductors, depending on your opener’s design.
- Application: Connects infrared safety sensors to the opener
- Type: Solid or stranded copper, low-voltage
- Color coding: Typically black, white, red, and green
LiftMaster, Chamberlain, and Genie openers often use 22/2 or 22/4 wire for these connections. Using proper gauge ensures the sensors receive accurate voltage and reduce false positives or connection loss.
3. 14/2 or 12/2 NM Cable for Power Supply (Romex®)
To supply 120V AC power to the opener itself, you’ll need standard NM cable (non-metallic sheathed cable), also known by the brand name Romex.
- Application: Connects the garage door opener to a junction box or power source
- Type: 14/2 or 12/2 depending on circuit requirements
- Rating: Rated for in-wall residential electrical systems
A 14/2 cable is typically used when the opener is on a 15-amp breaker, while 12/2 is used for 20-amp circuits. Always follow your local electrical codes and consider hiring a licensed electrician for high-voltage wiring.
4. Shielded Wire for Interference-Free Performance
In homes with smart garage door systems or nearby high-frequency interference (e.g., from routers or appliances), using shielded low-voltage wire can help minimize signal disruption.
- Application: Ideal for advanced systems using data or digital communication
- Shielding: Foil or braid around conductors to block EMI
- Use case: Long runs or smart opener integrations
Shielded wire isn’t always required, but in specific cases, especially when sensor problems occur due to interference, it’s a great choice.
Wire Installation Tips for Garage Door Openers
Installing the correct wire isn’t just about choosing the right type—it also involves using the correct installation techniques.
1. Use Staples or Conduit for Support
Secure wires neatly along walls or ceiling beams using insulated staples or plastic conduit. This prevents sagging and mechanical damage.
2. Label Wires Clearly
If you’re installing multiple wire runs (e.g., sensors and wall switch), label them with masking tape or wire tags to avoid confusion later.
3. Maintain Safe Distances from Power Wires
Keep low-voltage wires at least 12 inches away from high-voltage power lines to avoid interference and comply with NEC safety guidelines.
4. Avoid Splicing if Possible
Long runs should ideally use a single length of wire. If splicing is necessary, use proper wire nuts and electrical tape, or a low-voltage junction box.
Common Mistakes to Avoid
Even if you know what type of wire is used for garage door opener systems, certain errors can lead to poor performance or dangerous conditions:
- Using speaker wire or lamp cord: These are not designed for structured wiring systems and can cause voltage drop or failure.
- Overloading low-voltage wire: Don’t run high-current loads through 18 or 22 gauge wire.
- Installing power cables without proper permits: This could violate local electrical codes.
- Leaving exposed wire ends: Always terminate wires properly and safely.
Safety and Code Compliance
When dealing with any type of electrical installation, especially one connected to your home’s power supply, follow these key safety tips:
- Turn off power at the breaker before any installation.
- Use a voltage tester to ensure circuits are not live.
- Consult your local building codes. Many areas require permits or inspections for new electrical work.
- Hire a licensed electrician for high-voltage connections if you’re unsure.
Low-voltage wiring, such as that used for sensors and wall controls, can typically be done by homeowners with basic DIY experience.
Recommended Wire Brands and Where to Buy
If you’re shopping for wires suitable for your garage door opener, look for these reputable brands:
- Southwire – Known for high-quality Romex and thermostat wires
- Ideal – Offers low-voltage wire kits for garage door installations
- GE – Produces sensor-compatible wire for home automation
- CerroWire – Affordable and reliable for residential use
Most home improvement stores like Home Depot, Lowe’s, or online retailers like Amazon and Grainger carry the right wire types in convenient lengths.
Conclusion
Choosing the correct wire may not seem like a big decision, but knowing what type of wire is used for garage door opener installations can save you time, frustration, and potential safety hazards.
To recap:
- Use 18/2 low-voltage wire for wall controls
- Use 22/2 or 22/4 wire for safety sensors
- Use 12/2 or 14/2 NM cable for 120V AC power connections
- Consider shielded wire for interference-prone areas
Following these guidelines ensures a safe, functional, and long-lasting garage door opener system. Whether you’re doing a new install or fixing an old setup, the right wire makes all the difference.

Leave a Reply