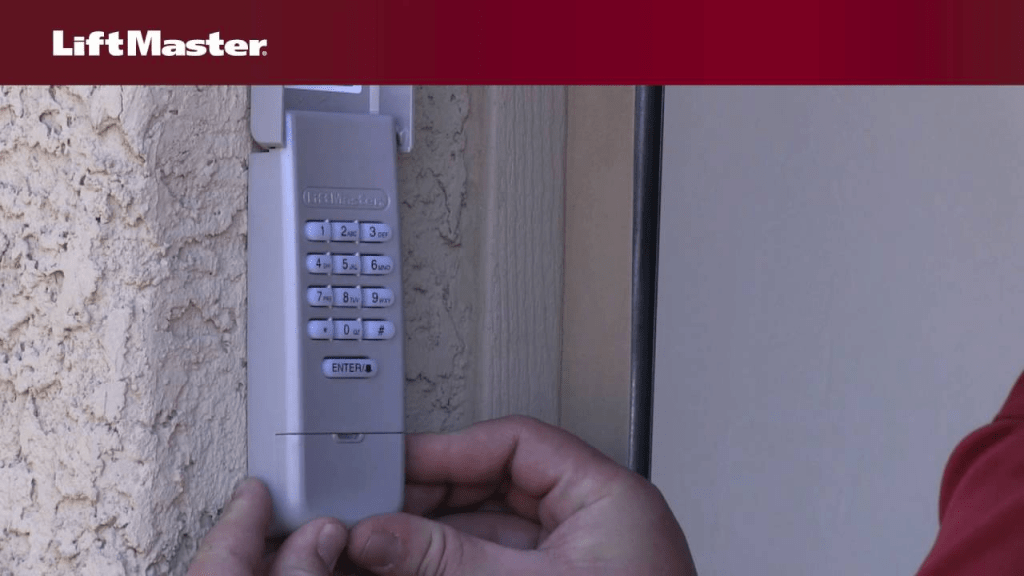
Maintaining your Liftmaster garage door opener keypad is essential for smooth operation and reliable performance. One common maintenance task is changing the battery. If you’ve noticed that your keypad isn’t working as it should, it may be time to replace its power source. In this guide, we’ll walk you through how to change the battery in a Liftmaster garage door opener keypad, ensuring you can get it back in working order quickly and easily.

Why Changing the Battery in Your Liftmaster Keypad Is Important
The keypad on your Liftmaster garage door opener relies on a battery to function. When the battery begins to fail, you might experience:
- Delayed or Non-Responsive Keypad Entries
The keypad may not register your input correctly, making it harder to open or close the garage door. - Reduced Security
A non-functioning keypad leaves your garage vulnerable since it cannot reliably secure the door. - Interruption of Daily Routines
Without a working keypad, you may have to rely solely on a remote or manual operation, which can be inconvenient.
Changing the battery is a quick and cost-effective solution to keep your keypad in top condition.
Read too: Door and Garage Door Companies: Choosing the Right Partner for Your Needs
How To Change Battery In Liftmaster Garage Door Opener Keypad
Follow these simple steps to replace the battery in your Liftmaster keypad:
1: Gather Your Tools and Materials
Before you begin, gather the following:
- A new 9-volt battery (check your keypad model for specific requirements).
- A screwdriver (if needed).
- A clean cloth to remove dust and debris.
Step 2: Locate the Battery Compartment
- Find the keypad on your garage’s exterior wall.
- Look for the battery compartment, typically located on the bottom or back of the keypad. Some models may have a sliding cover, while others require unscrewing.
3: Open the Battery Compartment
Depending on your model:
- Sliding Cover: Slide the cover downward or outward to reveal the battery.
- Screw Secured: Use a screwdriver to remove the screws and gently open the compartment.
Take care not to damage the keypad or its components during this process.
4: Remove the Old Battery
Carefully disconnect and remove the old battery. If the battery has leaked or shows signs of corrosion, clean the compartment with a damp cloth. Allow it to dry completely before inserting the new battery.
5: Insert the New Battery
- Take your new 9-volt battery and align the terminals with the connectors in the compartment.
- Snap the battery into place securely. Ensure the connections are tight for proper functionality.
6: Close the Battery Compartment
- Slide the cover back into place or screw it back on, depending on your model.
- Ensure the compartment is sealed properly to protect the battery from weather exposure.
7: Test the Keypad
Once the new battery is installed:
- Enter your PIN on the keypad.
- Press the Enter button to confirm the door’s operation.
If the keypad responds and the garage door opens or closes as expected, the replacement was successful.
Troubleshooting Common Issues After Battery Replacement
If your keypad doesn’t work even after replacing the battery, try these troubleshooting tips:
- Check the Battery Orientation
Ensure the battery is installed correctly with the terminals aligned to the connectors. - Inspect the Battery Compartment
Look for signs of corrosion or debris that may obstruct proper connections. - Reset the Keypad
Refer to your Liftmaster manual for reset instructions. Resetting can resolve software or memory issues. - Replace the Battery Again
Occasionally, a new battery may be defective. Try replacing it with another fresh battery. - Consult a Professional
If issues persist, contact Liftmaster customer support or a garage door technician for assistance.
When to Replace the Battery in Your Liftmaster Keypad
On average, the battery in your Liftmaster keypad should last about 1-2 years, depending on usage and weather conditions. Signs that it’s time to replace the battery include:
- Weak or inconsistent response from the keypad.
- LED lights on the keypad dimming or failing to illuminate.
- Failure to operate the garage door despite correct PIN entry.
Benefits of Regular Battery Maintenance
Replacing the battery in your Liftmaster keypad has several advantages:
- Ensures Reliable Operation
A fresh battery guarantees that the keypad responds promptly to your commands. - Enhances Security
Prevent unauthorized access by maintaining a fully operational keypad. - Prolongs Keypad Lifespan
Regular maintenance, including battery replacement, helps keep the keypad in good condition for years to come. - Convenience
Avoid interruptions to your daily routine by staying ahead of battery-related issues.
FAQs About Changing Batteries in Liftmaster Keypads
1. How Often Should I Change the Battery in My Liftmaster Keypad?
It’s recommended to replace the battery every 1-2 years or as soon as you notice performance issues.
2. What Type of Battery Does a Liftmaster Keypad Use?
Most Liftmaster keypads use a 9-volt battery, but check your user manual to confirm.
3. Can I Use Rechargeable Batteries?
While rechargeable batteries are eco-friendly, they may not provide consistent power for a long duration. It’s best to use high-quality alkaline batteries.
4. What Should I Do If the Keypad Still Doesn’t Work After Replacing the Battery?
Inspect the battery compartment for corrosion, reset the keypad, or contact customer support for further assistance.
Conclusion
Knowing how to change the battery in a Liftmaster garage door opener keypad is an essential skill for maintaining your garage door system. With just a few simple steps, you can ensure your keypad operates reliably and provides the convenience and security you expect.
Don’t wait until your keypad stops working—keep a spare battery on hand and replace it proactively to avoid disruptions. Regular maintenance will save you time, money, and frustration in the long run.


Leave a Reply