Are you looking to free up ceiling space, reduce garage door noise, and enhance the look and functionality of your garage? If so, switching to a LiftMaster 8500 Wall Mount Garage Door Opener is a smart upgrade. This unit is sleek, efficient, and designed for modern homes where saving space is essential. In this comprehensive guide, we’ll walk you through how to install LiftMaster 8500 wall mount garage door opener correctly and safely, even if you’re a DIYer with moderate experience.
Let’s dive into the details, tools you’ll need, safety considerations, and step-by-step instructions to help you complete your installation smoothly.
Read too: Door and Garage Door Companies: Choosing the Right Partner for Your Needs
Why Choose the LiftMaster 8500 Wall Mount Opener?
Before jumping into the installation process, let’s take a moment to understand why the LiftMaster 8500 is such a popular choice among homeowners.
Key Benefits:
- Wall-mount design saves ceiling space.
- Virtually silent operation with direct drive.
- Integrated Security+ 2.0® technology for enhanced safety.
- Compatible with MyQ smart technology for remote control.
- Battery backup option for uninterrupted access during power outages.
The LiftMaster 8500 is an ideal option for garages with high ceilings or limited headroom, and it adds a clean, professional look to any setup.
How To Install LiftMaster 8500 Wall Mount Garage Door Opener
Installing the LiftMaster 8500 wall mount garage door opener isn’t overly complicated, but it does require attention to detail. Let’s break it down step by step.
Tools and Equipment You’ll Need
Make sure you have the following tools on hand before beginning:
- Drill with various bits
- Level
- Wrench set or socket set
- Stud finder
- Tape measure
- Stepladder
- Screwdrivers (Phillips and flat-head)
- Safety glasses and gloves
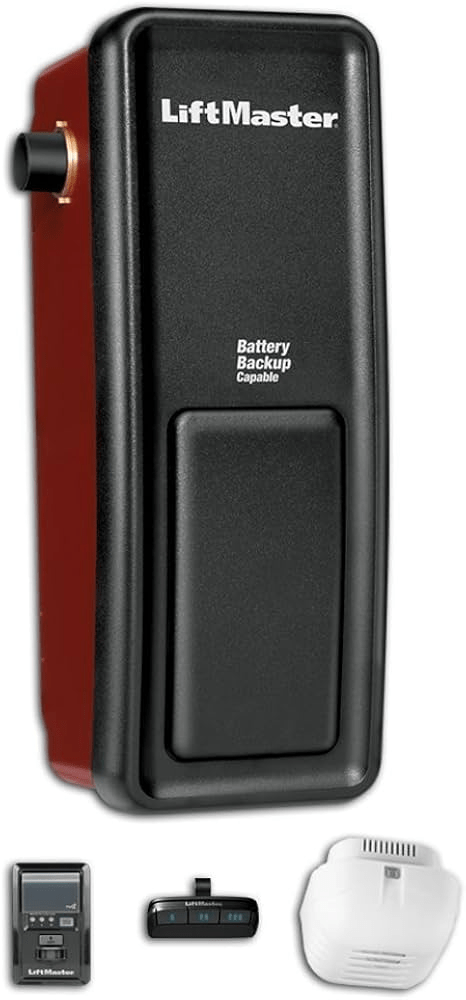
You’ll also need the LiftMaster 8500 opener kit, which includes:
- Wall mount opener unit
- Power door lock
- Protector system (safety sensors)
- MyQ control panel
- Mounting hardware
- Instructions manual
Step 1: Verify Garage Door Compatibility
The LiftMaster 8500 is designed for use with torsion bar systems only. If your garage door uses an extension spring system or doesn’t have a torsion bar, this opener will not be compatible.
Also, make sure:
- The door is balanced and manually operable.
- The torsion shaft is 1” in diameter and extends at least 8.5 inches beyond the bearing plate.
- You have a 110V outlet within 6 feet of where the opener will be mounted.
Step 2: Install the Wall Mount Opener Unit
- Locate the mounting spot: Typically on the torsion bar side with more clearance. Use the stud finder to locate a secure anchor point.
- Mount the bracket: Use lag screws to fasten the mounting bracket to a wall stud.
- Attach the opener: Slide the opener onto the torsion shaft. Ensure it’s flush and the drive collar connects firmly to the shaft.
- Secure the opener: Tighten the set screws onto the torsion shaft. Make sure the opener is level.
💡 Tip: Make sure the shaft rotates freely and there is no binding.
Step 3: Install the Power Door Lock
The power door lock is a crucial part of the system—it keeps your door securely locked when closed.
- Position the lock: Mount it 6” above the ground on the track on the same side as the opener.
- Drill holes for the lock bolt and mounting screws.
- Connect the wiring: Run the lock wires neatly along the wall or ceiling using insulated staples.
Step 4: Install the Safety Sensors
Also called the Protector System, these sensors prevent the door from closing if there’s an object in its path.
- Mount the brackets: Place them on each side of the garage door, 6 inches above the ground.
- Align the sensors so the LEDs on both units are solid (not blinking).
- Run the wires along the base of the garage and connect them to the opener unit.
Step 5: Connect the MyQ Control Panel
This smart panel replaces your standard wall button and offers more functionality, including MyQ connectivity and motion detection.
- Mount the panel: Place it near the garage entryway, out of reach of children.
- Wire it directly to the opener using the included low-voltage wiring.
- Secure the wiring along the walls or ceiling using cable clips or staples.
Step 6: Power and Program the Opener
Once everything is mounted:
- Plug in the opener to the dedicated outlet.
- Run a power test to ensure everything is functioning.
- Program the remote by pressing the “Learn” button on the opener and then pressing the desired button on your remote.
- Set travel limits for opening and closing using the adjustment buttons.
- Test the door multiple times to ensure smooth operation and safety lock engagement.
Step 7: Connect to MyQ (Optional)
For smart home control:
- Download the MyQ app on your smartphone.
- Follow the in-app instructions to pair the opener.
- Connect it to your Wi-Fi for remote access, scheduling, and notifications.
Common Issues and Troubleshooting
Even when installation goes smoothly, you may encounter one or two hiccups. Here are some common problems:
Door Doesn’t Close All the Way
- Fix: Check the down travel limit setting and realign safety sensors.
Lock Not Engaging
- Fix: Ensure the lock wires are properly connected and the lock bolt can move freely.
Opener Not Responding to Remote
- Fix: Reprogram the remote or check for signal interference.
Safety Tips for Installing a LiftMaster Wall Mount Opener
- Never work on the torsion spring unless you’re trained. These springs are under extreme tension and can be dangerous.
- Turn off power when working with electrical wiring.
- Keep children and pets away during installation.
- Always test the auto-reverse function of the sensors after installation to ensure safety compliance.
When to Hire a Professional
While many homeowners complete the installation of LiftMaster 8500 wall mount openers on their own, there are cases where professional help is best, such as:
- Inadequate tools or experience
- Garage doors that are unbalanced
- Non-compatible torsion systems
- Need for advanced programming or electrical rerouting
Hiring a certified LiftMaster technician ensures the opener is installed to code and under warranty.
Conclusion: Take Back Your Garage With LiftMaster 8500
Now that you’ve learned how to install LiftMaster 8500 wall mount garage door opener, you’re on your way to a quieter, more efficient, and smarter garage. This space-saving solution is not only practical but also modernizes your home and increases its value.
While the installation process is detailed, it’s entirely manageable with the right tools, instructions, and patience. Take your time, follow safety protocols, and don’t hesitate to ask for help if needed. Once installed, you’ll wonder why you didn’t make the switch sooner.


Leave a Reply