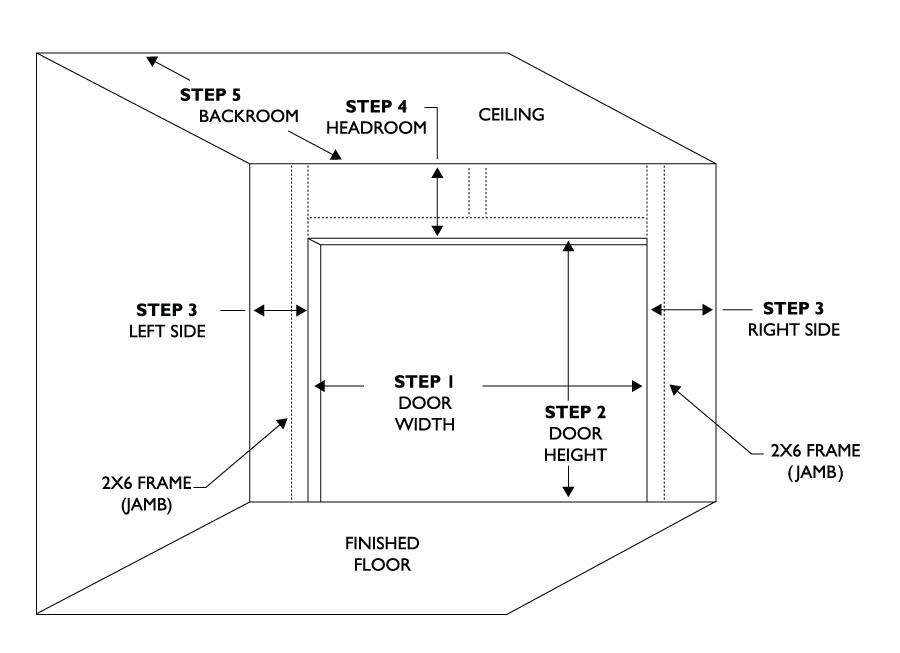
When it comes to installing a new garage door, one of the critical factors to consider is the rough opening. The rough opening is the framed space in your garage wall where the door will be installed. For a 10×10 garage door, getting the rough opening dimensions right is essential for a seamless and trouble-free installation. In this guide, we’ll walk you through the steps to create the perfect rough opening for your 10×10 garage door.
Understanding the Importance of a Proper Rough Opening:
Precision Matters A proper rough opening ensures that your garage door fits snugly and operates smoothly. If the opening is too small, the door won’t fit, and if it’s too large, you risk drafts, security issues, and potential damage to the door during operation.
Step-by-Step Guide to Create the Rough Opening:
Measure Twice, Cut Once Creating the rough opening for your 10×10 garage door requires careful planning and precise measurements. Here are the steps to follow:
1. Gather Your Tools and Materials:
- You’ll need a tape measure, level, framing square, circular saw, reciprocating saw, framing nails, and safety equipment like gloves and goggles.
2. Measure the Door:
- Begin by measuring the actual width and height of your 10×10 garage door. These measurements will be crucial for creating the rough opening.
3. Determine the Header Size:
- The header is the horizontal beam above the door that carries the load of the wall above. Consult your local building codes or a structural engineer to determine the appropriate header size based on your garage door’s weight and the span.
4. Mark the Wall:
- Use a level to mark a straight line on both sides of the wall where the top of the rough opening will be. This line will guide the header installation.
5. Cut and Remove Wall Studs:
- Using a reciprocating saw, carefully cut and remove the wall studs within the marked area. Make sure to follow the measurements precisely.
6. Install the Header:
- Place the header board into the opening, ensuring it’s level and securely fastened to the remaining wall studs on both sides.
7. Frame the Sides and Top:
- Frame the sides and top of the rough opening with additional lumber, creating a sturdy structure to support the garage door.
8. Check for Square:
- Use a framing square to ensure that the rough opening is square and plumb. Adjust the framing as needed.
9. Apply Appropriate Sheathing and Insulation:
- Depending on your climate, consider adding sheathing and insulation to the rough opening for energy efficiency and weather resistance.
10. Install the Garage Door:
- Once the rough opening is complete and the framing is secure, it’s time to install the 10×10 garage door following the manufacturer’s instructions.
Common Mistakes to Avoid:
Preventing Installation Headaches Creating the rough opening for a garage door can be tricky, and there are common mistakes to avoid:
1. Incorrect Measurements:
- Measuring the door opening inaccurately can lead to a rough opening that’s either too large or too small.
2. Insufficient Header:
- Failing to install an adequate header can result in structural issues and potential safety hazards.
3. Poor Framing:
- Inadequate framing or failing to ensure the rough opening is square can lead to problems with the door’s operation.
Conclusion:
Creating the perfect rough opening for your 10×10 garage door is a critical step in ensuring a smooth and successful installation. Take your time, follow the measurements precisely, and consider seeking professional assistance if you’re unsure about any aspect of the process. With the right rough opening, your garage door will not only look great but also function flawlessly for years to come.



Leave a Reply