If your garage door won’t close properly or keeps reversing, faulty sensor wiring is often the culprit. Learning how to wire a garage door opener with sensors can save time, money, and prevent safety risks. This guide walks you through the process clearly, even if you have little electrical experience.
What Are Garage Door Opener Sensors and Why Are They Important?
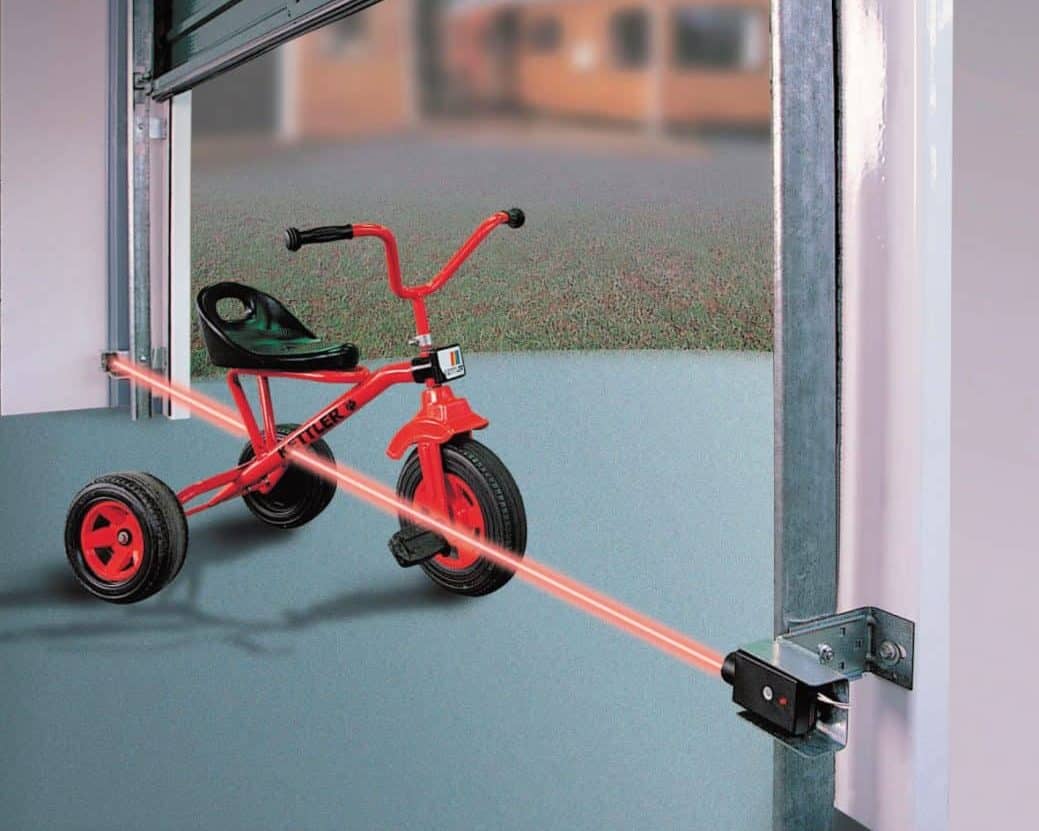
Garage door opener sensors—often called photo-eye sensors—are small safety devices installed near the bottom of your garage door tracks. Their job is simple but critical: prevent the door from closing if something is in the way.
According to the U.S. Consumer Product Safety Commission, safety sensors became mandatory on residential garage door openers in 1993 due to injury risks caused by automatic doors. These sensors use an infrared beam; if it’s interrupted, the door automatically reverses.
Read too: The Complete Guide to Tighten Chain On Garage Door Opener for Smooth Operation
Why correct wiring matters:
- Prevents accidental injuries
- Avoids property damage
- Ensures compliance with safety standards
- Stops frustrating door malfunctions
How Does a Garage Door Sensor System Work?
Garage door sensor systems work using low-voltage electrical wiring connected to the opener’s control board.
Basic operation flow:
- One sensor emits an infrared beam
- The second sensor receives the beam
- The opener allows closing only when the beam is uninterrupted
If wiring is loose, crossed, or damaged, the opener assumes an obstruction exists—even when the path is clear.
For a deeper technical overview, you can reference this explanation on Wikipedia:
👉 https://en.wikipedia.org/wiki/Garage_door_opener
Tools and Materials You Need Before Wiring
Before you begin, gather the following items to avoid interruptions:
| Tool / Material | Purpose |
|---|---|
| Flathead screwdriver | Terminal tightening |
| Wire stripper | Expose copper wire |
| Low-voltage bell wire (22/2) | Sensor connections |
| Ladder | Access opener unit |
| Electrical tape | Secure connections |
| Safety gloves | Hand protection |
Tip: Always use 22-gauge, 2-conductor wire, which is standard for garage door sensors.
Safety Precautions Before You Start Wiring
Before touching any wiring, follow these safety steps:
- Unplug the garage door opener from the power outlet
- Avoid working in wet conditions
- Do not mix sensor wires with high-voltage lines
- Keep children and pets away from the workspace
Although sensor wires are low-voltage, improper handling can still damage the opener board.
How To Wire A Garage Door Opener With Sensors (Step-by-Step Guide)
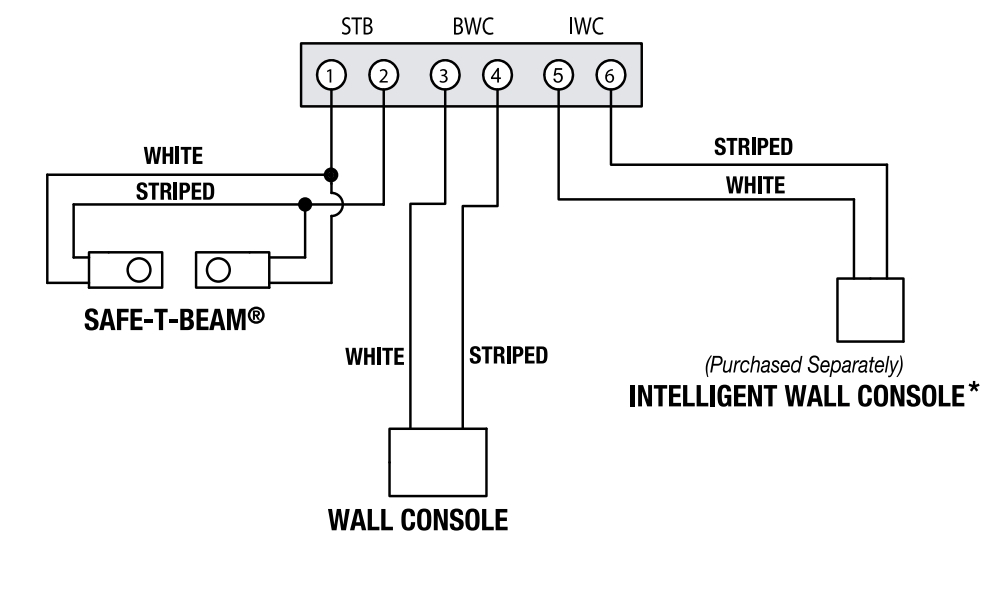
Step 1: Identify the Sensor Wires
Most garage door sensors use two solid-colored wires:
- White (common)
- White with a black stripe (signal)
These wires run from each sensor back to the opener motor unit.
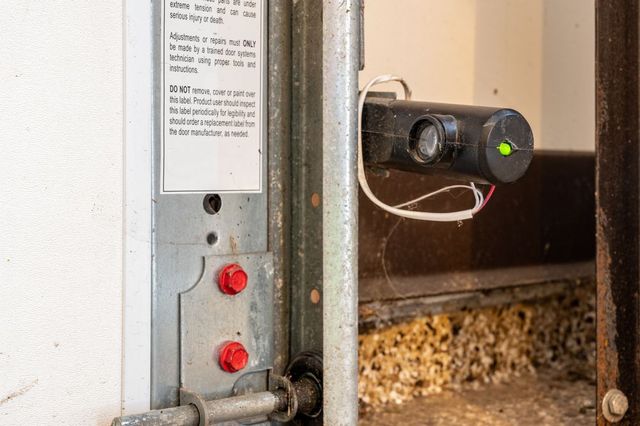
Step 2: Mount the Sensors Correctly
Sensors should be mounted:
- 4–6 inches above the floor
- Directly facing each other
- On both sides of the garage door track
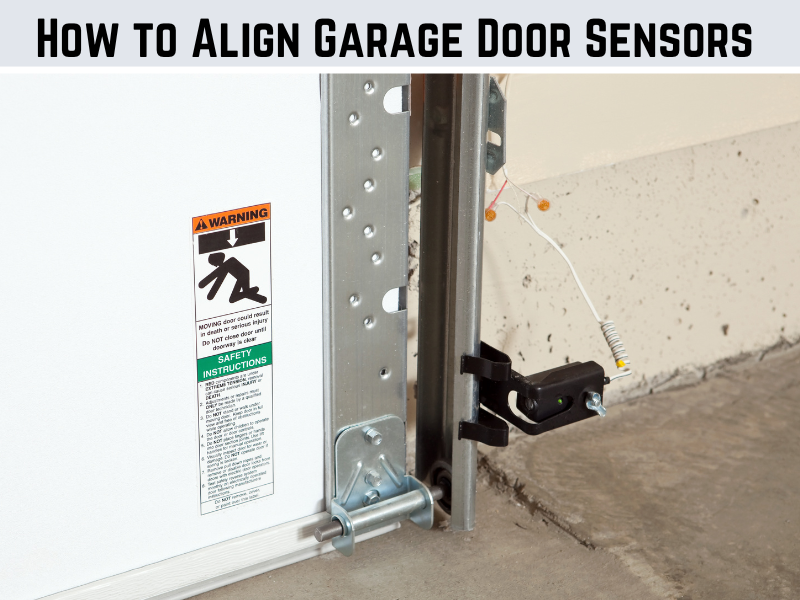
Misaligned sensors will cause blinking lights and door reversal issues.
Step 3: Route the Sensor Wires Safely
Run the wires:
- Along the wall or track
- Using staples or clips (do not pierce wires)
- Away from moving parts
Leave a small slack near the sensor for future adjustments.
Step 4: Strip and Prepare the Wires
Using a wire stripper:
- Remove ½ inch (1.25 cm) of insulation
- Twist copper strands neatly
- Ensure no frayed wires touch other terminals
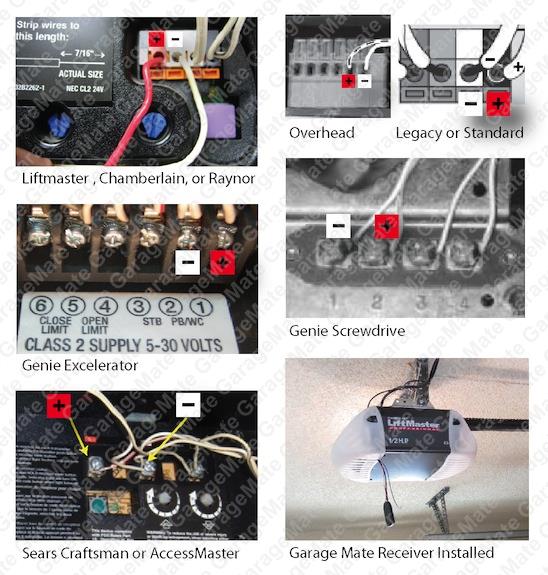
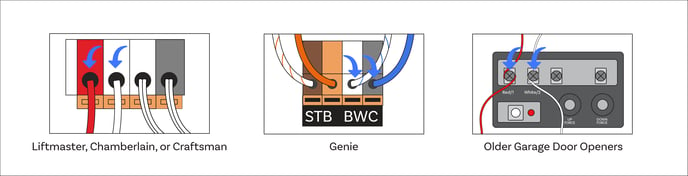
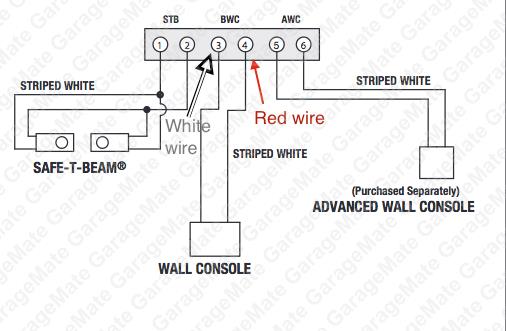
Step 5: Connect Wires to the Garage Door Opener
Locate the sensor terminals on the opener motor (usually labeled “Sensor” or “Safety”).
Typical wiring setup:
- White wires → white terminal
- Striped wires → gray or black terminal
Tighten terminal screws firmly but gently.
Step 6: Test the Sensor System
After wiring:
- Plug the opener back in
- Observe sensor indicator lights
- Solid green or amber = correct wiring
- Blinking or off = wiring or alignment issue
- Close the door and wave an object through the beam
The door should immediately reverse.
Common Wiring Mistakes and How to Avoid Them
Mistake vs Solution Table
| Common Mistake | How to Fix It |
|---|---|
| Crossed sensor wires | Match wire colors correctly |
| Loose terminal screws | Retighten connections |
| Damaged insulation | Replace affected wire section |
| Sensor misalignment | Adjust until lights are solid |
Avoid rushing—most issues stem from small oversights.
Should You DIY or Call a Professional?
DIY Wiring – Pros & Cons
Pros:
- Saves $100–$250 in service fees
- Immediate fix
- Builds homeowner confidence
Cons:
- Risk of incorrect wiring
- Time investment
- Potential opener board damage
If your opener is under warranty or wiring looks severely damaged, professional service may be the safer option.
How Long Does Sensor Wiring Take?
For most homeowners:
- Beginner: 60–90 minutes
- Intermediate DIYer: 30–45 minutes
Proper preparation significantly reduces time spent troubleshooting.
FAQ: How To Wire A Garage Door Opener With Sensors
Q1: Can I use any wire for garage door sensors?
No. Use 22-gauge, 2-conductor low-voltage wire. Thicker or thinner wires may cause signal issues.
Q2: Why are my sensor lights blinking after wiring?
Blinking usually indicates misalignment, crossed wires, or loose terminals.
Q3: Can I splice sensor wires if they are too short?
Yes, but only using proper connectors and electrical tape. Avoid twisting wires without insulation.
Q4: Do garage door sensors work without wiring?
No. Wireless sensors are rare and still require power connections to function.
Q5: Is sensor polarity important?
Yes. Reversing polarity can prevent the opener from recognizing the sensors.
Conclusion
Learning how to wire a garage door opener with sensors is a practical skill that improves safety, reliability, and peace of mind. By following a structured, step-by-step approach, even beginners can complete the task confidently. If this guide helped you, share it with friends or family who might be struggling with garage door issues—you might save them time, money, and frustration.
Leave a Reply