Introduction
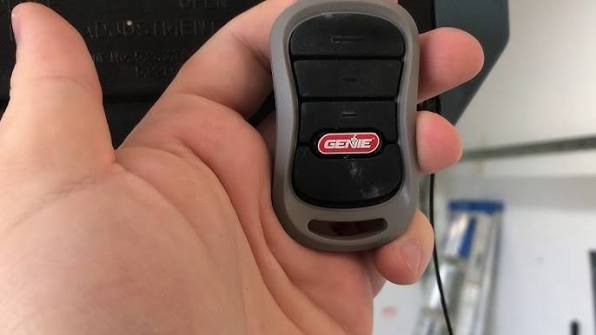
Is there anything more frustrating than standing in your driveway, pressing your garage remote repeatedly, only to watch your car sit idle while the door remains stubbornly closed? You are not alone. Thousands of homeowners face this issue every year, often after a power outage, battery change, or simply due to signal interference. Knowing how to program Genie 3 button garage door opener remotes can save you the cost of a service call and restore your peace of mind instantly.
In this guide, we will walk you through the exact steps to sync your remote with your Genie motor unit. Whether you have an older model with DIP switches or a newer Intellicode system, we have covered the specific procedures you need. Let’s get your garage working smoothly again.
Identifying Your Genie Model Type
Before you begin programming, it is crucial to identify which type of technology your Genie opener uses. Genie has produced two primary types of coding systems over the years, and the programming method differs significantly between them.
1. Intellicode (Rolling Code)
Most Genie openers manufactured after 1997 use Intellicode technology. This is a security feature that changes the code every time you press the button, preventing thieves from “capturing” your signal.
- Visual Cue: Look for a small square button on the motor head (the main unit hanging from your ceiling). It is usually labeled “Learn,” “Program,” or has an icon of a light bulb. The LED next to it is typically purple, blue, or orange.
2. DIP Switches (Fixed Code)
Older models (pre-1997) use a series of tiny switches inside both the remote and the motor unit.
- Visual Cue: Open the battery compartment of your remote. If you see a row of 8–12 tiny switches that can be flipped up or down, you have a DIP switch model.
Expert Tip: If you are unsure, check the model number on the back of your motor unit. A quick search on the Genie Company official support page can confirm your specific model type. For broader technical definitions of garage door safety standards, you can also refer to Wikipedia’s entry on Garage Door Openers.
Step-by-Step: Programming Intellicode Remotes
If your Genie opener uses the modern Intellicode system, follow these precise steps. This process works for most 3-button remotes, including the GIRT-395, GITR-395, and similar models.
Step 1: Prepare the Motor Unit
Locate the motor head unit in your garage. Find the “Learn” or “Program” button. It is usually located near the antenna wire (a hanging yellow or gray wire).
- Press and release the “Learn” button.
- The LED indicator next to the button should turn solid blue or purple (depending on the model). This indicates the unit is in “programming mode.”
- Note: You typically have 30 seconds to complete the next steps before the unit times out.
Step 2: Program the Remote
Take your 3-button remote and stand within 5 feet of the motor unit.
- Press and hold the button you wish to program (e.g., Button 1).
- Keep holding it until the LED on the motor unit blinks twice.
- Release the button immediately after the second blink.
Step 3: Test the Connection
Press the same button on the remote again. The garage door should activate. If the LED on the motor unit flashes once, the code has been successfully accepted.
| Indicator Light Behavior | Meaning | Action Required |
|---|---|---|
| Solid Blue/Purple | Ready to Program | Proceed to press remote button |
| Blinks Twice | Code Accepted | Release remote button |
| Blinks 4 Times | Error/Timeout | Restart the process from Step 1 |
| Off | Not in Program Mode | Press “Learn” button again |
Step-by-Step: Programming DIP Switch Remotes
If you have an older model with physical switches, the process is mechanical rather than digital. This method requires precision.
Step 1: Access the Switches
- Remove the battery cover from your 3-button remote.
- Locate the ladder of DIP switches inside.
- Simultaneously, locate the DIP switches on the motor unit. You may need a ladder to reach the motor head.
Step 2: Match the Positions
This is the most critical step. Every single switch in the remote must match the position of the corresponding switch on the motor unit.
- If Switch #1 on the motor is UP, Switch #1 on the remote must be UP.
- If Switch #5 on the motor is DOWN, Switch #5 on the remote must be DOWN.
Use a small pen or screwdriver to flip the switches carefully. Do not force them, as they are fragile.
Step 3: Secure and Test
- Replace the battery cover on the remote.
- Stand near the door and press the button.
- If the door does not move, double-check each switch position. Even one mismatched switch will prevent the door from operating.
Troubleshooting Common Issues
Even when following instructions perfectly, things can go wrong. Here are the most common reasons why your Genie remote might fail to program and how to fix them.
1. Weak Batteries
This is the number one cause of failure. Even if the LED on the remote lights up, the signal may be too weak to reach the motor unit.
- Solution: Replace the batteries with fresh alkaline ones (usually CR2032 or AA, depending on the model). Avoid using rechargeable batteries as they often have lower voltage output.
2. Interference from LED Bulbs
Recent studies have shown that certain LED light bulbs in garage door opener fixtures can emit radio frequency interference that blocks the remote signal.
- Solution: Try unscrewing the light bulb from the motor unit and testing the remote. If it works, replace the bulb with a Genie-approved LED or a standard incandescent bulb.
3. Locked Control Panel
Some newer Genie models have a “Lock” feature that disables remote programming to prevent unauthorized access.
- Solution: Check your wall console. If the lock icon is lit, hold the lock button for 5 seconds to disable it, then retry programming.
4. Antenna Issues
Ensure the antenna wire on the motor unit is hanging down vertically and is not wrapped around metal brackets or buried in insulation. Metal objects can block the signal.
FAQ Section
Q1: Can I program a universal remote to my Genie 3-button opener?
Yes, most universal remotes (like those from Chamberlain or Craftsman) are compatible with Genie Intellicode systems. You will need to follow the universal remote’s specific instructions, which usually involve entering a brand code (often “009” or “056” for Genie) before syncing.
Q2: How many remotes can I program to one Genie opener?
Most Genie Intellicode openers can store up to 7 to 10 different remote codes. However, this varies by model. If you reach the limit, you may need to clear all codes and reprogram them. To clear codes, hold the “Learn” button for 10 seconds until the LED goes out.
Q3: Why does my remote work close to the door but not from my car?
This is likely a range issue caused by interference or weak batteries. First, replace the batteries. If the problem persists, check for nearby sources of interference, such as large metal structures, high-voltage lines, or neighboring Wi-Fi routers operating on similar frequencies.
Q4: What do I do if the “Learn” button doesn’t light up?
If the LED does not illuminate when you press the “Learn” button, the motor unit may not be receiving power, or the internal circuit board may be faulty. Check your home’s circuit breaker. If the power is on, you may need to contact Genie customer support for a repair kit.
Q5: Is it safe to leave the garage door opener in programming mode?
No. The unit stays in programming mode for only about 30 seconds. After that, it automatically exits the mode for security reasons. If you take longer than 30 seconds, simply press the “Learn” button again to restart the timer.
Q6: Can I program my 3-button remote to control a second door?
Only if you have a second Genie opener installed. Each button on a multi-button remote can be programmed to a different opener. Simply repeat the programming steps for each button, targeting the respective motor unit for each door.
Conclusion
Learning how to program Genie 3 button garage door opener remotes is a straightforward task that empowers you to maintain your home’s convenience without relying on expensive technicians. Whether you are dealing with a modern Intellicode system or a vintage DIP switch model, the key lies in identifying your hardware and following the steps precisely.
By keeping your batteries fresh, minimizing interference, and understanding your specific model type, you can ensure reliable access to your garage for years to come.
Did this guide help you get your garage door working again? If so, please share this article with friends or family who might be struggling with their own garage remotes. Don’t forget to bookmark this page for future reference!



Leave a Reply