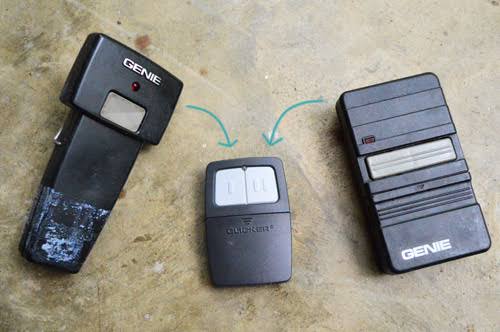
Have you ever stared at your aging garage door opener, wondering why it no longer responds to your remote? If your system relies on the classic mechanical dip switches, you are not alone. Many homeowners struggle with these older systems when remotes fail or security is compromised. Learning how to program garage door opener with dip switches is a straightforward process that can save you hundreds of dollars in replacement costs. This guide will walk you through the exact steps to sync your remote and secure your home.
Understanding Dip Switch Technology in Garage Openers
Before diving into the programming steps, it is essential to understand what you are working with. Dip switches, short for “dual in-line package” switches, were the standard for garage door openers from the 1970s through the early 2000s. Unlike modern rolling-code systems that change their encryption every time you press the button, dip switches use a fixed binary code.
These small toggle switches create a unique pattern of “on” and “off” positions. For your remote to communicate with the motor unit, the pattern inside the remote must match the pattern inside the opener exactly. While this technology is considered obsolete by today’s cybersecurity standards, it remains reliable for millions of households across the United States.
According to historical technical documentation, most dip switch systems utilize 8 to 12 switches, allowing for thousands of possible combinations. However, because the code never changes, they are vulnerable to “code grabbing” attacks. If you are concerned about security, consider upgrading to a modern smart opener after you get your current system working. For now, let’s focus on getting your door operational again.
Tools and Safety Precautions You Need
Programming your garage door opener is a low-risk DIY task, but safety should always come first. You do not need advanced technical skills, but having the right tools will make the job easier.
Required Tools:
- A sturdy ladder (ensure it is fully opened and stable).
- A small flathead screwdriver or a pen (to flip tiny switches).
- A fresh battery for your remote control (usually 12V or 9V).
- A flashlight (garage ceilings are often dim).
Safety Warning: Always disconnect the power to the garage door opener before opening the motor housing if you need to access internal components. Never attempt to adjust the springs or cables of the garage door itself; those are under high tension and require a professional.
Step-by-Step Guide: How to Program Garage Door Opener With Dip Switches
The process of syncing your remote is logical and precise. Follow these steps carefully to ensure success.
Step 1: Locate the Dip Switches on the Motor Unit
First, you need to find the brain of your system. Look for the motor unit hanging from your garage ceiling. There will be a light cover or a plastic panel on the back or side of the unit. Remove this cover to reveal the circuit board.
Look for a row of small, tiny switches. They are usually numbered 1 through 8 or 1 through 12. These are your dip switches. Note their current positions. Some may be flipped up (ON), and others down (OFF). Write down this pattern or take a photo with your phone for reference.
Step 2: Access the Dip Switches on the Remote Control
Next, grab your handheld remote. Open the battery compartment. In many older models, the dip switches are located directly beneath the battery. In some cases, you may need to unscrew the casing of the remote to access them.
Ensure the remote has a fresh battery. Weak batteries are the most common reason for programming failures. If the battery is older than a year, replace it before proceeding.
Step 3: Match the Switch Patterns Exactly
This is the critical step. Your goal is to make the remote’s switch pattern identical to the motor unit’s pattern.
- Look at the motor unit’s switches.
- Flip the switches in your remote to match each position exactly.
- If switch #1 is UP on the motor, it must be UP on the remote.
- If switch #5 is DOWN on the motor, it must be DOWN on the remote.
Pro Tip: Double-check every single switch. One mismatched switch will prevent the door from opening. It is helpful to have a friend hold the ladder while you verify the positions.
Step 4: Test the Connection
Once the patterns match, replace the cover on the motor unit and close the remote’s battery compartment. Stand within 10 feet of the garage door and press the button on your remote.
If the door opens, congratulations! You have successfully programmed your device. If the door does not respond, do not panic. Repeat the process, paying close attention to switches that may be stuck in the middle position. Ensure they are firmly clicked into either ON or OFF.
Troubleshooting Common Dip Switch Issues
Even with careful programming, issues can arise. Here are the most common problems and their solutions.
| Problem | Possible Cause | Solution |
|---|---|---|
| Remote not working | Dead battery | Replace the battery with a new one. |
| Intermittent response | Dirty contacts | Clean the battery terminals with a dry cloth. |
| No response at all | Mismatched switches | Re-verify every switch position against the motor unit. |
| Range is very short | Interference | Move away from LED bulbs or Wi-Fi routers near the opener. |
If you have matched the switches correctly and the remote still fails, the receiver board in the motor unit may be damaged. In this case, you might need to replace the entire logic board or consider upgrading the system.
Why Consider Upgrading From Dip Switches?
While learning how to program garage door opener with dip switches is useful for maintenance, it is worth noting the limitations of this technology. Dip switches use a static code. This means that once someone learns your code, they can replicate it indefinitely.
Modern garage door openers use rolling code technology. This system generates a new code every time you press the button, making it nearly impossible for thieves to intercept and reuse the signal. According to Wikipedia’s entry on garage door openers, rolling codes became the industry standard in the mid-1990s due to security concerns.
If you plan to stay in your home long-term, investing in a new opener with smart capabilities and rolling codes is a wise decision. However, for rental properties or temporary fixes, dip switches remain a viable option.
FAQ Section
Can I program a universal remote to a dip switch opener?
Yes, most universal remotes designed for older systems come with adjustable dip switches. You simply set the switches on the universal remote to match the pattern on your motor unit, just as you would with the original remote.
What if my dip switches are broken or missing?
If the physical switches are damaged, you can sometimes use a small piece of foil or wire to bridge the contacts for an “ON” position, or leave them open for “OFF.” However, this is a temporary fix. Replacing the remote or the logic board is a more reliable solution.
How many combinations do dip switches offer?
An 8-switch system offers 256 combinations (28). A 12-switch system offers 4,096 combinations (212). While this seems like a lot, it is significantly less secure than modern digital encryption.
Do I need to reset the motor unit before programming?
No, unlike modern smart openers, dip switch systems do not require a “learn button” reset. The communication is purely mechanical based on the switch positions. As long as the patterns match, the system will work.
Why does my remote work closer to the door but not from the driveway?
This is likely a battery issue or interference. Old dip switch remotes operate on specific radio frequencies that can be disrupted by LED light bulbs in the garage opener. Try changing the battery first. If that fails, try replacing the garage opener’s light bulb with an incandescent one to test for interference.
Conclusion
Mastering how to program garage door opener with dip switches is a valuable skill for any homeowner with an older system. By understanding the simple binary logic behind these switches, you can quickly restore functionality to your garage door without calling a technician. Remember, the key is precision: ensure every switch on your remote matches the motor unit exactly.
While dip switches are outdated, they are still reliable for basic use. However, keep security in mind. If you notice any suspicious activity or want peace of mind, consider upgrading to a modern rolling-code system.
Did this guide help you get your garage door working again? Share this article with friends or neighbors who might be struggling with their old openers. Let’s keep our garages secure and functional, one switch at a time!



Leave a Reply