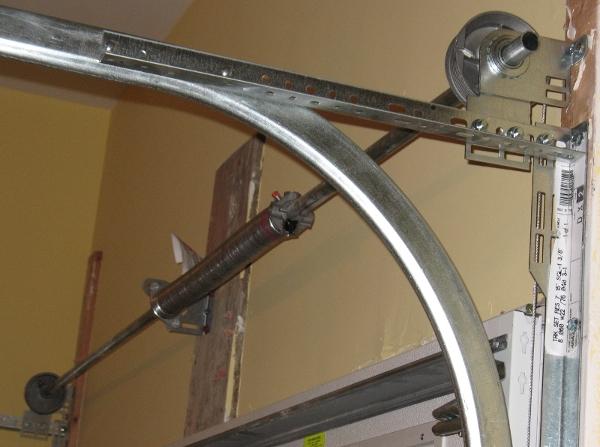
Garage door torsion springs are responsible for lifting and lowering your garage door. They are under a lot of tension, so it is important to replace them if they are damaged or broken. Replacing a garage door torsion spring is a DIY project that can save you money. In this article, we will walk you through the steps on how to install a single torsion spring on a garage door.

Tools and Materials
- New torsion spring
- Torque wrench
- Winding bar
- Safety glasses
- Gloves
- Ladder
- Level
Safety Precautions
- Always wear safety glasses and gloves when working with garage door springs. Torsion springs are under a lot of tension, and if they break, they can cause serious injury.
- Never work on a garage door spring that is under tension. To do this, you will need to disconnect the garage door from the opener.
- Have a helper nearby in case of an emergency. If a torsion spring breaks, it is important to have someone nearby to help you.
Read too: How To Change Battery In Garage Door Opener Liftmaster
Step 1: Disconnect the Garage Door
Before you can replace the torsion spring, you need to disconnect the garage door from the opener. To do this, follow these steps:
- Turn off the power to the garage door opener. This can be done by unplugging the opener or turning off the breaker that powers it.
- Locate the cable release handle. It is usually located on the side of the garage door opener.
- Pull the cable release handle down to disconnect the garage door from the opener.
- Use a ladder to raise the garage door so that it is about 6 inches off the ground. This will give you enough clearance to work on the spring.
Step 2: Remove the Old Torsion Spring
Once the garage door is disconnected, you can remove the old torsion spring. To do this, follow these steps:
- Locate the anchor brackets. They are the two brackets that hold the torsion spring in place.
- Use a wrench to loosen the set screws that secure the anchor brackets to the garage door frame.
- Carefully remove the old torsion spring from the anchor brackets.
Step 3: Install the New Torsion Spring
Now it is time to install the new torsion spring. To do this, follow these steps:
- Align the new torsion spring with the anchor brackets. Make sure that the spring is oriented in the correct direction.
- Use a wrench to tighten the set screws that secure the anchor brackets to the garage door frame.
- Use a winding bar to wind the new torsion spring.
- Use a torque wrench to tighten the set screws that secure the winding bar to the spring.
Step 4: Reattach the Garage Door
Once the new torsion spring is installed, you can reattach the garage door to the opener. To do this, follow these steps:
- Lower the garage door to the ground.
- Reconnect the garage door to the opener by pulling the cable release handle up.
- Turn on the power to the garage door opener.
Step 5: Test the Garage Door
Once the garage door is reconnected to the opener, you need to test it to make sure it works properly. To do this, follow these steps:
- Open and close the garage door several times.
- Make sure the garage door opens and closes smoothly.
- Check for any signs of damage or wear.
Conclusion
Install single torsion spring on garage door is a relatively easy DIY project. By following the steps in this article, you can save yourself money and do the job yourself.
Additional Tips
- When purchasing a new torsion spring, make sure to get one that is the same size and type as the old spring. This is important to ensure that the garage door opens and closes properly.
- If you are not comfortable working with garage door springs, it is always best to hire a professional. Working with garage door springs can be dangerous, so it is important to have the proper training and experience.
- Keep your garage door springs properly lubricated to extend their lifespan. You can use a garage door lubricant to apply a thin coat of lubricant to the spring.


Leave a Reply