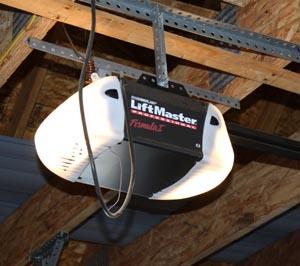
Is your Liftmaster garage door refusing to close, leaving you frustrated and worried about security? Don’t panic – there are several potential reasons why this may be happening, and solutions are available. In this comprehensive guide, we’ll explore the possible causes behind why your Liftmaster garage door won’t close and provide step-by-step instructions on how to troubleshoot and resolve the issue.

Understanding the Issue: My Liftmaster Garage Door Won’t Close
When your Liftmaster garage door won’t close, it can be attributed to various factors, including:
- Misaligned Safety Sensors: Liftmaster garage doors are equipped with safety sensors that detect obstructions in the door’s path. If these sensors are misaligned or obstructed themselves, the door may refuse to close as a safety precaution.
- Blocked Tracks: Debris, dirt, or objects obstructing the tracks can prevent the garage door from closing properly. Even small obstructions can trigger the door to stop its downward movement.
- Faulty Remote Control: If the remote control or wall-mounted button is malfunctioning, it may not send the signal to close the door effectively. This can happen due to dead batteries, signal interference, or other issues with the remote or control unit.
- Broken Springs or Cables: Springs and cables play a crucial role in the operation of the garage door. If they’re broken or damaged, the door may not close properly or may stop midway through the closing process.
Troubleshooting Steps: How to Fix It
Now that we’ve identified potential causes, let’s discuss how to troubleshoot and fix the issue of a Liftmaster garage door not closing:
1. Check the Safety Sensors
- Inspect the safety sensors located near the bottom of the garage door tracks. Ensure that they’re aligned properly and free from any obstructions.
- Clean the sensors with a soft cloth to remove any dirt, dust, or debris that may be interfering with their operation.
- Test the door again after realigning the sensors to see if it closes properly.
2. Clear the Tracks
- Examine the tracks on both sides of the garage door for any debris, such as leaves, dirt, or small objects.
- Use a damp cloth or brush to clean the tracks thoroughly, removing any obstructions that could be preventing the door from closing.
- Check for any bends or misalignments in the tracks that may need to be corrected.
Read too: The Complete Guide to Tighten Chain On Garage Door Opener for Smooth Operation
3. Test the Remote Control
- Replace the batteries in the remote control to ensure they’re not the cause of the problem.
- If you have multiple remotes, try using a different one to see if the issue persists.
- If the door still won’t close with the remote, try using the wall-mounted button to determine if the problem lies with the remote or the control unit.
4. Inspect Springs and Cables
- Visually inspect the springs and cables for any signs of damage, such as fraying, rust, or breakage.
- If you notice any issues with the springs or cables, it’s best to contact a professional garage door technician to handle repairs or replacements.
- Attempting to repair or replace garage door springs and cables yourself can be dangerous and should only be done by trained professionals.
Conclusion
In conclusion, if your Liftmaster garage door won’t close, there are several potential causes to consider. By following the troubleshooting steps outlined above, you can identify and address the issue, restoring smooth operation to your garage door. However, if you’re unsure or uncomfortable performing these tasks yourself, it’s always best to consult a professional garage door technician for assistance.


Leave a Reply