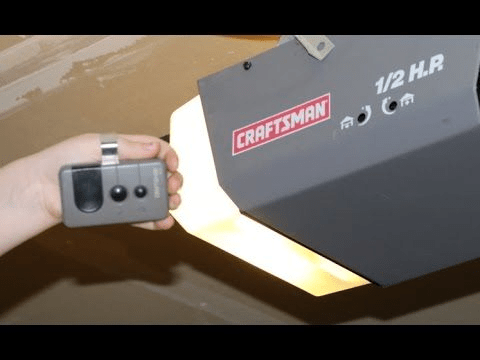
When it comes to reliable and powerful garage door openers, the Craftsman 1/2 HP model has been a long-time favorite among homeowners. Whether you’re replacing an old unit or installing a new one for the first time, following the correct Craftsman 1 2 Hp Garage Door Opener Installation Instructions ensures safety, efficiency, and long-term durability.
This guide is designed to walk you through the entire process of installing your Craftsman 1/2 HP garage door opener. From preparation and safety tips to step-by-step installation and troubleshooting, you’ll gain all the knowledge you need to complete the project confidently.
Read too: How to Perform a Chamberlain Garage Door Opener Code Change? Mastering Security
Why Choose the Craftsman 1/2 HP Garage Door Opener?
Before diving into installation, let’s explore why this opener remains popular:
- Strength – The 1/2 HP motor provides enough power for most standard residential garage doors.
- Durability – Craftsman is known for building long-lasting equipment.
- Safety Features – Includes auto-reverse technology and photoelectric sensors.
- Ease of Use – Compatible with wireless remotes, keypads, and smart home setups.
- Value – Offers reliable performance at a reasonable price point.
Understanding these benefits makes following the Craftsman 1 2 Hp Garage Door Opener Installation Instructions worth the effort.
Tools and Materials You’ll Need
Before starting, gather the following tools:
- Power drill with bits
- Stepladder
- Adjustable wrench
- Tape measure
- Screwdrivers (flathead and Phillips)
- Level
- Hammer
- Pliers
- Safety glasses and gloves
Also, make sure your installation kit includes:
- Motor unit
- Rail assembly
- Chain or belt drive system
- Header bracket
- Door bracket and arm
- Safety sensors
- Mounting hardware
- Wall control and remote(s)
Safety Precautions
Garage door opener installation involves both electrical and mechanical work. To avoid accidents:
- Disconnect power before installation.
- Check that your garage door is properly balanced and functional.
- Always use a stable ladder.
- Wear safety glasses and gloves.
- Do not attempt installation if the door springs are damaged—call a professional instead.
Step-by-Step Craftsman 1 2 Hp Garage Door Opener Installation Instructions
Step 1: Assemble the Rail
Connect the rail sections together as directed in the manual. Install the chain or belt along the rail, ensuring proper alignment. Attach the trolley that will move along the rail to operate the door.
Step 2: Connect the Rail to the Motor Unit
Slide the assembled rail into the motor head and secure it using bolts from the hardware kit. Confirm that the connection is stable.
Step 3: Install the Header Bracket
Above the center of the garage door, mount the header bracket securely into a structural support. This piece holds the front end of the rail in place.
Step 4: Position the Rail and Motor
Lift the rail assembly and place it onto the header bracket. Then, position the motor unit on the ceiling and attach it to ceiling joists using angle brackets. Ensure the unit is level and tightly secured.
Step 5: Attach the Door Bracket and Arm
Mount the door bracket onto your garage door. Connect the curved and straight sections of the opener arm to the trolley and door bracket. Verify that the arm moves freely without obstruction.
Step 6: Install Safety Sensors
Craftsman openers come with photoelectric safety sensors. Mount these near the bottom of the garage door tracks, about 6 inches above the floor, one on each side. Align them properly so the opener will function correctly.
Step 7: Wire the Wall Control and Sensors
Run the provided wires from the motor unit to the wall-mounted control and safety sensors. Use staples or clips to secure them neatly along the wall. Follow the color-coded wiring diagram included in your manual.
Step 8: Plug in and Program the Opener
Restore power to the opener by plugging it into an outlet. Program your remote controls and keypads according to the instructions, usually by pressing the “Learn” button on the motor unit.
Step 9: Set Travel and Force Limits
Adjust the up and down travel limits so the door opens and closes fully without slamming. Also, fine-tune the force settings to prevent the door from exerting too much pressure if it encounters an obstruction.
Step 10: Test the Opener
Test the opener several times to ensure smooth and safe operation. Check that the door stops when it encounters an object and that the safety sensors function properly.
Troubleshooting Common Problems
Even with correct installation, you may encounter some issues. Here are solutions:
- Door won’t close fully – Adjust the down travel limit.
- Remote doesn’t work – Reprogram the remote or replace batteries.
- Safety sensors malfunction – Realign them and clean the lenses.
- Unusual noise – Tighten bolts and lubricate moving parts.
- Chain or belt too loose – Adjust the tensioner as per the manual.
Maintenance Tips
After completing the Craftsman 1 2 Hp Garage Door Opener Installation Instructions, routine maintenance is essential:
- Lubricate moving parts every 6 months.
- Inspect the chain or belt tension regularly.
- Test the safety sensors monthly.
- Replace remote batteries annually.
- Check the door’s balance by disconnecting the opener and lifting the door manually.
DIY vs. Professional Installation
While many homeowners successfully complete the installation, hiring a professional might be a better choice if:
- You’re uncomfortable with electrical wiring.
- Your garage door is unusually heavy or unbalanced.
- You lack the necessary tools or time.
A professional ensures proper setup and often provides a warranty on the installation.
Conclusion
Installing your opener correctly is crucial for safety and performance. By following these Craftsman 1 2 Hp Garage Door Opener Installation Instructions, you’ll save money, gain confidence, and enjoy years of reliable use.
Whether you decide to do it yourself or hire a professional, the Craftsman 1/2 HP garage door opener remains one of the best options for homeowners seeking power, reliability, and convenience.


Leave a Reply