Garage door openers have become essential for homeowners, offering both convenience and security. Among the most popular models, the Craftsman 1/2 HP Garage Door Opener is known for its strength, reliability, and easy-to-use features. A key component that makes it simple to program remotes and keypads is the Craftsman 1 2 Hp Garage Door Opener Learn Button.
If you’re a homeowner struggling to program a remote, sync a keypad, or simply want to understand how the Learn Button works, this guide will provide a detailed explanation. You’ll learn where to find the Learn Button, how to use it, common troubleshooting tips, and why this small button is such a vital feature.
Read too: How to Perform a Chamberlain Garage Door Opener Code Change? Mastering Security
What Is the Craftsman 1 2 Hp Garage Door Opener Learn Button?
The Learn Button is a programming feature built into Craftsman garage door openers. It allows you to easily connect new remotes, keypads, or even vehicles with HomeLink systems to your opener. Instead of complicated wiring or manual coding, the Learn Button uses wireless communication to “teach” the opener which devices are authorized to control it.
Key functions of the Learn Button include:
- Programming Remotes – Sync handheld remotes in seconds.
- Keypad Setup – Program a wireless keypad with a custom code.
- HomeLink Integration – Sync your vehicle’s built-in garage opener system.
- Erasing Codes – Clear out old remotes or lost devices for better security.
Locating the Learn Button
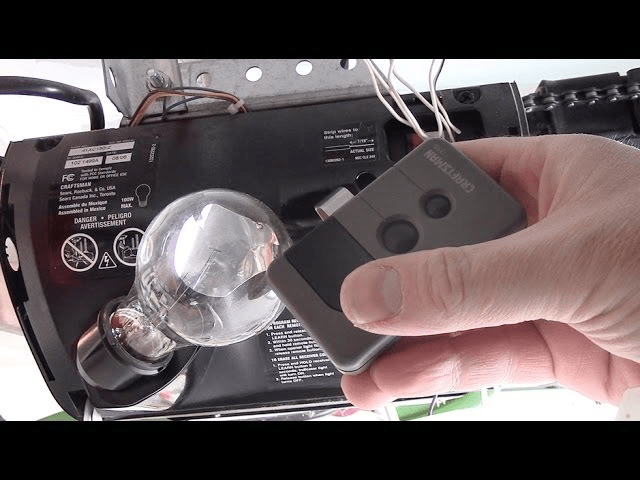
On most Craftsman 1/2 HP garage door openers, the Learn Button is found on the motor unit hanging from the ceiling of your garage. Typically, it is located near the back panel of the opener, close to the antenna wire and light bulb housing.
The button is often color-coded (red, purple, yellow, or green depending on the model and year). Knowing the color can also help you identify compatibility with certain remotes.
Why the Learn Button Is Important
The Craftsman 1 2 Hp Garage Door Opener Learn Button plays a vital role in security and convenience:
- Quick Programming – Adding a new remote or keypad takes only seconds.
- Enhanced Security – By resetting or clearing old codes, you prevent unauthorized access.
- Flexibility – Compatible with universal remotes and newer wireless technologies.
- Home Automation – Essential for connecting smart home or vehicle-based systems.
How to Program a Remote Using the Craftsman 1 2 Hp Garage Door Opener Learn Button
Here’s the step-by-step process for programming a remote:
- Locate the Learn Button on the opener’s motor unit.
- Press and release the Learn Button. The indicator light will turn on, signaling it’s ready to pair.
- Press the button on your remote control within 30 seconds. The opener light will blink or you’ll hear a click, confirming the programming.
- Test the remote by pressing the button to operate the garage door.
How to Program a Wireless Keypad
If you’re setting up a wall-mounted keypad for keyless entry:
- Press and release the Learn Button on the motor unit.
- Enter your desired 4-digit PIN on the keypad, then press and hold the Enter button.
- Wait for the opener’s light to flash, confirming successful programming.
- Test the keypad by entering your PIN and pressing Enter to open or close the door.
How to Erase Old Remotes or Codes
Sometimes you need to clear old devices—especially if you’ve lost a remote or moved into a new home.
- Hold down the Learn Button for about 6–10 seconds until the indicator light goes out.
- This erases all programmed remotes and keypads.
- Reprogram the devices you want to keep using the steps above.
Craftsman 1 2 Hp Garage Door Opener Learn Button Troubleshooting
Even though the Learn Button is simple to use, problems can sometimes occur. Here are common issues and solutions:
Problem 1: Remote Won’t Program
- Check the remote battery.
- Make sure you pressed the remote button within 30 seconds of pressing the Learn Button.
- Ensure you’re using a compatible remote based on the color of your Learn Button.
Problem 2: Keypad Not Responding
- Reprogram the keypad and confirm you entered the correct PIN.
- Check the keypad’s batteries.
- Reset the opener by holding the Learn Button to clear all codes and start fresh.
Problem 3: Light Doesn’t Blink After Pressing Learn Button
- Unplug the opener for 30 seconds, then plug it back in and try again.
- Inspect wiring and ensure the opener is receiving power.
- If the Learn Button is physically damaged, the logic board may need replacement.
Tips for Using the Learn Button Effectively
- Label Your Remotes – Helps track which ones are programmed.
- Regularly Reset Codes – Boosts security if you suspect a lost or stolen remote.
- Test Monthly – Verify that all remotes and keypads are working properly.
- Upgrade When Necessary – If your system is older, consider updating remotes or keypads for better compatibility.
Maintenance and Safety
Even though the Learn Button simplifies programming, remember:
- Keep remotes out of children’s reach.
- Don’t share your keypad PIN with strangers.
- Perform routine maintenance on your garage door opener, including lubricating moving parts and testing safety sensors.
When to Call a Professional
If your Learn Button isn’t working, or if you’re having repeated programming failures, a professional may be needed. Garage door opener technicians can:
- Replace faulty circuit boards.
- Install compatible remotes or keypads.
- Upgrade your system for better functionality.
Conclusion
The Craftsman 1 2 Hp Garage Door Opener Learn Button may be small, but it plays a powerful role in ensuring both convenience and security for homeowners. Whether you’re programming a remote, setting up a wireless keypad, or clearing old codes, understanding how the Learn Button works gives you full control of your garage door system.
By following the programming steps, troubleshooting common issues, and maintaining your system, you’ll enjoy smooth operation for years to come. And if problems arise, knowing when to call in a professional will help protect your home and garage security.


Leave a Reply