Introduction
Managing multiple garage doors can be a hassle without the right remote. The Craftsman Garage Door Opener 3 Function Compact Remote Control simplifies access by allowing you to control up to three devices with one compact device. This guide helps you program, troubleshoot, and maximize the convenience of your remote safely and efficiently.
What Is the Craftsman 3 Function Compact Remote?
People Also Ask: What does the Craftsman 3 Function Compact Remote do?
The Craftsman 3 Function Compact Remote is designed to:
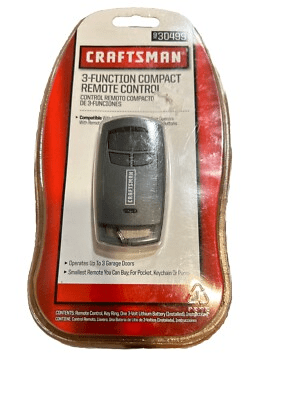
- Operate up to three separate garage doors or devices
- Use rolling code technology for enhanced security
- Fit comfortably in a pocket or attach to a keychain
- Provide long-range wireless control (up to 100 feet)
According to Craftsman technical specifications, using this remote prevents unauthorized access while offering convenient control from anywhere near your garage.
Read too: How To Replace Garage Door Roller Like a Pro? Step-by-Step Guide
Tools and Materials Needed
Before setting up the remote, prepare:
- Your Craftsman 3 Function Compact Remote
- Fresh AAA or lithium batteries
- Ladder (if motorhead access is needed)
- User manual for reference
- Safety gloves for handling electronics
Having all materials ready ensures a smooth and safe setup process.
Step-by-Step Guide: How To Set Up Craftsman 3 Function Remote
People Also Ask: How do I program my Craftsman 3 Function Compact Remote?
Step 1: Locate the Learn Button
- On your Craftsman garage door opener, find the learn/program button on the motorhead.
Step 2: Prepare the Remote
- Insert fresh batteries.
- Press any button to ensure it is not already paired.
Step 3: Enter Programming Mode
- Press the learn button on the opener until the LED flashes.
- Within 30 seconds, press and hold the desired remote button.
- Release when the LED blinks or the motorhead beeps to confirm programming.
Step 4: Test Remote Function
- Press the programmed button to ensure proper operation of the garage door.
- Repeat the steps for the remaining two buttons if controlling multiple doors.
Pro Tip: If the remote fails to program, reset the opener by holding the learn button for 10 seconds, then retry.
Common Issues and Troubleshooting
| Problem | Solution |
|---|---|
| Remote doesn’t work | Check batteries and reprogram |
| Door only responds intermittently | Verify distance, remove obstacles |
| LED doesn’t blink on motorhead | Confirm learn button functionality |
| Multiple doors not syncing | Reprogram each button individually |
Regular testing and maintenance ensure consistent performance and prevent common frustrations.
Maintenance Tips for Craftsman Remote
- Replace batteries every 12 months or sooner if response weakens.
- Keep remote clean and dry to prevent corrosion.
- Avoid dropping or exposing the remote to extreme temperatures.
- Test functionality monthly to ensure reliability.
Proper maintenance ensures your remote operates seamlessly for years.
Safety Considerations
- Always stand clear of the garage door while programming or testing.
- Keep children and pets away from the door area.
- Avoid touching wiring or moving parts during setup.
- Do not attempt programming in wet conditions to prevent electrical hazards.
FAQ Section
Q1: Can this remote control multiple garage doors?
A1: Yes, it can control up to three doors or devices independently.
Q2: How far does the remote signal reach?
A2: Typically up to 100 feet, depending on environmental conditions.
Q3: How do I reset the remote?
A3: Remove batteries for 30 seconds and reinsert, then reprogram as needed.
Q4: Are modern Craftsman remotes compatible with older openers?
A4: Some models are compatible, but check your opener’s manual for rolling code compatibility.
Q5: Can I program multiple remotes at once?
A5: No, each remote button must be programmed individually to avoid signal conflicts.
Q6: What type of batteries does the remote use?
A6: Standard AAA batteries or lithium equivalents, depending on the model.
Conclusion
The Craftsman Garage Door Opener 3 Function Compact Remote Control makes managing multiple doors effortless. By following this step-by-step guide, troubleshooting common issues, and maintaining your remote properly, you ensure reliable and secure operation. Share this guide with friends or family to help them optimize their Craftsman garage door setup!


Leave a Reply