A garage door plays a critical role in your home’s security and functionality. Over time, wear and tear can cause a garage door to become misaligned, noisy, or difficult to open and close. Proper garage door adjustment can solve many of these issues, extending the life of your garage door system and preventing the need for costly repairs. In this comprehensive guide, we’ll walk you through the different types of garage door adjustments, why they are necessary, and how you can perform them yourself.

Why is Garage Door Adjustment Important?
A well-maintained garage door operates smoothly and safely. When your garage door becomes unbalanced or starts to malfunction, it can lead to more significant problems such as motor strain, door jams, or even accidents. Regular garage door adjustment ensures that all components, from the springs to the tracks and sensors, are aligned and functioning properly. Adjusting your garage door can also:
- Prevent damage: A poorly adjusted door can wear down components like the motor, springs, and rollers faster than normal.
- Ensure safety: Misaligned doors can be a safety hazard, especially in households with children or pets.
- Increase convenience: If your door opens or closes unevenly, or if the opener struggles to lift it, making the right adjustments can restore proper function.
- Reduce noise: Garage doors that are out of alignment often make squeaking, grinding, or banging noises. Adjustments can help quiet these sounds.
Read too: Mastering the Art of Adjusting a Chamberlain Garage Door Opener for Smooth Operation and Safety
Common Types of Garage Door Adjustment
There are several different types of adjustments that may be needed over the life of your garage door. Each type addresses a specific problem, and understanding these will help you identify and fix common issues.
1. Garage Door Spring Adjustment
The springs on your garage door play a critical role in its operation, helping to counterbalance the weight of the door. If the springs are not properly adjusted, your garage door may not open or close smoothly.
- Signs you need spring adjustment: If your garage door opens unevenly, slams down when closing, or the opener strains to lift the door, the springs may need adjusting.
- How to adjust the springs: There are two types of garage door springs—torsion springs (mounted horizontally above the door) and extension springs (located along the sides of the door). Torsion springs require more precise adjustments, and it’s often recommended that you leave this job to a professional due to the tension involved. However, if you have experience and the right tools, you can tighten or loosen the spring using a winding bar. For extension springs, you can adjust the tension by moving the spring to a different hook on the bracket.
2. Garage Door Track Adjustment
The tracks on which your garage door runs need to be properly aligned for smooth operation. Over time, these tracks can become bent or misaligned, causing the door to jam, stick, or even come off the track.
- Signs of track problems: If your garage door is moving unevenly, making grinding noises, or gets stuck midway, the tracks may need adjusting.
- How to adjust the tracks: To fix track misalignment, first, check if the tracks are parallel to each other and properly secured to the walls. Loosen the bolts holding the tracks in place, and gently tap them into position using a rubber mallet. Once aligned, tighten the bolts and check if the door operates smoothly.
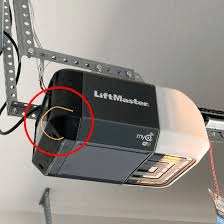
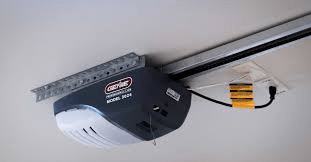
3. Garage Door Opener Limit Adjustment
Garage door openers come with limit switches that control how far the door opens and closes. If the door doesn’t open all the way or closes too far, you may need to adjust the opener limits.
- Signs you need limit adjustments: The door reverses after hitting the floor, doesn’t fully close, or doesn’t open fully.
- How to adjust the limits: Locate the limit adjustment screws on the garage door opener motor (usually labeled “up” and “down”). Use a screwdriver to turn the screws, adjusting how far the door opens or closes. After making small adjustments, test the door’s operation and fine-tune if necessary.
4. Garage Door Sensor Adjustment
Modern garage doors come with safety sensors that prevent the door from closing if something is in its path. If these sensors are out of alignment, the door may refuse to close, or it may reverse after coming into contact with an object.
- Signs of sensor issues: The garage door stops and reverses, or it won’t close at all.
- How to adjust the sensors: First, check if the sensors (located at the base of the garage door tracks) are aligned and free from dirt. If they’re out of alignment, loosen the screws holding them in place and gently adjust them until the LED lights on both sensors are solid, not blinking. Tighten the screws and test the door.
5. Garage Door Cable Adjustment
Garage door cables help lift the door smoothly by distributing tension from the springs. Over time, these cables can become frayed or lose tension, causing operational issues.
- Signs of cable problems: The door opens unevenly, makes squeaking noises, or slams down quickly when closing.
- How to adjust the cables: First, inspect the cables for signs of wear. If they are frayed, replace them immediately. If the tension is the issue, adjust the cable drum located near the door springs. Turn the drum to either increase or decrease cable tension as needed.
How to Perform a Garage Door Adjustment
While some garage door adjustment tasks can be done by the average homeowner, others—like adjusting torsion springs—are dangerous and should be left to professionals. Here’s a step-by-step guide for performing some of the more straightforward adjustments:
1. Gather Your Tools
You’ll need the following tools to make most basic garage door adjustments:
- A ladder
- Wrenches
- Pliers
- Screwdrivers
- Level
- Safety goggles and gloves
2. Ensure Safety First
Before you begin, always disconnect the garage door opener from its power source. This will prevent the door from moving while you’re making adjustments. Additionally, when working with springs or cables, wear protective gear to avoid injury from sudden releases of tension.
3. Adjusting the Garage Door Tracks
- Open the garage door and inspect the tracks for any visible misalignment or obstructions.
- Loosen the track bolts using a wrench, but do not remove them completely.
- Gently tap the tracks back into alignment using a mallet, ensuring they are parallel to each other and the door.
- Tighten the bolts and test the door’s operation.
4. Adjusting the Garage Door Opener Limits
- Locate the limit screws on the garage door opener motor.
- Using a flathead screwdriver, turn the screws clockwise to increase the door’s travel distance, or counterclockwise to decrease it.
- Test the door after each adjustment until the desired open/close positions are achieved.
5. Adjusting Garage Door Springs and Cables
- For extension springs, adjust the tension by moving the spring to a different notch on the hanger bracket.
- For torsion springs, use a winding bar to tighten or loosen the spring’s tension carefully.
- Adjust cable tension by turning the cable drum and securing it in place.
Common Garage Door Adjustment Mistakes to Avoid
When making adjustments to your garage door, it’s easy to make mistakes that could lead to further problems. Here are a few common errors to avoid:
- Ignoring Safety Precautions: Working on a garage door involves risks, especially with the tension in springs and cables. Always follow safety guidelines to prevent injury.
- Overtightening Springs or Cables: Adding too much tension can cause damage to the door system or make it difficult to operate. Make small adjustments and test the door after each tweak.
- Not Aligning Tracks Properly: Misaligned tracks can cause significant wear on rollers and may cause the door to derail. Use a level to ensure the tracks are perfectly aligned before tightening the bolts.
- Skipping Professional Help: While many adjustments can be done on your own, some, such as torsion spring adjustments, are best left to professionals to avoid injury or damage to the door.
When to Call a Professional
Not all garage door issues can be solved with a quick DIY adjustment. If your garage door is severely misaligned, the springs are damaged, or the motor struggles to lift the door, it may be time to call in a professional. A technician can quickly identify the underlying problem and make necessary repairs or adjustments, ensuring the safety and longevity of your garage door system.
Conclusion
Maintaining a smooth and functional garage door requires regular garage door adjustment. From spring tension and track alignment to opener limits and sensor calibration, each adjustment plays a critical role in the door’s overall performance. By performing routine checks and fixes, you can extend the life of your garage door, reduce noise, and ensure it operates safely. However, for complex adjustments—especially those involving springs or cables—don’t hesitate to seek professional help to avoid potential hazards.
Leave a Reply