Garage Door Opener Overload Reset – A properly functioning garage door opener is essential for convenient and safe access to your garage. However, it’s not uncommon for a garage door opener to become overloaded, leading to slow operation, strange noises, or even complete failure. In such cases, it becomes necessary to reset the garage door opener to resolve the overload issue. This article will provide you with a step-by-step guide on how to reset an overloaded garage door opener, ensuring smooth and reliable operation.
Section 1: Understanding Garage Door Opener Overload
When a garage door opener becomes overloaded, it means that it is experiencing excessive strain or encountering malfunctions. The primary causes of overload include an excessively heavy garage door, damaged or misaligned components, or an issue with the opener itself. Recognizing the signs of an overloaded opener is crucial to addressing the problem promptly and preventing further damage. If your garage door operates slowly, makes unusual noises, or fails to function altogether, it’s likely experiencing overload.
Section 2: Preparing for the Reset
Before you begin the reset process, it’s important to gather the necessary tools and materials. You may need a ladder, a pair of pliers, and the owner’s manual of your garage door opener. It’s also crucial to ensure your safety throughout the procedure. Make sure to disconnect the power source of the opener and follow all safety precautions mentioned in the manual. If you are unsure about any aspect of the reset process, consider contacting a professional for assistance.
Section 3: Step-by-Step Reset Process
Step 1: Powering Down the Opener
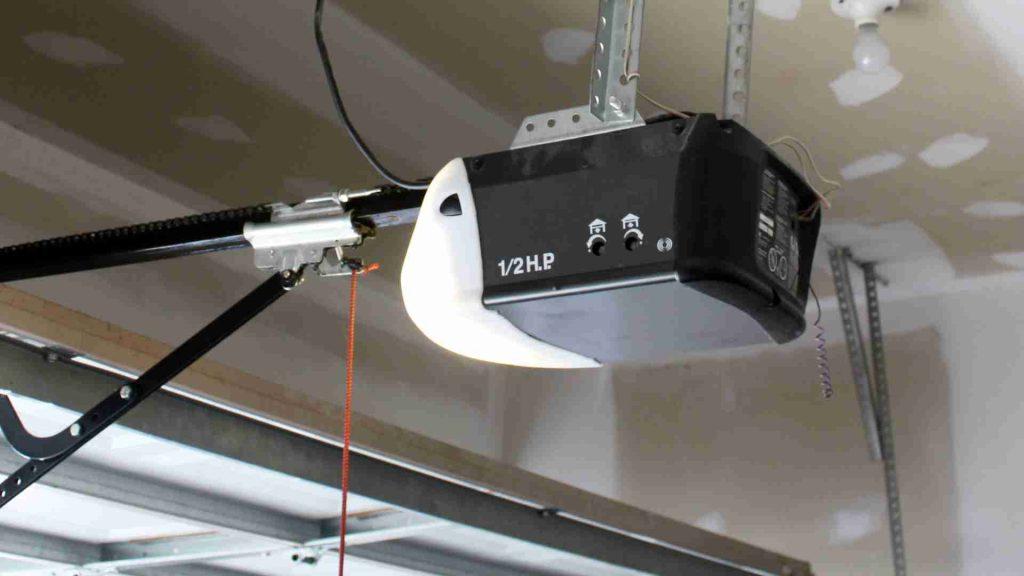
To begin the reset process, locate the power source of your garage door opener. It is typically a cord plugged into an electrical outlet or a dedicated circuit. Switch off the power by unplugging the cord or turning off the circuit breaker connected to the opener. This step is vital for your safety as it prevents any electrical mishaps during the reset.
Step 2: Releasing the Door from the Opener
Next, you need to disconnect the garage door from the opener to relieve the strain. Look for the manual release handle or cord, usually hanging from the opener or located near the garage door. Pull the handle or cord to disengage the opener from the door. The method may vary depending on the type of garage door opener you have, such as a chain drive or a belt drive. Consult your owner’s manual for specific instructions related to your opener model.
Step 3: Checking for Obstructions and Malfunctions
Before proceeding with the reset, inspect the garage door and the opener for any obstructions, damaged parts, or misalignments. Clear any debris or objects that may be blocking the door’s movement. Examine the opener components, such as the springs, cables, and pulleys, for signs of damage or wear. Ensure that everything is in proper working order before proceeding.
Step 4: Resetting the Overload Protection
Now it’s time to reset the overload protection mechanism of your garage door opener. The location and method for resetting may vary depending on the specific model of your opener. Consult your owner’s manual for detailed instructions. Generally, you need to press a reset button or flip a switch to reset the overload protection. Follow the prescribed steps precisely to ensure a successful reset.
Section 4: Testing and Maintenance
Once you have completed the reset process, it’s crucial to perform a test run of your garage door. Power up the opener and operate the door using the remote control or wall-mounted button. Observe its movement for smoothness and listen for any unusual noises. If the door operates correctly without any signs of overload, you have successfully resolved the issue.
To prevent future overload problems, regular maintenance is essential. Lubricate the moving parts of the garage door and opener as recommended by the manufacturer. Inspect the door and its components periodically for wear and tear. Address any issues promptly to avoid further complications.
Conclusion
Resetting an overloaded garage door opener is a relatively simple process that can save you from potential inconvenience and expensive repairs. By following the step-by-step guide provided in this article, you can troubleshoot and reset your opener, restoring its proper functionality. Remember to prioritize safety throughout the procedure, and don’t hesitate to seek professional assistance if needed. With a well-maintained and properly functioning garage door opener, you can enjoy convenient and trouble-free access to your garage.

Leave a Reply